DIY Leaf ZE1 Battery Replacement: Everything You Need to Know
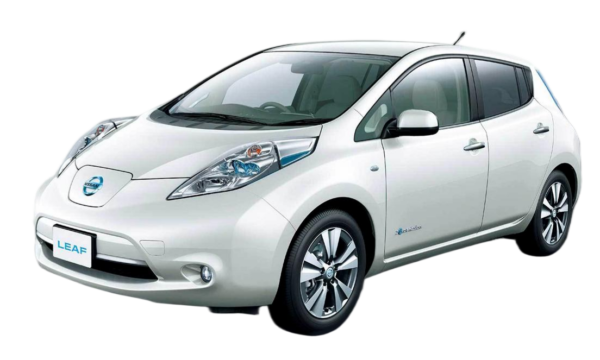
Is your 2011-2013 Nissan Leaf ZE1 struggling with range anxiety? If your daily commute has shrunk to a crawl or you’re terrified of your battery dying on the highway, you’re not alone. The ZE1 generation, while a pioneer in the EV world, is now facing critical battery degradation.
Replacing the battery in a classic EV like the Leaf ZE1 often feels like a financial dead-end. Dealerships quote prices north of $12,000, forcing owners into a tough choice: buy a new car or watch their reliable Leaf gather dust. But there’s a third path—one that restores your car’s original glory without bankrupting you.
At CNS BATTERY, we specialize in giving these classic Nissan Leafs a second life. This guide is designed for the do-it-yourselfer or the savvy owner looking to understand the process of swapping a ZE1 battery. We’ll walk you through the why, the how, and how our brand-new CATL cell packs offer a “Like New” performance at half the price.
🛠️ Why Replace Your Leaf ZE1 Battery?
The Nissan Leaf ZE1 (2011-2013 models) was a revolutionary car, but its aging Lithium-Manganese (LMO) chemistry batteries are now hitting the end of their lifespan.
- The Reality of Degradation: Most ZE1 packs have degraded by 40-60%. A car that once boasted 100 miles (160 km) might now struggle to reach 60 miles (96 km).
- The “Limp Mode” Fear: As cells degrade unevenly, the Battery Management System (BMS) often forces the car into “Turtle Mode” (reduced power) even when there’s apparent charge left.
- The Cost Barrier: The sticker shock of an OEM replacement is the main reason 90% of these cars are scrapped instead of saved.
The DIY Solution: Replacing your ZE1 battery with a new 24kWh or upgraded 30kWh lithium pack from CNS BATTERY costs significantly less than a dealership option. It’s not just a repair; it’s a performance upgrade.
📦 Choosing the Right Pack: 24kWh vs. 30kWh
When you decide to pull the trigger on a DIY replacement, you have two primary options for the ZE1 chassis:
| Feature | Standard 24kWh Pack | Upgraded 30kWh Pack |
|---|---|---|
| Cell Type | Brand New CATL Cells | Brand New CATL Cells |
| Capacity | 24 kWh (Original Spec) | 30 kWh (+25% Capacity) |
| Estimated Range | ~100 miles (160 km) | ~125 miles (200 km) |
| Best For | Daily city errands, budget rebuilds | Drivers needing extra highway confidence |
Expert Tip: We highly recommend the 30kWh upgrade. While the ZE1 was originally designed for 24kWh, the physical dimensions and voltage requirements align perfectly with the newer 30kWh modules found in later Leafs. This “Gen 2” upgrade gives you significantly more range and is often priced very competitively.
🔧 The DIY Installation Process: Is It For You?
Replacing an EV battery is serious work, but it is absolutely achievable in a home garage with the right preparation. Here is the standard workflow for a Leaf ZE1 swap.
1. Preparation & Safety (The Most Important Step)
- Disconnect the 12V: Before touching anything, disconnect the negative terminal of the 12V auxiliary battery. This kills power to the BMS.
- Gear Selection: Ensure the car is in Park.
- Tools Needed: You will need standard socket sets, a torque wrench, insulated gloves (Class 00, 500V+), and a floor jack.
2. Removing the Old Battery
The ZE1 battery is located under the floor of the car.
- Access: You will need to remove the interior carpet and the metal floor pan.
- Disconnection: Carefully disconnect the high-voltage (HV) orange connector and the 12V auxiliary cables.
- Removal: The pack is heavy (approx. 600 lbs / 272 kg). You will need a transmission jack or a team of strong helpers to lower it safely.
3. Installing the New CNS BATTERY Pack
- Fitment: Our packs are designed for OEM compatibility. The mounting points, brackets, and connectors match the original factory specifications.
- Connection: Connect the HV cables and the 12V signal cables. Double-check polarity before proceeding.
- Sealing: Reinstall the floor pan and carpet, ensuring a proper seal to prevent moisture ingress.
4. The “Magic” Step: BMS Programming
This is where many DIYers get stuck. Simply plugging in a new battery doesn’t always work due to the car’s memory.
- The Process: You will need to reset the BMS or perform a “learning cycle.” This often involves turning the key to “On” (without starting) and waiting for the dashboard lights to cycle.
- Support: If you encounter the “Red Battery Light,” don’t panic. Our technical team provides remote video guidance to walk you through the specific reset procedure for your ZE1 model.
Note: The entire process, for a prepared DIYer with help, typically takes 2 to 3 hours.
🆚 Why Choose a New Build vs. Used/Refurbished?
When sourcing parts for your ZE1 restoration, you might be tempted by “cheap” used batteries from junkyards. Do not do this.
Here is why building with a brand-new CNS BATTERY is the only safe bet:
- Unknown History: Used packs have unknown charge cycles and potential internal damage.
- Swelling Risk: Old LMO cells are prone to swelling, which can damage the battery casing and create short circuits.
- Guaranteed Freshness: Our packs use brand-new CATL cells. You are the first owner of the battery. We back this with a 2-Year / 80,000 KM warranty, which is unheard of in the used battery market.
💡 Pro Tips for a Successful ZE1 Rebuild
Before you finalize your order, consider these expert insights:
- Inspect the Compressor: Since you have the floor off, check the A/C compressor and refrigerant lines. If they are leaking (common on ZE1), replace them now to avoid having to drop the battery again in 6 months.
- Check the 12V: Replace the 12V auxiliary battery at the same time. It’s a simple, cheap part that can leave you stranded if it fails right after your big rebuild.
- Thermal Management: Ensure the new pack has proper thermal paste application on the contact points. While the ZE1 doesn’t have active liquid cooling like newer models, good thermal transfer to the chassis is vital for longevity.
🚀 Ready to Restore Your Leaf?
Replacing the battery in your Nissan Leaf ZE1 is one of the most rewarding DIY projects you can undertake. You are saving a car from the crusher and restoring it to a usable, fun vehicle.
At CNS BATTERY, we don’t just sell boxes of cells; we provide a complete engineering solution. Our packs are rigorously tested to meet OEM standards, ensuring your ZE1 drives exactly as it should—smooth, powerful, and reliable.
Don’t let your Leaf die. Give it a new heart.
👉 Get a Free Custom Quote for your ZE1 today and speak to our technical experts.
Contact Our Technical Experts Now
❓ Frequently Asked Questions (FAQ)
Q1: Will a new battery fit my 2011, 2012, or 2013 Leaf without modifications?
Yes. Our battery packs are designed with OEM-level precision. They utilize the exact same mounting brackets, high-voltage connectors, and communication protocols as the original Nissan factory packs. No cutting, drilling, or adapter wiring is required.
Q2: How long does the installation take?
For a professional technician, the swap usually takes about 1-2 hours. For a DIY enthusiast with basic tools and a helper, plan for a full afternoon (approx. 3 hours). We provide detailed installation videos and PDF manuals to guide you through every step.
Q3: What is the warranty on a DIY replacement battery?
We offer a comprehensive 2-Year / 80,000 KM warranty on all our automotive battery packs. This covers defects in materials and workmanship. If you encounter any issues during installation or operation, our customer service team is available via phone, email, or video call to assist you.
Q4: Can I upgrade from a 24kWh to a 30kWh pack?
Absolutely. This is a very popular upgrade path for ZE1 owners. The 30kWh pack uses newer generation cells and provides approximately 25% more range. The physical dimensions and electrical interfaces are compatible with the ZE1 chassis, making it a seamless plug-and-play upgrade.


