
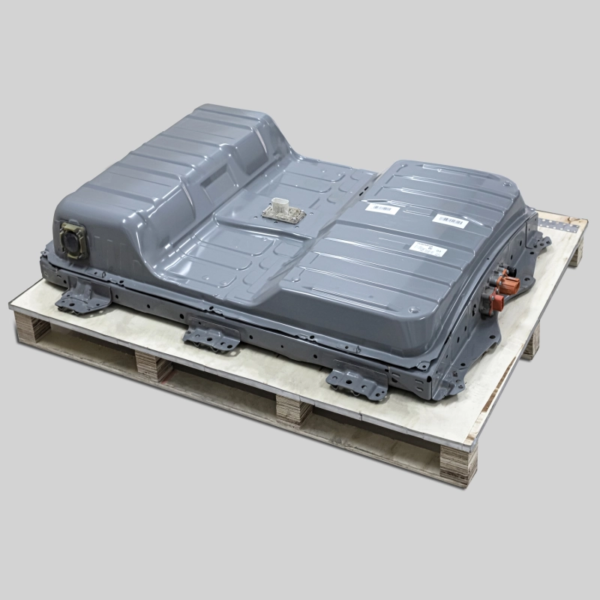
Top DIY Resources for New Nissan Leaf Battery Swap
If you own a Nissan Leaf and are considering a battery replacement, you’re likely facing a significant financial decision. The original manufacturer’s price for a new pack can be astronomical, often exceeding $12,000 USD. However, the aftermarket offers a compelling alternative. This guide is designed for Leaf owners (specifically ZE0, AZE0, and ZE1 models) who want to extend their vehicle’s life with a DIY approach. We will explore the best resources, tools, and safety protocols to ensure your battery swap is successful, safe, and cost-effective.
Why Upgrade Your Nissan Leaf Battery?
Before diving into the “how,” let’s discuss the “why.” Many Nissan Leaf owners find themselves at a crossroads after 5–8 years of ownership. The original battery capacity degrades, reducing the range to a point where daily commutes become stressful.
- Cost Savings: Aftermarket solutions, such as those utilizing brand-new CATL cells, can cost roughly 50% less than the original manufacturer’s price.
- Range Extension: You can often upgrade to a higher kWh capacity (e.g., from 40kWh to 62kWh) to double your driving range.
- Environmental Impact: Replacing only the battery cells keeps a functional car out of the landfill, reducing the need for new raw materials.
Essential DIY Resources for Your Swap
To successfully replace your battery, you need more than just the hardware. You need the right information and support network.
1. Comprehensive Video Tutorials
A picture is worth a thousand words, but a video is worth a thousand pictures when dealing with high-voltage systems. Look for suppliers that provide HD step-by-step installation videos. These should cover:
- Safety First: How to disconnect the vehicle’s power correctly.
- Removal: Techniques for unbolting the heavy battery pack (approx. 300kg).
- Reinstallation: Proper torque specifications for mounting brackets and cable connections.
2. Remote Video Guidance
Even with a video, you might hit a snag. The best resource for a DIYer is access to real-time video call support with a technical expert. This allows an engineer to guide you through wiring connections or BMS programming issues without needing to drive to a repair shop.
3. Pre-Sale Compatibility Assessment
Not all Leafs are the same. Before purchasing, use a VIN compatibility check tool. By providing your Vehicle Identification Number, a technical consultant can confirm that the battery’s voltage, capacity, and interface (e.g., Type 2 connectors) match your specific model year (2011–2023).
Step-by-Step: The DIY Installation Process
While every vehicle is unique, the general process for a Nissan Leaf battery swap follows these stages. Always wear insulated gloves and safety glasses.
Step 1: Preparation and Safety
- Park the vehicle on a flat surface and engage the parking brake.
- Disconnect the 12V Battery: This is the most critical safety step to ensure no low-voltage current is flowing before you touch the high-voltage components.
Step 2: Removing the Old Battery
- The battery is located under the cabin floor. You will need to remove the underbody covers.
- Warning: The pack weighs approximately 300kg (660 lbs). You must use a proper transmission jack or a specialized battery lift tool. Do not attempt to remove it manually.
- Disconnect the high-voltage cables and the signal connectors carefully.
Step 3: Installing the New Pack
- Carefully lower the new battery into place using the jack.
- Reconnect the high-voltage cables and signal lines. Ensure the connectors are color-coded and matched correctly to avoid short circuits.
- Torque Specifications: Tighten the mounting bolts to the manufacturer’s specifications (usually provided in the installation manual).
Step 4: System Check and Programming
- Reconnect the 12V battery.
- Turn the ignition on. The dashboard should not show any immediate errors.
- BMS Programming: This is where remote support is invaluable. You may need to connect a diagnostic tool to program the new Battery Management System (BMS) to communicate with the car’s computer.
Why Choose a Professional-Grade Aftermarket Solution?
When sourcing a new battery for your DIY project, it is crucial to distinguish between “remanufactured” and “brand new.”
| Feature | Remanufactured/Used Packs | Professional Aftermarket (e.g., CNS) |
|---|---|---|
| Core Cells | Recycled/aged cells, prone to swelling | Brand new CATL/LG cells |
| Warranty | Often none, or very short | 2 Years / 80,000 km |
| Performance | Unpredictable degradation | Full rated capacity (e.g., 440km range) |
| Support | Limited technical help | Lifetime technical support |
Choosing a pack built with brand-new cells ensures that you are not inheriting someone else’s battery degradation problems. It should offer the same safety standards as the original factory.
Frequently Asked Questions (FAQ)
1. How long does a DIY Nissan Leaf battery replacement take?
For a prepared DIYer with the right tools (a transmission jack), the process typically takes 1 to 2 hours. This includes removal, installation, and the final system check. First-time users should allocate extra time for reading instructions.
2. Is it safe to do this myself?
Yes, provided you strictly follow the safety protocols. Always disconnect the 12V battery first. The high-voltage battery pack operates at around 360V-400V, which is dangerous. If you are uncomfortable with high-voltage electrical work, consider hiring a mechanic or using the remote video guidance service for supervision.
3. Will a new aftermarket battery void my car’s warranty?
A properly installed aftermarket battery using OEM-standard connectors should not void the remaining warranty on other vehicle components. However, the warranty on the battery itself will be covered by the aftermarket supplier (e.g., a 2-year warranty from the seller).
4. What tools do I need for the swap?
You will primarily need:
- A heavy-duty transmission jack (rated for at least 700kg/1500lbs for safety).
- Basic hand tools (wrenches, screwdrivers).
- Insulated gloves and safety glasses.
- A laptop or smartphone for BMS programming assistance (if required).
5. How much can I save compared to the dealer price?
You can expect to save approximately 50% compared to the original manufacturer’s replacement cost. Instead of paying $12,000-$16,000, a high-quality aftermarket solution with new cells typically costs around $7,000-$8,000.
Get Your Custom Quote Today
Replacing your Nissan Leaf battery doesn’t have to be a financial burden. With the right resources—HD video tutorials, remote expert support, and a high-quality pack built with brand-new cells—you can revive your EV for a fraction of the cost.
If you are ready to extend your driving range and save thousands, Contact our technical experts now for customization. We offer free compatibility checks and personalized recommendations to ensure you get the perfect battery for your Leaf model.

