The Ultimate Checklist for Nissan e-NV200 Battery Installation
The Nissan e-NV200 is a versatile workhorse for both commercial delivery fleets and adventurous campervan conversions. However, like all electric vehicles, its performance hinges entirely on the health of its lithium-ion battery pack. If you’re facing range anxiety or degraded capacity, replacing the battery is the most effective solution to restore your vehicle’s utility.
At CNS BATTERY, we specialize in providing high-performance, OEM-compatible lithium-ion battery solutions for the Nissan e-NV200. Unlike risky refurbished packs, our batteries utilize brand-new CATL cells, ensuring maximum durability and safety. To ensure a smooth transition from old to new, we have compiled this comprehensive, step-by-step installation checklist.
📦 Phase 1: Pre-Installation Preparation
Before you even open the hood, proper preparation is key to a safe and efficient installation. Rushing this phase can lead to safety hazards or compatibility issues.
1. Verify Compatibility
Not all battery packs are created equal. Ensure the replacement battery is specifically designed for the Nissan e-NV200. At CNS, we recommend checking the Voltage, Capacity (kWh), and Connector Type against your vehicle’s specifications. If you are upgrading to a higher capacity (e.g., from 24kWh to 40kWh), you must also verify that your Vehicle Control Unit (VCU) and Battery Management System (BMS) are compatible or require reprogramming.
Pro Tip: Contact our technical experts for a free VIN compatibility check to avoid any mismatches.
2. Gather Essential Tools & Safety Gear
Safety is paramount when dealing with high-voltage systems. Do not proceed without the following:
- Personal Protective Equipment (PPE): Insulated rubber gloves and safety goggles.
- Mechanical Tools: A complete socket set, torque wrench, and pry tools for underbody covers.
- Electrical Tools: Multimeter (for voltage checks) and insulated screwdrivers.
- Lifting Equipment: A transmission jack or engine crane capable of handling the battery’s weight (typically 200-300kg).
3. Vehicle Setup
- Park the e-NV200 on a flat, level surface.
- Engage the parking brake and place wheel chocks.
- Disconnect the 12V Auxiliary Battery: This is the most critical safety step to de-energize the vehicle’s low-voltage system before touching the high-voltage components.
🔧 Phase 2: Removal of the Old Battery
This phase involves accessing the battery tray located beneath the vehicle’s floor.
1. Remove Underbody Protection
- Locate the underbody splash guards or plastic covers.
- Carefully remove the screws and bolts securing these covers. Keep them organized for reinstallation.
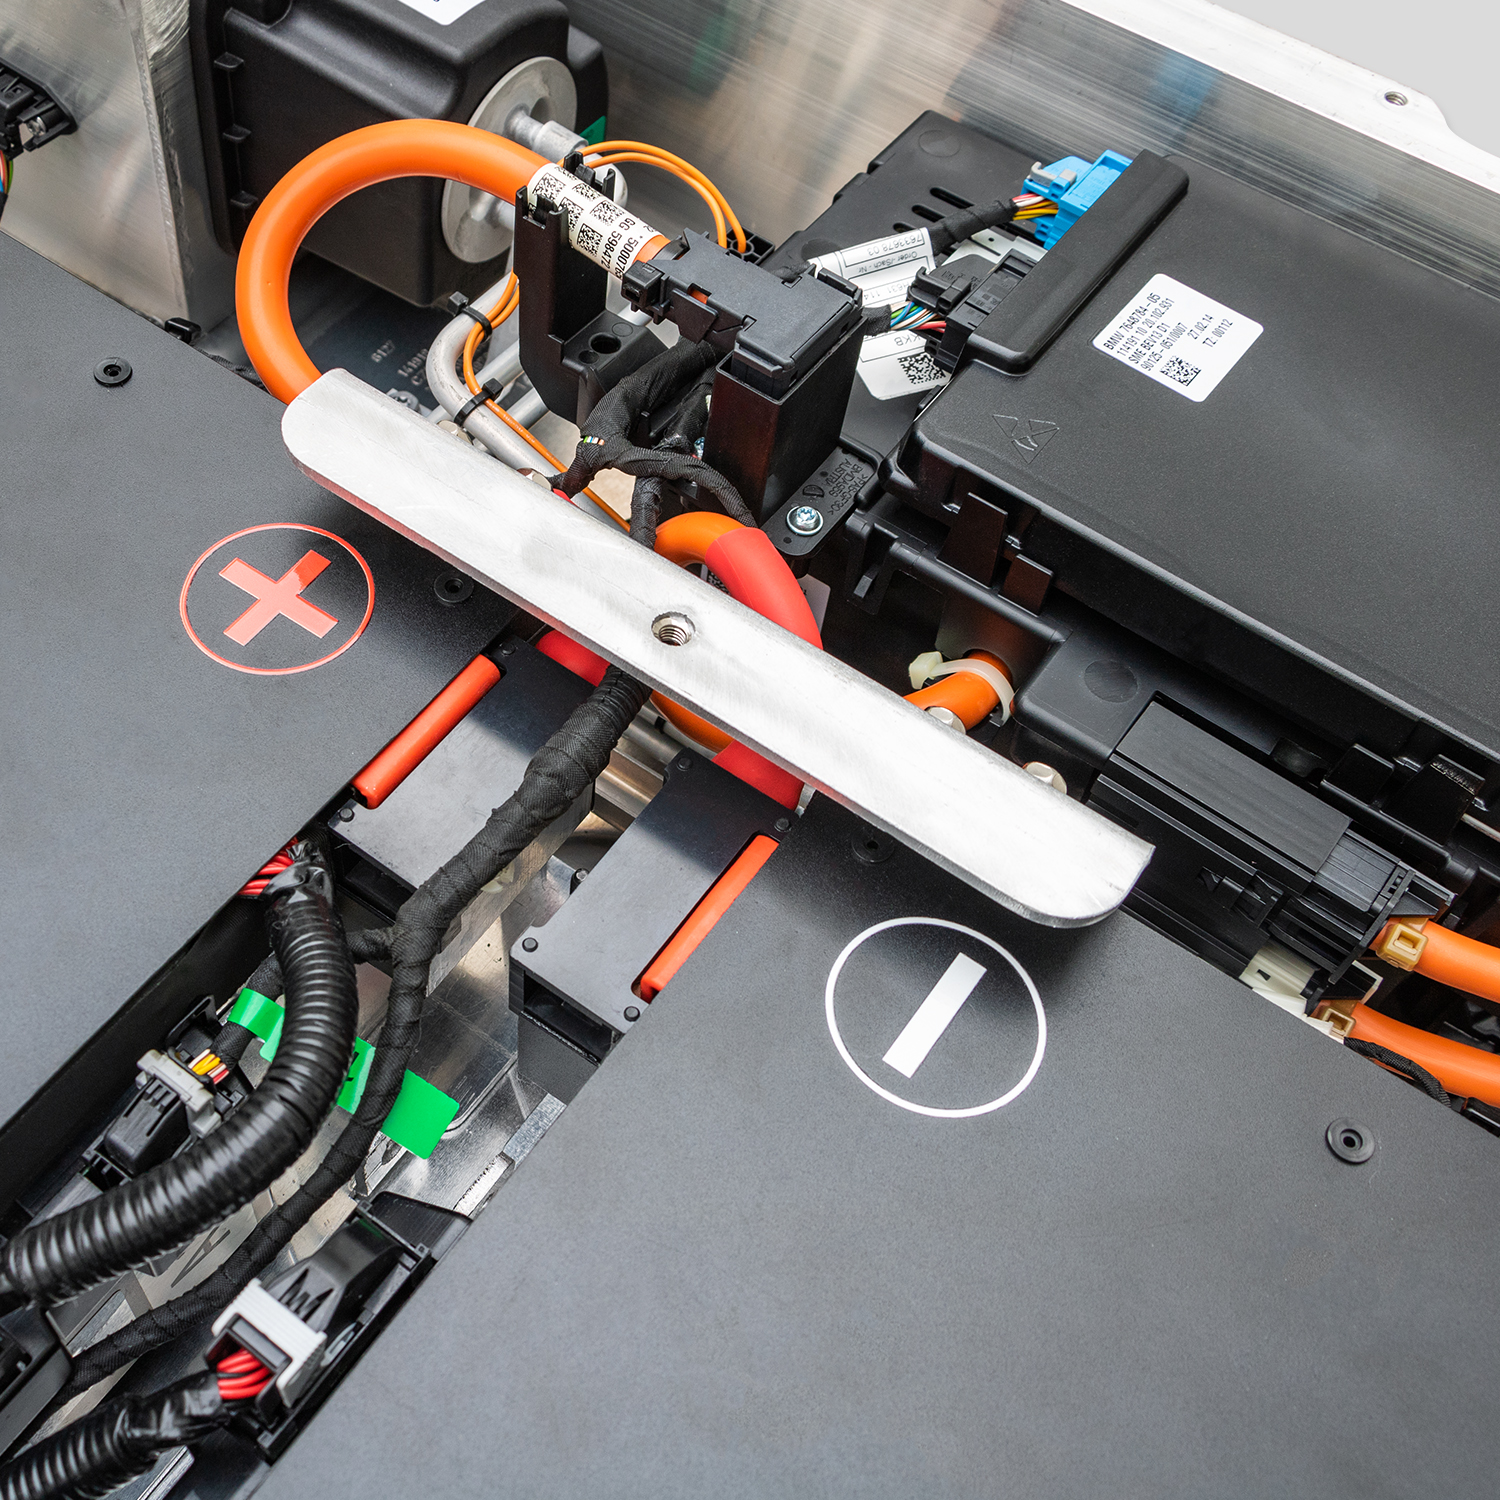
2. Disconnect High-Voltage (HV) Cables
- Locate the HV Service Disconnect (if present) or the main contactors.
- Disconnect the positive (+) and negative (-) high-voltage cables from the battery terminals. Always disconnect the negative terminal first to prevent short circuits.
- Insulate the Ends: Use rubber insulation caps or electrical tape to cover the exposed terminals to prevent accidental contact.
3. Disconnect Low-Voltage & Sensors
- Unplug the 12V auxiliary cable.
- Disconnect the Battery Management System (BMS) communication harness and temperature sensor connectors.
4. Unbolt the Battery
- Identify the mounting bolts securing the battery to the chassis. The e-NV200 typically has bolts along the edges and corners of the pack.
- Using a long breaker bar or impact wrench, remove these bolts.
- Support the Weight: Slowly lower the old battery using the jack. Ensure the jack is centered to maintain balance.
⚡ Phase 3: Installing the New CNS Battery
With the old unit out, it is time to install the new heart of your vehicle.
1. Positioning the New Pack
- Carefully lift the new CNS Nissan e-NV200 Battery onto the jack.
- Align the mounting holes with the chassis rails. Ensure the orientation is correct (front/back).
- Slowly raise the jack until the battery is seated in position.
2. Secure the Mounts
- Reinstall the mounting bolts. Do not fully tighten yet.
- Once all bolts are in place, torque them down to the manufacturer’s specification (usually around 80-100 Nm, but refer to your specific model manual).
3. Reconnect Electrical Systems
- Reconnect the BMS communication cables and temperature sensors first.
- Reconnect the high-voltage terminals. Tighten the positive (+) terminal first, followed by the negative (-).
- Finally, reconnect the 12V auxiliary power.
🛠️ Phase 4: Post-Installation Testing & Activation
The physical installation is complete, but the job isn’t finished until the system is verified.
1. Initial Power-Up
- Reconnect the 12V auxiliary battery.
- Turn the ignition key to the “ON” position (do not start the vehicle yet).
- Observe the dashboard: The “Ready” light should illuminate, and the battery charge level should display correctly.
2. Diagnostic Check
- Use an OBD2 scanner to check for any Diagnostic Trouble Codes (DTCs).
- If the battery is a different capacity than the original (e.g., an upgrade), you may need to perform a BMS reset or VCU reprogramming. CNS provides detailed programming guides or remote video support for this step.
3. First Drive & Calibration
- Take the vehicle for a short test drive to ensure the drivetrain engages smoothly.
- For the first few charge cycles, we recommend charging the new battery to 100% to allow the BMS to calibrate the State of Charge (SoC) accurately.
💡 Why Choose a CNS Battery for Your e-NV200?
When replacing the battery in your commercial or recreational vehicle, you need a solution that guarantees uptime and longevity. Here is why our customers trust CNS:
- Brand-New CATL Cells: We use only A-grade, brand-new cells from the world’s leading manufacturer, ensuring superior thermal stability and energy density compared to recycled or refurbished cells.
- Plug-and-Play Design: Our packs are engineered to OEM specifications, meaning the connectors, dimensions, and communication protocols match your e-NV200 perfectly.
- Unbeatable Warranty: We back our confidence in quality with a 2-year / 80,000 km warranty, covering defects and performance degradation, far exceeding industry standards for aftermarket batteries.
❓ Frequently Asked Questions (FAQ)
Q1: Can I install the battery myself, or do I need a professional mechanic? While the installation process is mechanically straightforward (bolting and plugging), working with high-voltage systems carries inherent risks. If you are comfortable with basic automotive mechanics and have the proper insulated tools, a DIY installation is possible. However, if you are unsure about the high-voltage safety protocols or the BMS programming, we strongly recommend using a certified EV technician. Our team offers remote video guidance to assist DIYers through the process.
Q2: Will the new battery work with my existing charger? Yes. The CNS Nissan e-NV200 battery is designed to be fully compatible with the OEM charging port and onboard charger specifications. You can use your existing home charger or public DC fast chargers without any modifications.
Q3: What is the expected range after installing a new CNS battery? The range depends on the capacity (kWh) of the pack you select. For example, a new 40kWh CNS battery in an e-NV200 can typically achieve a real-world range of approximately 240-280 km under mixed driving conditions. This represents a significant improvement over a degraded original pack.
Q4: How long does the installation process take? For a professional mechanic, the physical installation usually takes between 1 to 2 hours. This includes removing the old battery, installing the new one, and performing the initial diagnostics. DIY installations may take longer, depending on your experience level.
Q5: Do I need to reprogram the car’s computer after installation? If you are replacing the battery with the same capacity (e.g., 40kWh for 40kWh), the car should recognize it automatically. However, if you are upgrading to a higher capacity (e.g., 50kWh or 62kWh), a BMS reset or VCU reprogramming is usually required to display the correct State of Charge (SoC). Our technical support team provides specific instructions for these upgrades.
Ready to restore your Nissan e-NV200 to its full potential? Contact our technical experts today for a free compatibility assessment and personalized quote.