Nissan Leaf SV New Battery Installation Guide: Expert Tips for a Seamless Upgrade
Is your Nissan Leaf SV’s range no longer meeting your daily needs? You’re not alone. As the heart of your electric vehicle, the battery pack is the most critical component determining performance and longevity. Whether you’re facing degraded capacity or planning a proactive upgrade to extend your car’s life, replacing the battery in your Nissan Leaf SV is a significant but rewarding project.
At CNS BATTERY, we specialize in providing high-performance, OEM-compatible battery solutions for Nissan Leaf models, including the SV trim. Our goal is to empower Leaf owners with the knowledge and tools to perform a safe and successful installation. This comprehensive guide walks you through every step, from pre-purchase checks to the final drive.
1. Pre-Installation: Ensuring Compatibility
Before you begin the physical work, it’s crucial to verify that the new battery is the perfect match for your specific Leaf SV model year.
- Identify Your Model Code: Nissan Leaf SV models fall into specific generations: ZE0 (2011-2017), AZE0 (2018-2022), or ZE1 (2023+).
- Check Voltage & Capacity: Ensure the new pack (e.g., 40kWh, 62kWh, or upgraded 68kWh) matches your car’s specifications. An incompatible voltage can damage the Battery Management System (BMS).
- The VIN Check: For absolute peace of mind, we recommend contacting our technical experts. By providing your Vehicle Identification Number (VIN), our team can confirm compatibility instantly, ensuring you receive the precise connector types and harnesses needed for a plug-and-play experience.
2. Essential Safety Precautions
Working with high-voltage lithium-ion batteries requires strict adherence to safety protocols. Your safety is our top priority.
- Disconnect Power: Always start by disconnecting the 12V auxiliary battery to cut off the vehicle’s low-voltage power before touching the high-voltage components.
- Personal Protective Equipment (PPE): Wear insulated gloves and safety glasses. Lithium-ion batteries operate at high voltages (typically 360V+ for the Leaf), and accidental short circuits can be dangerous.
- Work Environment: Ensure the vehicle is on a level surface, the parking brake is engaged, and the area is dry and well-ventilated.
3. Step-by-Step Installation Process
This guide assumes you have basic mechanical skills. If you are uncomfortable, we strongly recommend using a certified technician, though many of our customers successfully perform this as a DIY project with the help of our video tutorials.
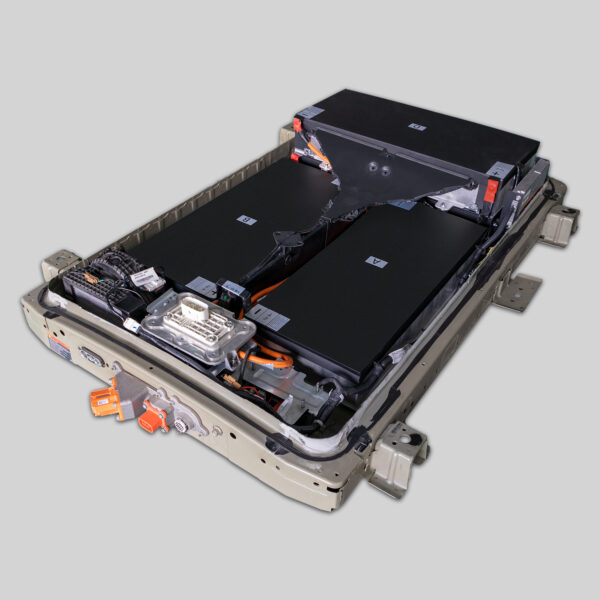
Step 1: Accessing the Battery Pack
- Lift the vehicle using a hydraulic lift or jack stands (never rely solely on a jack).
- Remove the underbody shields and protective covers to access the high-voltage battery connectors.
Step 2: Disconnecting the Old Battery
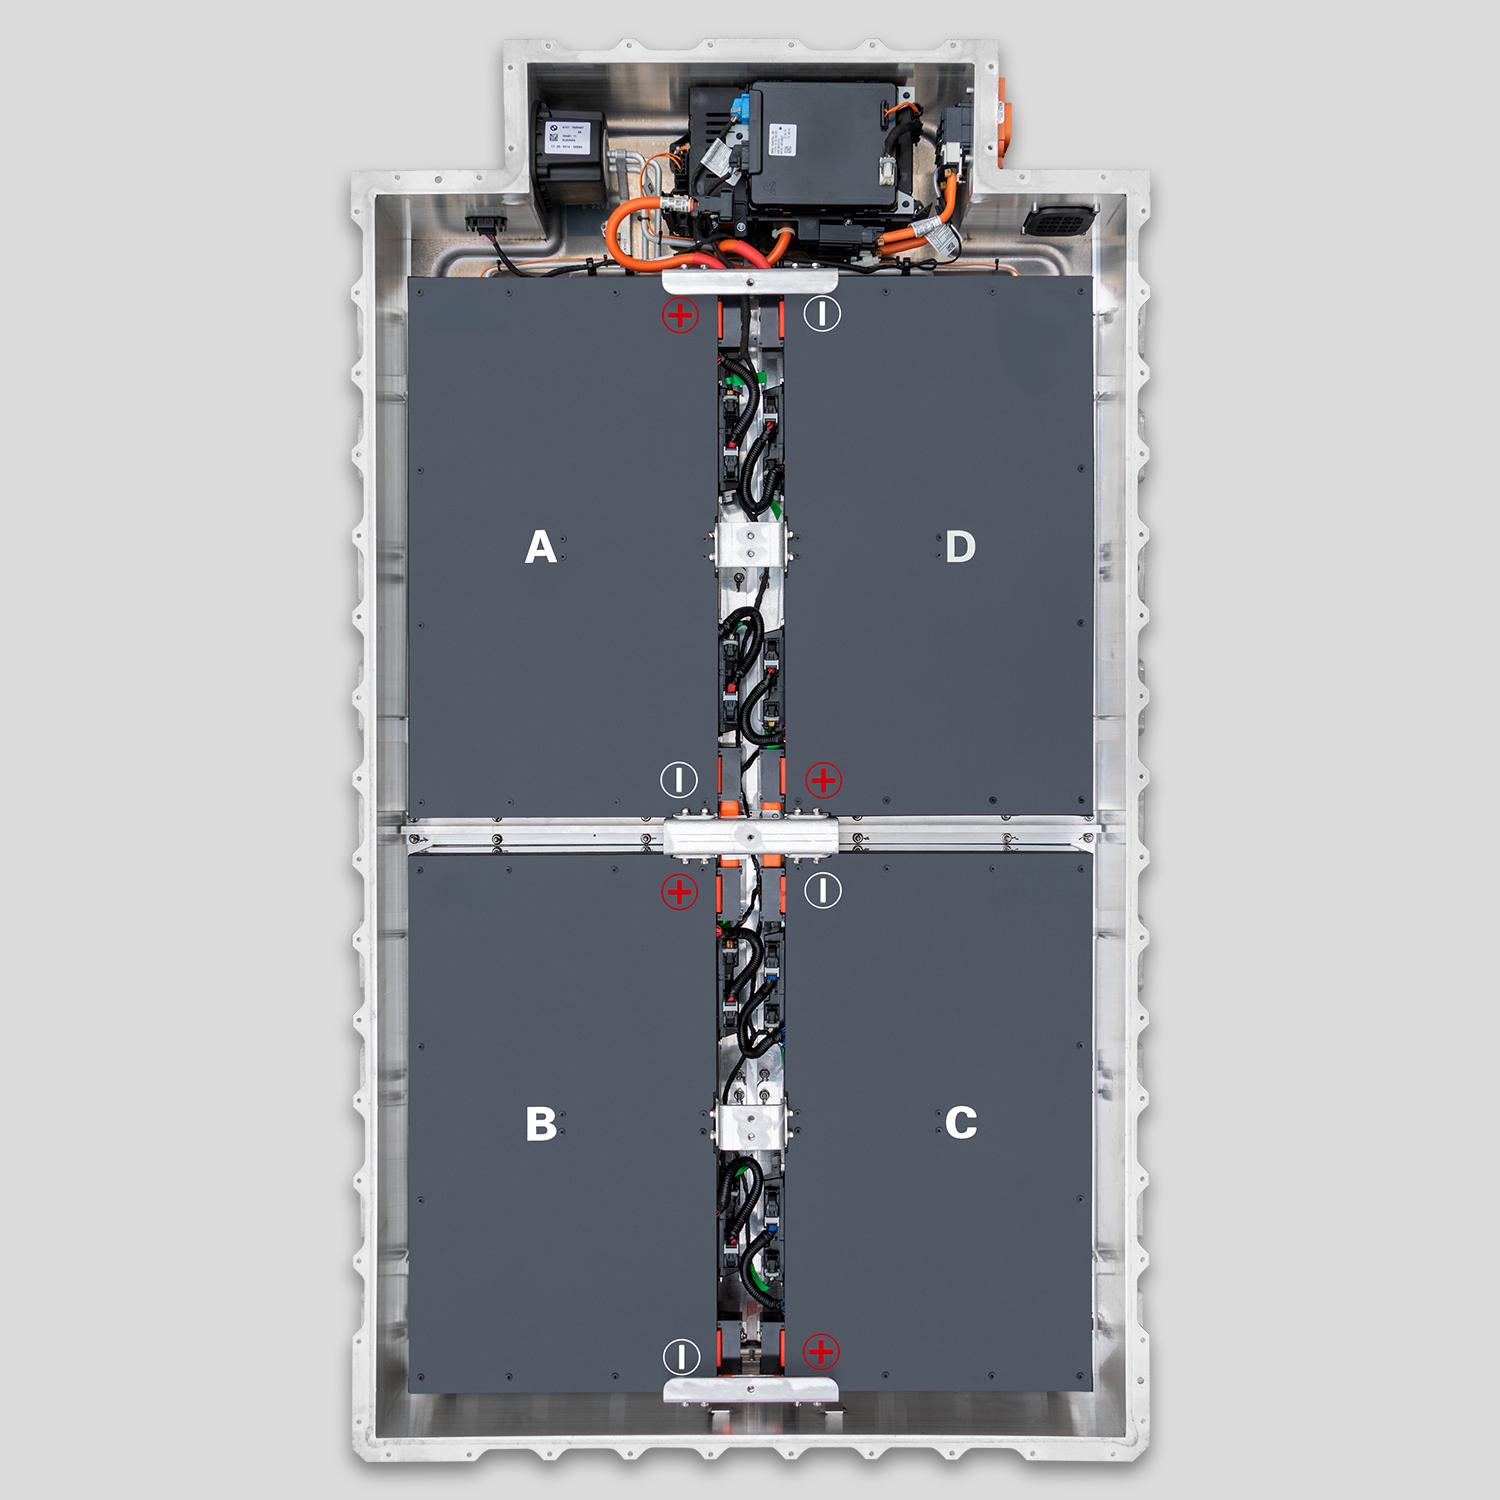
- High-Voltage Disconnect: Locate the main service disconnect (MSD) or the high-voltage interlock loop (HVIL) connectors. Disconnect these first.
- Signal & Communication Cables: Carefully unplug the signal harnesses, temperature sensors, and communication lines. Take photos during this step to remember the wiring layout.
- Physical Removal: Remove the mounting bolts securing the battery to the chassis. The battery pack is heavy (approx. 300-400 kg), so use a transmission jack or a specialized EV battery lift to lower it safely.
Step 3: Installing the New CNS Battery
- Inspection: Before lifting, inspect the new CNS battery pack for any shipping damage.
- Lifting: Using the lift, carefully align the new battery with the chassis mounting points.
- Reconnection: Reverse the disconnection process. Connect the high-voltage cables first, ensuring the polarity is correct (+ to +, – to -).
- Signal Harness: Reconnect all signal and sensor cables. Ensure the connectors are fully seated and locked to prevent communication errors.
Step 4: System Check and Initialization
- Reconnect the 12V auxiliary battery.
- Turn the ignition to the “ON” position (do not start driving yet).
- The vehicle’s BMS will communicate with the new battery. You should see a “Ready” light or a full charge indication on the dashboard.
- BMS Programming: In some cases, particularly with older models or specific trims, the BMS may require a software reset or update to recognize the “0” cycle count of the new battery. Our support team offers remote video guidance for this step if needed.
4. Why Choose a CNS BATTERY for Your Leaf SV?
When upgrading your Nissan Leaf SV, you have options: refurbished packs, OEM replacements, or a premium aftermarket solution like CNS.
- Brand-New CATL Cells: Unlike refurbished batteries made from recycled or degraded cells, every CNS battery is assembled using brand-new, top-tier CATL lithium-ion cells. This guarantees maximum energy density, thermal stability, and a long lifespan.
- Cost Efficiency: Replacing a battery with an OEM unit can cost upwards of $16,000. A CNS battery offers the same (or superior) performance and safety standards for roughly 50% less.
- Comprehensive Warranty: We back our confidence in quality with an industry-leading 2-year / 80,000 km warranty. This covers manufacturing defects and includes a prorated protection for performance degradation, ensuring your battery maintains at least 70% capacity over the warranty period.
5. Post-Installation Maintenance Tips
To maximize the life of your new battery:
- Avoid 100% Charging Daily: For daily use, charging up to 80-90% is optimal for longevity. Save the 100% charge for long trips.
- Avoid Deep Discharges: Try not to let the battery drop below 10-15% regularly.
- Storage: If storing the vehicle for an extended period, keep the battery charged between 40-60% in a cool, dry place.
Frequently Asked Questions (FAQ)
Q1: How do I know if the CNS battery is compatible with my specific Nissan Leaf SV year and model?
A: Compatibility is based on OEM standards, including voltage, capacity, and interface matching. To check your specific vehicle model, simply provide our customer service team with your vehicle’s year, model number, and VIN code for instant confirmation. We support a wide range of popular models, including the Nissan Leaf ZE0, AZE0, and ZE1 series.
Q2: Is the installation process difficult? Do I need special tools?
A: Installing a CNS battery typically takes 1-2 hours for a professional technician. For DIY users, it is manageable with basic tools like a wrench and screwdriver. We provide comprehensive support, including step-by-step installation videos and PDF guides. However, because lithium-ion batteries are high-voltage systems, we recommend having it done by a certified technician if you are not experienced, to avoid warranty issues or safety hazards.
Q3: What is the warranty coverage for the new battery?
A: All CNS Automotive Batteries come with a minimum 2-year / 80,000 km warranty (whichever comes first), which is far more comprehensive than standard industry offerings. This includes protection against defects in materials and workmanship, with free replacement or repair options. We also provide prorated coverage for performance degradation, ensuring your battery maintains at least 70% capacity.
Q4: How long does shipping take, and is it safe?
A: We offer DDP (Delivered Duty Paid) service worldwide. Due to the size and classification of lithium-ion batteries as dangerous goods, shipping times can vary. Sea shipping typically takes 4-8 weeks, while air freight is faster but more expensive. We use robust, fumigation-free wooden crates to ensure the battery arrives without damage.
Q5: Do I need to reprogram the car’s computer after installation?
A: In most cases, the installation is plug-and-play, and the vehicle recognizes the new battery automatically. However, in some instances, particularly with older models, the BMS may require a software reset to acknowledge the new battery’s cycle count. Our customer service team offers remote video guidance to assist with this process if necessary.
Ready to revive your Nissan Leaf SV with a brand-new, high-capacity battery? Get a Free Custom Quote today and let CNS BATTERY put your mind at ease.