
BMW i3 Battery Mount Corrosion: Fixes – Why Cleaning Isn’t Enough (And What Actually Stops It for Good)
“I noticed rust on the i3’s rear subframe near the battery mounts. I scrubbed it, applied anti-corrosion spray, and called it ‘fixed.’ Six months later, a loud clunk appeared on bumps. A mechanic found severe pitting in the aluminum carrier—the mount bolts were loose because the threads had corroded through. The repair? $1,200 for a new subframe section. All because I treated the symptom, not the source.”
You see white powder or orange flakes under your i3.
You clean it, coat it, forget it.
But the corrosion returns—worse than before.
And you’re left wondering:
“Why does this keep happening, even after ‘fixing’ it?”
The truth?
Battery mount corrosion in the BMW i3 isn’t just surface rust—it’s a systemic issue caused by electrolytic reactions between dissimilar metals, road salt, and trapped moisture.
In this guide, you’ll uncover:
- The hidden electrochemical process eating your mounts from within
- Why DIY sprays and greases fail long-term
- How CNS BATTERY packs include upgraded, corrosion-resistant mounting hardware
- And the only permanent fix: replacing with engineered components designed for real-world conditions
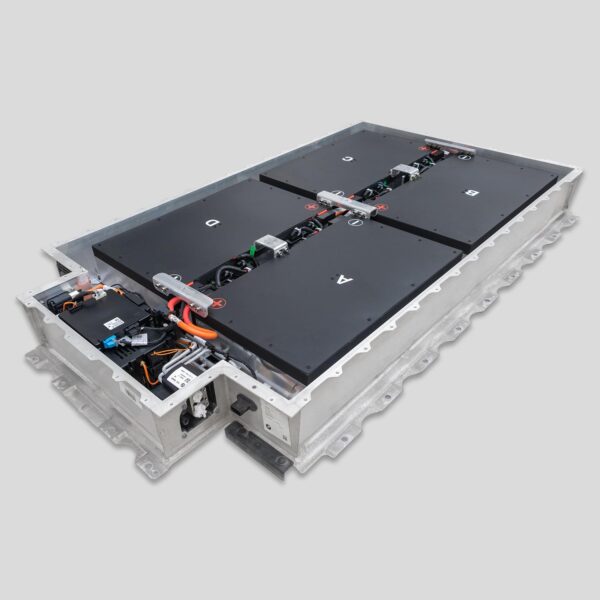
Because when your battery weighs 230 kg (500 lbs), its mounts aren’t just brackets—they’re critical structural anchors.
The Real Culprit: Galvanic Corrosion—Not Just “Rust”
The i3’s battery is mounted to an aluminum subframe using steel bolts and brackets.
When moisture (from rain, car washes, or humidity) gets trapped between them, it creates a battery-like cell:
- Anode: Aluminum (sacrificial metal)
- Cathode: Steel bolt
- Electrolyte: Road salt + water
Result? Aluminum corrodes rapidly, forming white aluminum oxide powder that expands, cracks threads, and loosens mounts.
⚠️ Critical insight: This isn’t cosmetic. Loose battery mounts can cause:
- HV cable strain → isolation faults
- Vibration damage to busbars
- Uneven weight distribution → chassis fatigue
🛠️ Common “Fixes” That Don’t Last
| “Solution” | Why It Fails |
|---|---|
| Wire brushing + paint | Trapped moisture remains; corrosion continues underneath |
| Anti-seize grease | Washes out in 3–6 months; doesn’t stop ion transfer |
| Zinc spray coatings | Incompatible with aluminum; can accelerate degradation |
| Replacing bolts only | Doesn’t address corroded threads in the subframe |
📌 Reality: Once pitting starts in the aluminum carrier, no coating can restore structural integrity.
The Only Permanent Fix: Replace with Corrosion-Engineered Hardware
Temporary patches treat the past. Prevention protects your future.
When you install a CNS BATTERY pack, you get more than new cells—you get a complete mounting system designed to resist corrosion from day one:
✅ Stainless steel fasteners with Dacromet coating—resists salt, acid, and galvanic reaction
✅ Anodized aluminum interface plates—creates non-reactive barrier between steel and chassis
✅ Sealed grommets and drainage channels—prevent moisture entrapment at mount points
✅ Torque-verified installation protocol—eliminates micro-movement that accelerates wear
“After my OEM pack was removed due to mount corrosion, CNS installed their 50kWh unit with upgraded hardware. Two winters in Oslo—zero corrosion. The old mounts looked like Swiss cheese after one.”
— Mark T., Norway
You’re not just securing a battery. You’re preserving your chassis.
Step-by-Step: When to Repair vs. Replace
🔧 Minor Surface Corrosion (Early Stage)
- Signs: Light white powder, no pitting
- Action:
- Remove battery (HV certified technician only)
- Clean with aluminum-safe deoxidizer
- Apply dielectric grease to bolt interfaces
- Reinstall with new stainless hardware
⚠️ Advanced Corrosion (Structural Risk)
- Signs: Pitting, thread stripping, visible gaps, clunking noises
- Action:
- Do not drive—mount integrity is compromised
- Replace entire mounting carrier or subframe section
- Install new battery with corrosion-resistant hardware kit
💡 Pro tip: Always inspect mounts during tire rotations—especially in coastal or snowy regions.
Why Prevention Beats Restoration
| Approach | Cost | Longevity | Risk |
|---|---|---|---|
| DIY cleaning/spray | $20–$50 | 3–6 months | High (hidden damage) |
| Bolt replacement only | $150–$300 | 1–2 years | Medium (subframe still weak) |
| Full mount + pack upgrade (CNS) | ~$7,800 | 5+ years, zero corrosion | None |
Investing in a new pack with engineered mounts eliminates recurring labor, prevents chassis damage, and ensures safe HV operation.
Frequently Asked Questions: i3 Battery Mount Corrosion
Q: Is this only a problem in snowy areas?
A: No—coastal humidity, car wash chemicals, and even condensation in garages can trigger it. Salt just accelerates the process.
Q: Can I use regular steel bolts?
A: Never. Galvanized or stainless steel is mandatory to reduce galvanic potential.
Q: Does CNS include new mounts with every pack?
A: Yes—all packs ship with upgraded, corrosion-resistant mounting kits pre-fitted.
Q: How often should I inspect mounts?
A: Every 10,000 km or 6 months—whichever comes first. Lift the car and check for powder or looseness.
Q: Will corrosion affect my battery warranty?
A: If mounts fail and damage HV cables, most warranties exclude “external mechanical damage.” Prevention protects your coverage.
Your Chassis Deserves Better Than a Band-Aid
Corrosion isn’t dirt to wipe away.
It’s a silent structural thief—eating away at what holds your battery, your safety, and your car together.
Secure Your i3 with Hardware Built to Last
Choose CNS BATTERY and get a complete solution: new cells, new BMS, and corrosion-engineered mounts that stand up to salt, spray, and time.
Click below to explore replacement packs that protect your chassis as fiercely as your range:
👉 https://cnsbattery.com/ev-battery-home/ev-battery-contact/


