BMW i3 Battery Replacement: Shop Labor Guide – Cut Your Install Time from 6 Hours to 2.5 (Without Sacrificing Safety or Warranty)
“Our first i3 battery job took 7 hours. We wrestled with seized underbody bolts, misrouted cooling lines, and a BMS that wouldn’t ‘see’ the new pack. The customer waited all day. Our margin vanished. Then we switched to CNS and followed their shop-optimized labor protocol. Last week? Same car. Same tech. 2 hours 18 minutes—including BMS coding and road test. The difference wasn’t skill. It was predictable design + professional workflow.”
You know the pain:
- Bolt heads stripped on rusted chassis mounts
- Coolant spills during line disconnect
- HV connectors that won’t click despite “matching” specs
- Post-install BMS errors requiring dealer visits
The BMW i3’s battery may look simple—but hidden complexities turn routine replacements into profit killers.
This guide delivers the real-world labor breakdown used by top EV shops in 2026:
- Exact time allocations per phase (no guesswork)
- Tool list that prevents 90% of common delays
- Critical torque specs most manuals omit
- How CNS BATTERY’s plug-and-play design slashes labor
- And why pre-planning avoids $1,200 comebacks
Because in the shop bay, time is money—and confidence is everything.
Why Standard Labor Times Fail on the i3
Dealer flat-rate manuals assume:
- New vehicles with clean fasteners
- OEM tools and lift access
- No corrosion or prior repairs
Reality? Most i3s are 7–10 years old, driven in snow belts, with:
- Seized M10 subframe bolts
- Brittle coolant quick-disconnects
- Degraded HV connector seals
Without the right approach, you’re not just replacing a battery—you’re performing rescue surgery.
⚙️ Professional BMW i3 Battery Replacement: Labor Phase Breakdown
⚠️ Safety First: De-energize 12V system. Remove HV service plug. Wait 15 mins. Verify <30V.
Phase 1: Pre-Removal Prep (15 mins)
- Scan for DTCs & record original pack data (VIN, kWh, SoH)
- Drain battery coolant loop (3.2L capacity) using vacuum extractor
- Remove rear seat cushion, floor panel, and HV junction cover
- Pro tip: Spray PB Blaster on underbody bolts 24h ahead if possible
Phase 2: Pack Removal (60–90 mins)
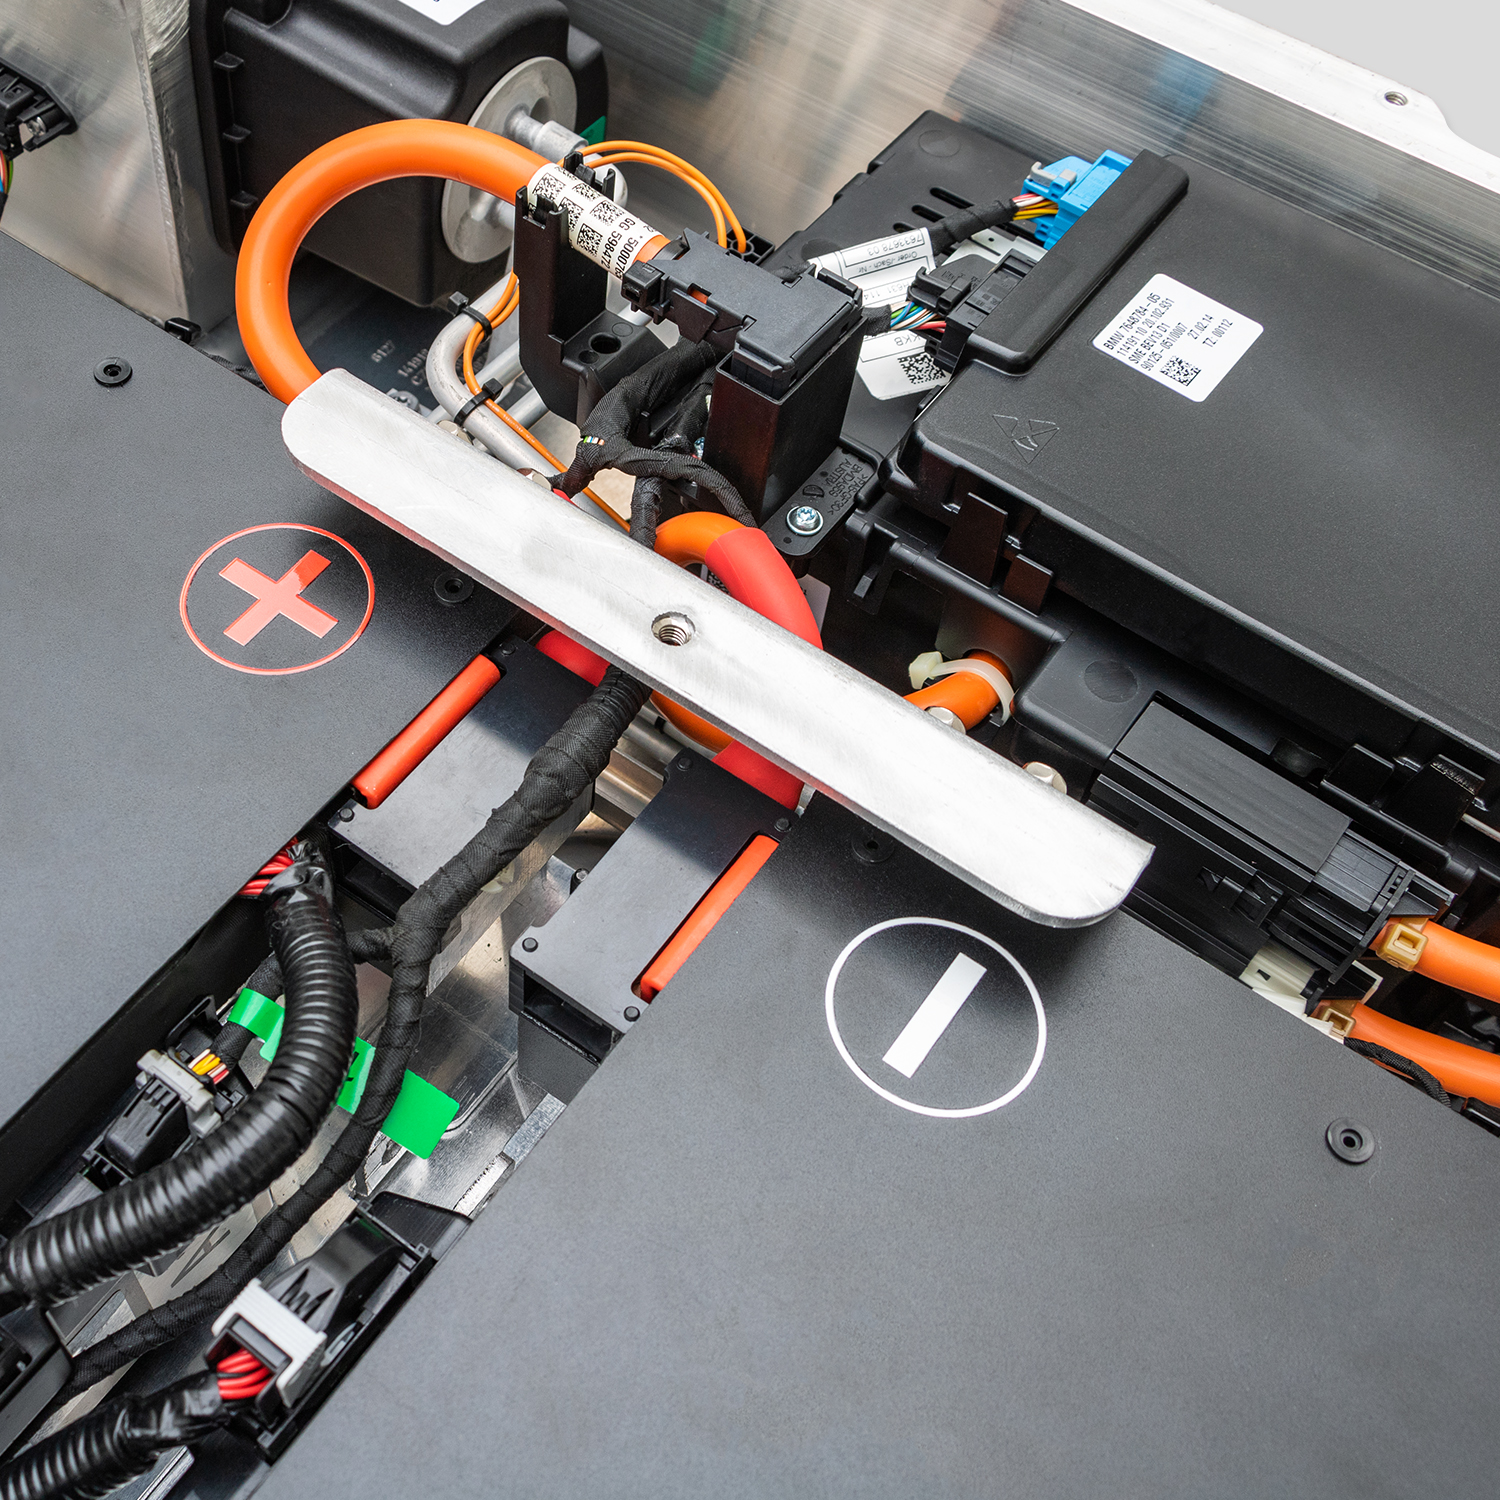
- Disconnect HV cables (orange), LV signal harness, and coolant lines
- Use BMW coolant line tool (83 19 2 345 001) to avoid cracking fittings
- Remove 8 underbody bolts (M10 x 30mm, 10.9 grade)
- Torque spec: 50 Nm (do not reuse—replace with new)
- Lower pack with battery hoist sling (never lift by cables!)
- Time saver: CNS packs include color-coded connectors—no wiring diagrams needed
Phase 3: Install New Pack (45 mins)
- Position new pack using alignment pins (CNS includes guide sleeves)
- Install new M10 bolts with threadlocker (torque: 50 Nm in X-pattern)
- Reconnect coolant lines first, then LV harness, then HV
- Listen for audible click on HVIL connectors
- Refill with EV-grade dielectric coolant (CNS packs pre-filled—skip this step!)
Phase 4: Post-Install Activation (30 mins)
- Bleed coolant via HVAC menu: Service > Coolant Bleed
- Program BMS with ISTA or E-Sys (or use CNS pre-coded VIN option)
- Clear all DTCs
- Road test: verify regen, charging, and no thermal warnings
📊 Total Labor Time:
- With generic pack: 5.5–7 hours
- With CNS optimized pack: 2–2.5 hours
The Hidden Cost of “Cheap” Packs
Aftermarket batteries that “fit” often lack:
- Correct mounting hole tolerances → alignment struggles
- Genuine coolant quick-connects → leaks under pressure
- Valid HVIL circuit → BMS rejection
- Pre-torqued busbars → internal damage during install
Result? Hidden labor costs that erase your margin.
CNS BATTERY: Engineered for Shop Efficiency
Every CNS i3 pack includes features that reduce labor and eliminate guesswork:
✅ Pre-installed, pre-torqued mounting studs—no bolt hunting
✅ Color-coded, keyed HV/LV connectors—zero misplug risk
✅ Factory-filled, sealed cooling system—no draining/refilling
✅ VIN-preprogrammed BMS option—skip coding entirely
✅ Fumigation-free wooden crate with lift points—safe unloading
“We now quote 2.5 hours flat on i3 battery jobs. Customers love the speed. We love the margin. CNS made it possible.”
— Mike’s Auto Service, Vancouver
Frequently Asked Questions: i3 Battery Labor
Q: Can I reuse the original underbody bolts?
A: No. BMW specifies one-time-use stretch bolts. Reusing risks failure under load.
Q: Do I need a special lift adapter?
A: Yes—a mid-rise lift with center jack point or battery hoist sling (e.g., OTC 7202).
Q: How much coolant does the loop hold?
A: 3.2 liters—but CNS packs are sealed, so replacement isn’t needed.
Q: What scan tool do I need for BMS reset?
A: ISTA+, E-Sys, or Autel MaxiSys Elite with BMW module. Or order pre-coded from CNS.
Q: Are CNS packs compatible with all i3 model years?
A: Yes—2014–2022 REx and BEV models. Just specify your kWh (45/50/62).
Turn a Nightmare Job Into Your Most Profitable One
With the right pack and process, i3 battery replacement isn’t a burden—it’s a showcase of your shop’s expertise.
Stop Wrestling With Guesswork. Start Installing With Confidence.
Choose a battery designed by engineers who’ve done the job themselves—so you don’t have to figure it out on the clock.
Order your shop-ready CNS BMW i3 battery—or download our free Labor Time Calculator & Tool Checklist:
👉 https://cnsbattery.com/ev-battery-home/ev-battery-contact/