How to Install a New Battery in a High-Mileage Nissan Leaf
Reviving a high-mileage Nissan Leaf is no longer a gamble. If you own a Leaf (ZE0, AZE0, or ZE1) with over 100,000 miles, you know the struggle: plummeting range, “Limp Mode” warnings, and the sticker shock of dealer replacement costs. The good news is that installing a new battery is the most cost-effective way to extend your EV’s life by another decade. However, the process requires technical precision and a deep understanding of the specific risks associated with older chassis. This guide walks you through the entire process, from pre-purchase compatibility checks to the final programming, ensuring you get the most value out of your investment.
Why Replace the Battery on a High-Mileage Leaf?
Before diving into the installation, it is crucial to understand why this specific scenario is different from a standard replacement. High-mileage Leafs often have degraded 24kWh, 30kWh, 40kWh, or even 62kWh packs that have lost significant capacity. More importantly, the Battery Management System (BMS) and the vehicle’s body structure have aged.
Replacing the battery isn’t just about swapping cells; it is about system integration. A new pack must communicate seamlessly with the old BMS. Many owners make the mistake of buying generic modules, only to find that the communication protocol fails, leaving the car unusable. This is where using a pre-tested, OEM-standard pack, such as those offered by specialized manufacturers, ensures compatibility and avoids the “bricking” of your vehicle.
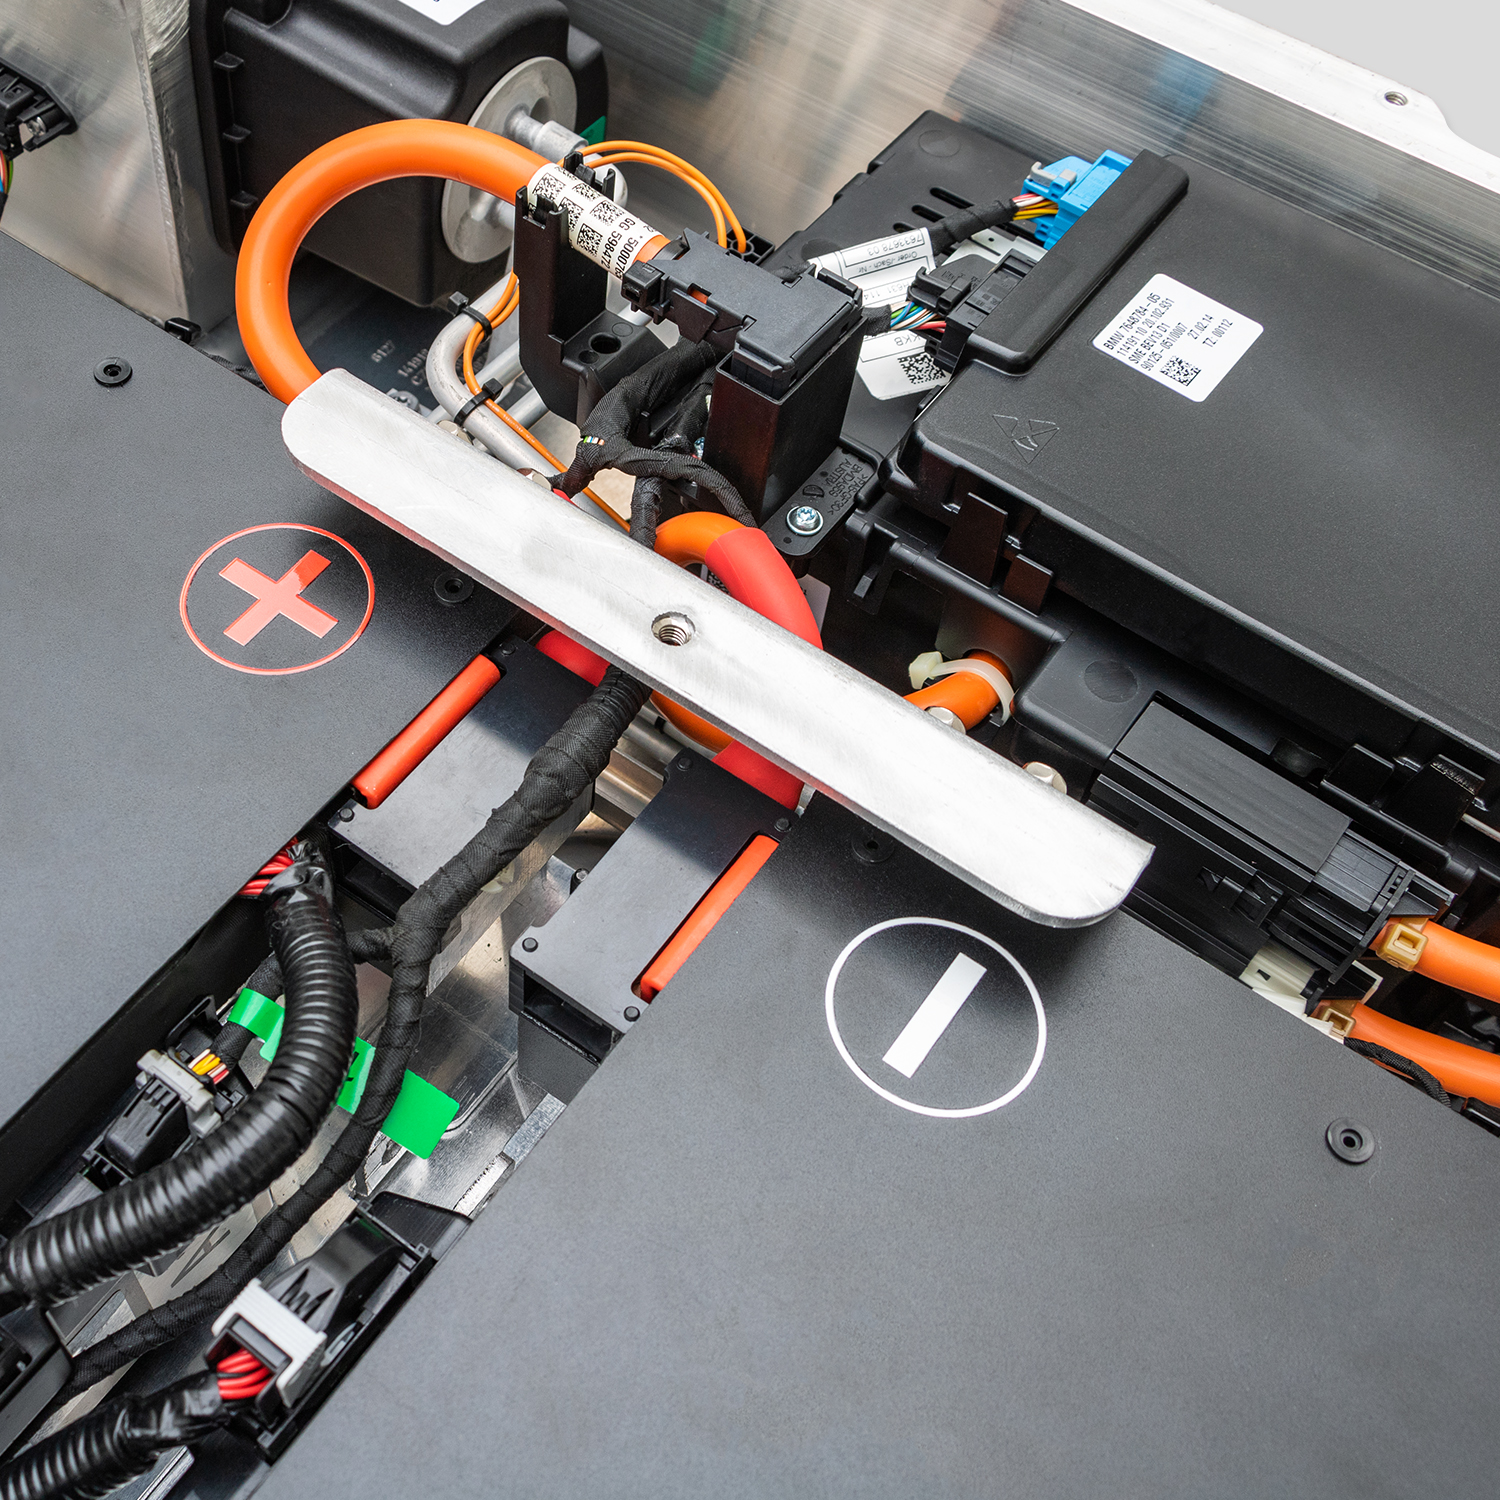
Step 1: The Pre-Installation Assessment (The Most Critical Step)
You cannot simply bolt a new battery into a high-mileage Leaf without checking the surrounding systems. Before you even lift the car, perform this assessment:
- Inspect the Chassis: High mileage means potential rust or structural fatigue. Check the battery mounting points and the undercarriage. If the chassis is compromised, installing a heavy new battery (often weighing over 300kg) could be dangerous.
- Check the BMS Health: The BMS is the brain of the battery. If your old battery died due to a BMS fault (not cell degradation), simply installing a new pack will not solve the problem. You must replace or repair the BMS first.
- Cooling System Flush: Old Leafs often have clogged or degraded thermal paste in the cooling plates. This is vital. Installing a new battery on top of old, cracked thermal pads will lead to immediate overheating and void your warranty. Always replace the thermal interface material.
Step 2: Selecting the Right Battery Solution
When replacing the battery in an older Leaf, you have two main choices: a refurbished OEM pack or a brand-new aftermarket pack.
The Refurbishment Trap: Many shops offer “refurbished” batteries using salvaged cells. These cells are already aged, and mixing them with new cells creates an imbalance, leading to rapid failure.
The Smart Upgrade: Consider upgrading to a brand-new Lithium-ion pack using cells from a Tier-1 supplier (like CATL). These packs are built to OEM specifications but offer better warranties and longer lifespans.
For a high-mileage Leaf, upgrading the capacity (e.g., from 24kWh to 40kWh or 40kWh to 62kWh) is highly recommended. It not only restores the range but also improves the power-to-weight ratio, making your older car feel like new again.
Step 3: The Installation Process
The physical installation of a Nissan Leaf battery is generally a “Plug and Play” process, but it requires strict safety protocols.
Safety First:
- Disconnect the 12V Battery: Always start by disconnecting the negative terminal of the 12V auxiliary battery. This cuts power to the BMS.
- High Voltage Safety: Wear insulated gloves. Even when disconnected, the orange cables can hold a dangerous charge.
Removal of the Old Pack:
- Lift the vehicle using a lift or jack stands (Never work under a car supported only by a jack).
- Remove the underbody shield.
- Disconnect the high-voltage (HV) connector located at the front of the battery pack.
- Disconnect the low-voltage (LV) communication cables.
- Remove the 32 mounting bolts securing the pack to the chassis.
- Carefully lower the old pack using a transmission jack or a specialized EV lift.
Installing the New Pack:
- Carefully lift the new CNS BATTERY pack into place. Ensure the orientation matches the original.
- Reconnect the LV communication cables first.
- Reconnect the HV connector. Ensure it is fully seated and locked.
- Torque the mounting bolts to the manufacturer’s specification (usually 30-40 Nm).
- Reinstall the underbody shield.
Step 4: BMS Programming and Commissioning
This is the step where most DIY attempts fail. A brand-new battery pack has a fresh BMS that needs to “introduce” itself to the car.
- The Reset: After installation, the car might show an error (like “Check Charging System” or “Battery Capacity Reduced”). This is normal.
- The Cycle: You must perform a full charge-discharge cycle. Charge the car to 100%, then drive it until it reaches 0% (or Limp Mode). This allows the car’s ECU to recalibrate and map the new battery’s capacity.
- Software Match: If the car still throws errors, the BMS software version might need updating to match the car’s year. This often requires a professional scan tool.
Step 5: Post-Installation Care
Once the battery is installed and programmed, treat it gently for the first 1,000 miles. Avoid rapid DC fast charging exclusively during this period to allow the internal chemistry to stabilize.
Frequently Asked Questions (FAQ)
Q1: Can I install a new battery on my high-mileage Leaf myself?
Yes, the mechanical installation is rated as moderate difficulty (taking about 1-2 hours for a professional). However, the BMS programming and compatibility check are critical. If you are not comfortable with electronics, it is recommended to use the video guidance provided by the manufacturer or hire a mechanic. We offer remote video support to guide you through the programming step.
Q2: Will a new battery fit my old Leaf model (like a 2011 ZE0)?
Yes, but compatibility is key. We design our packs to match OEM standards. Before purchasing, you must provide your VIN (Vehicle Identification Number) to ensure the connector types, voltage, and communication protocols match your specific year and model.
Q3: What is the warranty on a new replacement battery?
We offer an industry-leading 2-year or 80,000 km warranty (whichever comes first) on our new packs. This far exceeds the warranty offered on most refurbished OEM batteries. This warranty covers defects in materials and workmanship, as well as performance degradation.
Q4: How much range can I expect after the replacement?
A brand-new pack will restore your Leaf to factory specifications. For example, replacing a degraded 24kWh pack with a new 40kWh pack can increase your range from a struggling 80km to a reliable 240km+.
Q5: Why is a new aftermarket pack cheaper than the Nissan dealer price?
Dealers charge a premium for the brand name. We are direct manufacturers specializing in Nissan EV batteries. By cutting out the dealership markup, we pass the savings to you—typically offering the same quality (or better) at 50% less than dealer prices.
Ready to bring your Nissan Leaf back to life? Don’t let high mileage stop your journey.