Here is the SEO-optimized article tailored for Nissan Leaf enthusiasts, focusing on the DIY installation process and the specific tools required to successfully upgrade to a CNS Battery pack.
Essential Toolkit for Your Nissan Leaf Battery Pack DIY Upgrade
Upgrading your Nissan Leaf’s battery pack is one of the most rewarding modifications you can make to extend the life and range of your EV. Whether you drive a Leaf ZE0, AZE0, or ZE1, or perhaps an e-NV200, replacing an aging or degraded battery with a brand-new CNS Battery pack can feel like getting a brand-new car. However, before you dive under the hood, it is crucial to have the right DIY tools on hand.
At CNS Battery, we specialize in OEM-compatible lithium battery solutions for Nissan and BMW models. We understand that our customers are often hands-on enthusiasts looking to save on labor costs. To ensure your Nissan Leaf battery replacement is safe, efficient, and successful, we have compiled this comprehensive guide to the top tools you need for the job.
🧰 The Core Toolkit: Safety and Basics
Safety is the absolute priority when working with high-voltage systems. While the CNS Battery pack is designed for plug-and-play installation, the environment you work in and your protective gear are non-negotiable.
1. Personal Protective Equipment (PPE)
Before touching a single wrench, you must be protected. Lithium-ion batteries operate at high voltages (often 300V+), and accidental short circuits can be dangerous.
- Insulated Safety Gloves: These are mandatory. Ensure they are rated for the voltage of your Leaf model.
- Safety Glasses: Protect your eyes from dust, debris, and potential sparks.
- Non-Conductive Shoes: Rubber-soled shoes provide an extra layer of insulation from the ground.
2. Socket Wrench Set (Metric)
The battery pack is held in place by numerous bolts and brackets. A high-quality metric socket set is essential.
- Key Sizes: You will primarily need sockets ranging from 10mm to 19mm.
- Torque Wrench: While not strictly necessary, a torque wrench ensures you tighten bolts to the manufacturer’s specifications, preventing stripped threads or loose connections.
3. Screwdrivers and Pry Tools
You will need to remove interior panels, the center console, and plastic underbody covers.
- Phillips and Flathead Screwdrivers: For standard screws.
- Trim Removal Tools: These plastic pry bars help remove plastic clips and panels without cracking them.
🔋 Advanced Tools for Electrical Work
While the mechanical removal of the old pack is straightforward, handling the electrical connections requires precision.
1. Digital Multimeter
This is your “eyes” for the electrical system. Before disconnecting the old battery, use a multimeter to verify that the power is off. After installation, you will use it to check voltage readings and ensure the BMS (Battery Management System) is communicating correctly with the vehicle.
2. Torx and Allen Keys
Modern EVs use a variety of fastener types. Ensure you have a set of Torx bits (E10, E12, E20) and Allen keys. These are often used for securing high-voltage connectors and specific mounting points within the battery tray.
3. Contact Cleaner and Dielectric Grease
As mentioned in our customer testimonials, terminal corrosion can be a silent killer.
- Terminal Cleaner: Use this to clean the vehicle’s mating connectors before plugging in your new CNS Battery.
- Dielectric Grease: Apply this to the seals and pins to prevent future corrosion and ensure a smooth connection.
🛠️ Why These Tools Matter for Your CNS Battery Installation
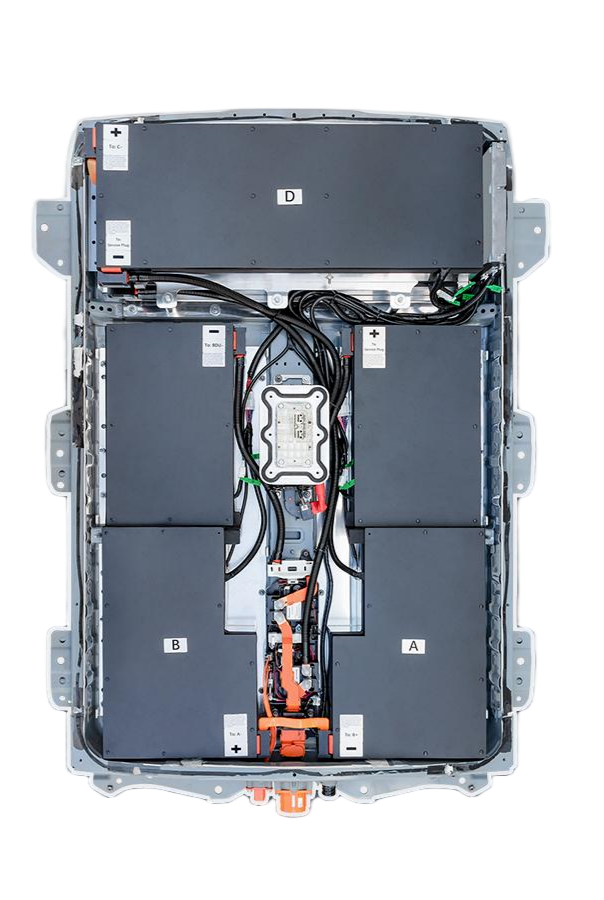
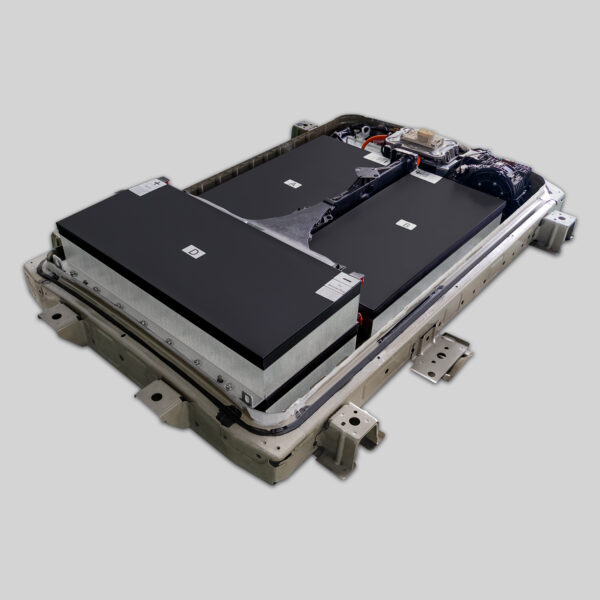
At CNS, we design our battery packs to be direct OEM replacements, saving you up to 50% compared to dealership prices. However, the savings only matter if the installation goes smoothly.
Many of our customers, like Thomas from the Netherlands, successfully installed their 50kWh packs themselves. He noted that the process was “surprisingly simple” and “plug-and-play.” However, even plug-and-play requires the correct tools to access the battery bay and secure the connections.
Pro Tip: If you are working on a Leaf ZE1 or e-NV200, pay special attention to the underbody shielding. Removing this often requires specific Torx bits, and reinstalling it correctly is vital for protecting your new investment from road debris and water.
📱 Digital Tools: Your Secret Weapon
Beyond physical wrenches, the most important tool in your arsenal might be your smartphone.
- Installation Videos: CNS provides high-definition installation tutorials. We recommend having a tablet or phone nearby to follow the video step-by-step.
- Remote Support: If you encounter a wiring question, our technical team offers remote video guidance. Having your phone charged and ready allows you to take photos of your wiring and get instant support from our experts.
📝 Step-by-Step: The Installation Process
To help you visualize the workflow, here is a quick breakdown of how these tools are used:
- Preparation (Safety First): Don your insulated gloves and safety glasses. Disconnect the 12V auxiliary battery to kill all power.
- Access (Pry Tools & Sockets): Remove the center console and interior trim panels using your trim tools. Slide the driver’s seat forward.
- Extraction (Socket Set): Remove the bolts securing the battery access panel. Carefully lift the old, heavy battery modules out.
- Cleaning (Contact Cleaner): Clean the vehicle’s contact pins and inspect for damage.
- Installation (Plug-and-Play): Lower the new CNS Battery pack into place. Connect the high-voltage and signal connectors.
- Verification (Multimeter): Perform a final check before reassembling the interior.
📊 Tool Checklist Summary
Here is a quick reference list to print out before you start your project.
| Tool Category | Essential Items | Purpose |
|---|---|---|
| Safety Gear | Insulated Gloves, Goggles | Prevent electrical shock and injury |
| Mechanical | Metric Socket Set, Torque Wrench | Remove and secure the battery mounting brackets |
| Electrical | Digital Multimeter, Contact Cleaner | Verify power status and ensure clean connections |
| Specialty | Torx Bits (E10/E20), Pry Tools | Remove specific fasteners and interior panels |
💡 Conclusion: Confidence in Every Connection
Replacing the battery in your Nissan Leaf is a significant project, but with the right DIY tools and a high-quality CNS Battery pack, it is entirely achievable for the competent home mechanic. By preparing your toolkit in advance, you ensure that the only delay in getting your car back on the road is the time it takes to torque down the final bolts.
Remember, our team of experts is always here to support you. If you have questions about compatibility or need guidance during the process, don’t hesitate to reach out.
Ready to upgrade your Nissan Leaf with a premium, cost-effective battery solution? Get your free quote today and take the first step towards a longer driving range and a revitalized EV experience.
❓ Frequently Asked Questions (FAQ)
Q1: Do I really need to buy special tools, or can I use basic car tools?
While many basic car tools (like standard wrenches) will work for removing bolts, insulated safety gloves and a digital multimeter are non-negotiable for an EV battery swap. These are specialized safety items you might not have in a standard gasoline car toolkit. We also recommend specific Torx bits (E10/E20) which are common in EVs but not always in basic home kits.
Q2: How long does a DIY Nissan Leaf battery replacement take?
For a professional technician, the installation typically takes 1-2 hours. As a DIYer, depending on your experience level and how organized your tools are, you should budget 2 to 3 hours. This includes the time to remove interior panels, swap the pack, and verify the connections.
Q3: What if I get stuck during the installation?
CNS Battery provides comprehensive support. We offer step-by-step installation videos and PDF manuals. If you encounter a specific problem, our customer service team can arrange a video call to guide you through the troubleshooting process in real-time. Don’t force anything; a quick call to our experts can save you time and prevent damage.
Q4: Are the tools different for a Leaf ZE0 vs. a ZE1?
The core toolkit remains the same. However, the Leaf ZE1 often has more extensive underbody shielding compared to older models, so having the correct Torx bits for plastic body panels is especially important for that specific model.