Nissan Leaf 40kWh Battery Installation Tips: Expert Guide for Seamless Setup (2026)
Are you planning a Nissan Leaf 40kWh battery installation but worried about costly mistakes, compatibility issues, or safety risks? The 40kWh battery—standard in 2018-2022 Leaf ZE1 models—requires precision handling, especially with its liquid cooling system and advanced BMS (Battery Management System). Many DIYers and even technicians struggle with thermal loop calibration, wiring mismatches, and post-install errors that derail the process. As CNS BATTERY experts, we’ve refined thousands of 40kWh installations, and this guide shares critical tips to ensure a smooth, safe setup that maximizes performance and longevity.
Pre-Installation Preparation: Lay the Groundwork for Success
Proper preparation is the key to avoiding installation headaches. Spend time on these steps to align with the Leaf’s 360V system and liquid cooling architecture.
1. Verify Vehicle Compatibility
The 40kWh battery is designed for 2018-2022 Nissan Leaf ZE1 models (S, SV trims). Never attempt installation in first-gen ZE0 (2010-2012) or third-gen (2023+) Leafs—their electrical and cooling systems are incompatible. Confirm your VIN with Nissan or CNS BATTERY to ensure the 40kWh pack matches your vehicle’s chassis and wiring harness. For 24kWh/30kWh ZE0 upgrades, opt for a 30kWh sodium-ion pack instead, as 40kWh requires liquid cooling retrofits (cost-prohibitive).
2. Gather Specialized Tools & Safety Gear
Unlike passive-cooled Leafs, 40kWh installation needs tools for liquid cooling work: a coolant vacuum filler, pressure tester (15-20 psi range), and torque wrench (precision to 1 N·m). Safety gear is non-negotiable: Class 00 insulated gloves (1,000V+ rating), insulated screwdrivers, and a high-voltage detector. Rent or purchase a Nissan-compatible OBD-II scanner (e.g., Autel MaxiCOM MK908P) for BMS calibration—generic scanners won’t sync with the ZE1’s protocol.
3. Inspect Core Components & Battery Condition
Before installation, inspect the Leaf’s cooling loop for leaks, corrosion, or damaged hoses—replace any faulty parts to avoid post-install overheating. Check the battery pack (new or refurbished) for physical damage, cell voltage balance (<0.03V variance), and intact connectors. CNS BATTERY’s 40kWh sodium-ion packs come pre-balanced and leak-tested, eliminating this step for our customers.
Step-by-Step Installation Tips for 40kWh Batteries
Follow these expert tips to navigate the ZE1’s liquid cooling system and electrical architecture, ensuring a secure, functional install.
1. Safe High-Voltage Disconnection
Start by disconnecting the 12V battery (under the hood) and waiting 15 minutes to discharge residual voltage from capacitors—never skip this, as lethal current can linger. Locate the high-voltage service plug (under the rear seat), remove the cover, and disconnect it using insulated pliers. Secure the plug with tape to prevent accidental reconnection during installation.
2. Liquid Cooling System Handling
Drain the factory coolant (Nissan-approved glycol) into a sealed container—reuse only if it’s clear and free of sediment. Disconnect the cooling hoses from the old battery, taking photos to document routing (critical for reassembly). When installing the new 40kWh pack, align the coolant ports with the hoses and torque clamps to 8 N·m—over-tightening damages hoses, while under-tightening causes leaks. Use a vacuum filler to refill the system, eliminating air bubbles that cause overheating.
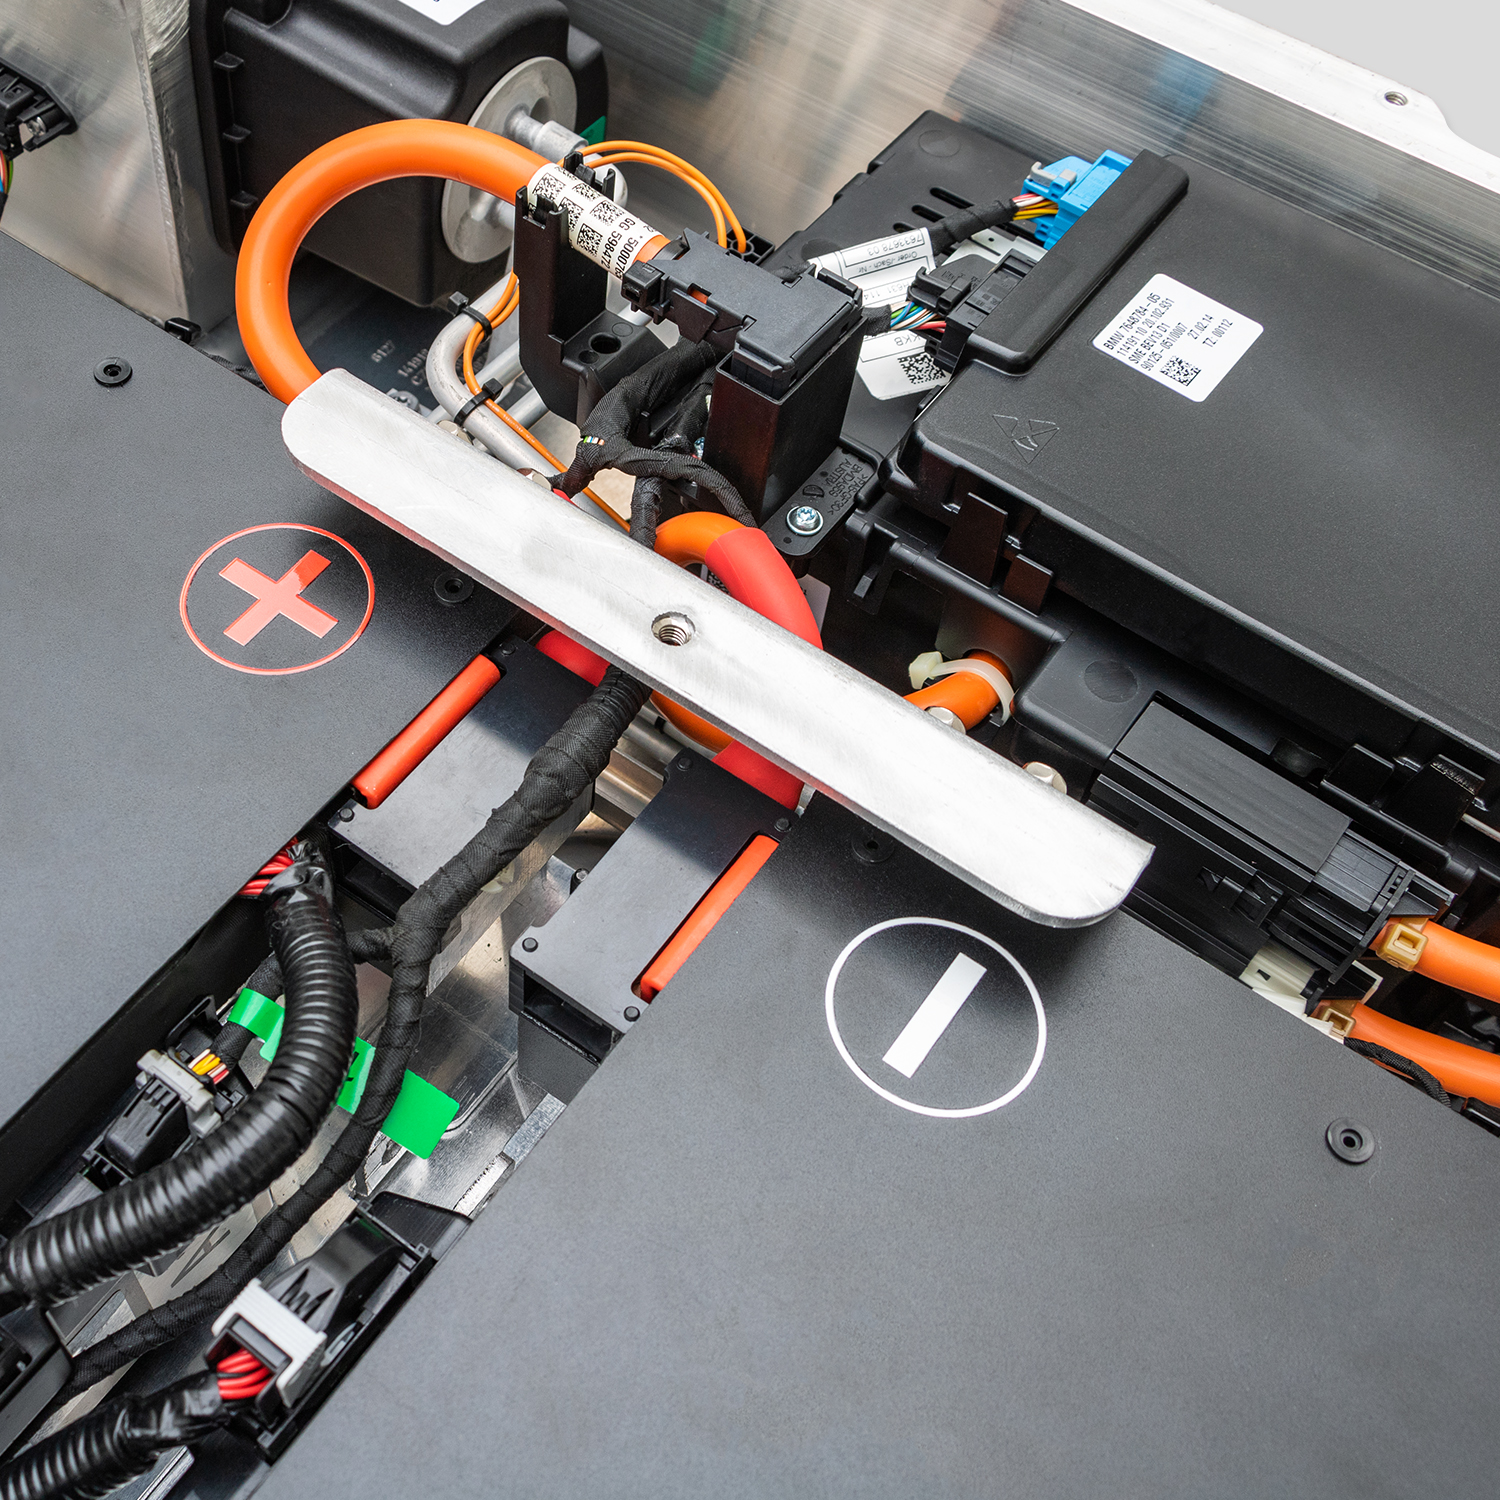
3. Battery Mounting & Wiring Precision
The 40kWh battery weighs 450 lbs—use a hydraulic battery trolley to lift and position it, avoiding strain on connectors. Align the battery with factory mounting points and torque bolts to 45 N·m (refer to ZE1 service manuals for exact locations). Connect the wiring harnesses, ensuring locks click into place—loose connections trigger BMS errors. Label harnesses during removal to avoid mix-ups, especially the CAN bus connectors (critical for BMS communication).
4. Post-Install BMS Calibration & Testing
Use the Nissan-compatible scanner to recalibrate the BMS, updating it to recognize the 40kWh capacity. This step eliminates range readout inaccuracies and optimizes charging cycles. Run a test charge (0-100%) on a Level 2 charger, monitoring coolant temperature (target 25-30°C) and voltage stability. Take a 30-minute test drive to verify regenerative braking and power delivery—clear any error codes with the scanner before finalizing.
Common Installation Pitfalls & How to Avoid Them
Even experienced technicians face issues with 40kWh installs. Avoid these costly mistakes with our expert fixes.
1. Air Bubbles in Cooling System
Bubbles block coolant flow, leading to battery overheating. Fix: Use a vacuum filler and bleed the system twice—once after installation and again after the test drive. Monitor temperature during charging; if it exceeds 35°C, bleed the system again.
2. BMS Communication Errors
Errors often stem from misconnected CAN bus wires or outdated firmware. Fix: Double-check harness routing against photos, and update BMS firmware to the latest version (2026 update available via CNS BATTERY support). Our packs come pre-programmed with ZE1-compatible protocols to reduce this risk.
3. Over-Torqued or Under-Torqued Components
Incorrect torque damages batteries, hoses, and wiring. Fix: Use a calibrated torque wrench and follow ZE1 specifications—never guess. Save time by referencing our 40kWh installation torque chart (available for free to CNS BATTERY customers).
Benefits of Professional-Grade 40kWh Installation
A precise installation maximizes the 40kWh battery’s performance and lifespan, delivering long-term value.
Extended Battery Lifespan
Proper cooling system setup and BMS calibration reduce degradation, extending the battery’s lifespan to 6-8 years (1,800+ charge cycles). Poor installation cuts lifespan by 30-40%, leading to premature replacement.
Optimal Range & Efficiency
A well-installed 40kWh battery delivers 149 miles of EPA range—mismatched wiring or uncalibrated BMS reduces range by 10-15%. Our sodium-ion 40kWh packs boost efficiency by 10%, further enhancing real-world range.
Safety & Warranty Protection
Correct installation eliminates fire and electrical risks. CNS BATTERY’s professional installation (or DIY support) ensures compliance with safety standards, preserving our 3-year warranty and the Leaf’s non-battery component coverage.
Frequently Asked Questions (FAQ) About 40kWh Installation
Can I install a 40kWh battery myself?
Yes—if you have experience with EV high-voltage systems and liquid cooling. Skilled DIYers take 4-6 hours; beginners should avoid it. We provide detailed guides and free technical support to DIY customers, reducing risks.
Will 40kWh installation void my Leaf’s warranty?
No. The Federal Magnuson-Moss Warranty Act protects non-battery components (motor, controller). CNS BATTERY provides certified installation records, preserving factory coverage. Our 3-year battery warranty complements remaining factory protection.
Do I need to replace coolant during installation?
Yes—if the coolant is older than 2 years or discolored. Reuse only fresh, Nissan-approved glycol to maintain cooling efficiency. Our installation packages include coolant replacement for added convenience.
How long does professional 40kWh installation take?
CNS BATTERY technicians complete installations in 2-3 hours, including testing and calibration. We offer same-day service for most ZE1 models, minimizing downtime for owners.
Trust CNS BATTERY for Your Nissan Leaf 40kWh Installation
A successful Nissan Leaf 40kWh battery installation depends on precision, specialized tools, and Leaf-specific expertise. CNS BATTERY’s sodium-ion 40kWh packs are engineered for ZE1 compatibility, and our team provides professional installation or DIY support to ensure success. Avoid costly mistakes and maximize your battery’s performance with our expert guidance. 立即访问https://cnsbattery.com/nissan-leaf-battery/,获取独家折扣并咨询专家升级方案! Let us help you complete a seamless 40kWh battery installation for your Nissan Leaf.