
How to Upgrade Nissan Leaf Battery Yourself: Safe DIY Guide for 2026
Are you an experienced DIY enthusiast looking to save on labor costs by upgrading your Nissan Leaf battery yourself? While professional installation is recommended for most owners, with the right tools, safety protocols, and step-by-step guidance, you can successfully upgrade Nissan Leaf battery yourself. Many Leaf owners avoid DIY upgrades due to fear of high-voltage risks or compatibility issues, relying on generic guides that skip model-specific details. As CNS BATTERY experts, we’ve crafted this comprehensive guide to walk you through a safe, successful DIY battery upgrade—tailored to ZE0 (2010-2017) and ZE1 (2018-2022) Leaf models. Learn how to avoid common pitfalls, use our DIY-friendly batteries, and enjoy the satisfaction of revitalizing your EV on your own terms.
Critical Prerequisites Before You Upgrade Nissan Leaf Battery Yourself
DIY battery upgrades demand preparation and expertise. Skip these steps at your peril—they’re non-negotiable for safety and success.
First, confirm your technical skill level: You need experience working with automotive electrical systems and comfort handling high-voltage components (360V). If you’ve never worked with EV batteries or high-voltage systems, opt for professional installation. Second, gather certified safety gear: Class 00 insulated gloves (rated for 1,000V+), impact-resistant safety glasses, non-conductive work boots, a Class C fire extinguisher (for electrical fires), and non-conductive mats. Third, secure specialized tools: A torque wrench (10-140 Nm range), Nissan-compatible OBD-II scanner for BMS calibration, a 1,000+ lb capacity battery trolley, plastic pry tools, and a multimeter (capable of measuring DC voltage up to 500V). Finally, choose a workspace: A flat, well-ventilated area free of flammable materials, with adequate lighting to see small components.
Tools & Materials Needed to Upgrade Nissan Leaf Battery Yourself
Having the right tools ensures a smooth upgrade. Below is a curated list, including CNS BATTERY’s DIY-friendly components.
Essential Tools
• Class 00 insulated gloves (certified to ASTM D120 standards) • Torque wrench with socket set (metric: 8mm-19mm) • Nissan-specific OBD-II scanner (e.g., CONSULT III+ or compatible third-party EV scanner) • Battery trolley (1,000+ lb capacity, with secure strapping) • Multimeter (DC voltage range: 0-500V, with insulated probes) • Plastic pry tools (to avoid scratching wiring harnesses) • Anti-corrosion grease (for electrical connectors) • Class C fire extinguisher (mounted within easy reach)
Recommended Materials
• CNS BATTERY DIY-friendly replacement/upgrade pack (model-specific for ZE0/ZE1) • Nissan-approved coolant (for ZE1 liquid-cooled models) • Wire labels or tape (to mark harness connections) • Microfiber cloths (for cleaning battery compartment) • Disposable rags (for coolant cleanup, ZE1 only)
Step-by-Step Guide to Upgrade Nissan Leaf Battery Yourself
Follow this model-specific process carefully. We’ll break it down for ZE0 (passive cooling) and ZE1 (liquid cooling) Leafs, as their battery architectures differ.
Pre-Upgrade: Power Disconnection & Safety Checks (All Models)
1. Park your Leaf on level ground, engage the parking brake, and turn off all electrical systems. Remove the key fob from the vehicle to prevent accidental power-on. 2. Disconnect the 12V battery (located in the front trunk). Loosen the negative terminal first, then the positive, and secure the cables away from metal components. 3. Locate the high-voltage service plug (under the rear seat for most models). Remove the cover, disconnect the plug, and store it in a safe place to prevent reconnection. 4. Wait 10-15 minutes to discharge capacitors. Use a multimeter to test for residual voltage—readings should be below 5V before proceeding.
ZE0 Models (2010-2017): Passive Cooling System Upgrade
1. Access the Battery Pack: Remove the underbody splash guards and heat shields using a socket set. Label all wiring harnesses and passive cooling ducts with tape—take photos for reference. 2. Remove the Old Battery: Loosen the 12 battery retaining bolts in a crisscross pattern (torque spec: 45 Nm) to avoid chassis stress. Use the trolley to safely lower the old pack (400+ lbs) and set it on a non-conductive surface. 3. Prepare the Compartment: Clean the battery compartment with a microfiber cloth, checking for corrosion or damage. Apply anti-corrosion grease to terminal contacts if needed. 4. Install the New CNS Battery: Lift the new pack into place with the trolley, aligning mounting points. Tighten retaining bolts to 45 Nm in a crisscross pattern. Reconnect cooling ducts and wiring harnesses (match labels/photos). 5. BMS Calibration: Reconnect the 12V battery and use the Nissan scanner to calibrate the BMS. This syncs the new battery with the Leaf’s electrical system for accurate range readouts.
ZE1 Models (2018-2022): Liquid Cooling System Upgrade
1. Additional Pre-Step: Drain Coolant: Locate the cooling system drain plug (near the battery pack). Drain the coolant into a sealed container (dispose of per local regulations). Disconnect cooling lines, labeling them to avoid cross-connection. 2. Access & Remove Old Battery: Follow the same underbody removal and bolt-loosening steps as ZE0 models. Use the trolley to lower the 518-lb pack carefully. 3. Install New CNS Battery: Position the new pack, tighten retaining bolts to 45 Nm. Reconnect cooling lines (match labels) and torque fittings to 15 Nm. Refill the system with Nissan-approved coolant, using a vacuum filler to bleed air. 4. BMS Calibration & Cooling Test: Calibrate the BMS with the scanner. Turn on the vehicle and let the cooling system circulate—check for leaks and ensure temperatures stabilize at 25-35℃.
Post-Upgrade Testing (All Models)
1. Test voltage balance with a multimeter—cell variance should be ≤0.05V. 2. Charge the battery to 100% via Level 2 charging (240V) to verify BMS functionality. 3. Take a 15-20 minute test drive, monitoring battery temperature and range readouts. 4. Check for error codes with the OBD-II scanner—resolve any issues before regular use.
Why CNS BATTERY Makes It Easier to Upgrade Nissan Leaf Battery Yourself
Our batteries are engineered for DIY compatibility, reducing frustration and minimizing risks.
DIY-Friendly Design
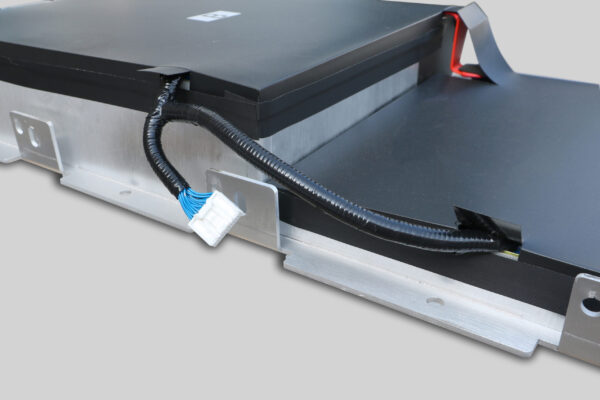
CNS BATTERY packs feature pre-labeled connectors and model-specific mounting points, matching OEM fitment perfectly. No modifications are needed—simply drop in and connect. Our ZE1 packs include precision cooling adapters that align with the factory liquid loop, eliminating guesswork.
Comprehensive Support
We provide a free DIY installation manual (with photos and torque specs) and 24/7 technical support. If you get stuck mid-project, our experts can guide you through troubleshooting—something generic battery suppliers rarely offer.
Pre-Balanced & Tested Packs
All our batteries are pre-balanced and tested for voltage consistency before shipping. This skips the time-consuming cell-balancing step many DIYers struggle with, ensuring optimal performance from day one.
Benefits of Upgrading Nissan Leaf Battery Yourself
A successful DIY upgrade delivers more than just cost savings—it’s a rewarding project with long-term value.
Significant Labor Cost Savings
Professional installation costs $800-$1,200. By upgrading yourself, you keep that money in your pocket—our DIY-friendly packs cost the same as our professionally installed options, with no hidden fees.
Full Control Over the Process
DIY lets you inspect every component, ensuring quality work. You can address small issues (like corrosion) during the upgrade, extending your Leaf’s lifespan further.
Satisfaction & Expertise Building
Successfully upgrading your EV battery is a proud achievement. You’ll gain valuable knowledge about your Leaf’s architecture, making future maintenance easier.
Frequently Asked Questions (FAQ) About DIY Leaf Battery Upgrades
Is it legal to upgrade Nissan Leaf battery yourself?
Yes, as long as you follow local safety regulations and use certified components. Our CNS BATTERY packs meet ISO 6469-3 EV safety standards, ensuring compliance with most regions’ requirements.
Will a DIY upgrade void my Leaf’s warranty?
It may affect the battery warranty, but non-battery components (motor, controller) remain covered if the upgrade doesn’t cause damage. Our packs include a 3-year warranty, and we provide installation records to support warranty claims for other components.
How long does a DIY Leaf battery upgrade take?
For first-time DIYers, ZE0 models take 4-6 hours; ZE1 models take 6-8 hours (due to cooling system steps). Plan for a full day to avoid rushing—mistakes happen when working under time pressure.
Can I reuse my old battery’s mounting hardware?
Yes, if it’s in good condition. Inspect bolts and brackets for rust or wear—replace any damaged parts with OEM or high-grade aftermarket hardware to ensure safety.
Get DIY-Ready Nissan Leaf Batteries from CNS BATTERY Today
Upgrading your Nissan Leaf battery yourself is a challenging but rewarding project—if you have the right tools, guidance, and components. CNS BATTERY’s DIY-friendly packs, expert support, and comprehensive guides make the process safe and accessible. Don’t let labor costs hold you back from revitalizing your EV. 立即访问https://cnsbattery.com/nissan-leaf-battery/,获取独家折扣并咨询专家升级方案! Our team will help you select the perfect battery for your DIY project and provide all the resources you need to succeed.

