How to Upgrade Your DIY Leaf Plus Power Battery: A Comprehensive Guide for Enthusiasts
Upgrading your Nissan Leaf battery is no longer just a repair—it’s a performance revolution. If you’re reading this, you likely own a Nissan Leaf (ZE0, ZE1, or AZE0) and are tired of the limited range and degraded performance of the older packs. You want the “Plus” upgrade, but you don’t want to pay the dealership premium.
As a DIY enthusiast, you value control, cost-efficiency, and the satisfaction of doing it yourself. At CNS BATTERY, we specialize in OEM-compatible Nissan and BMW batteries, and we’ve helped thousands of owners like you transform their EVs from “city crawlers” into “weekend warriors.”
This guide will walk you through the exact process of upgrading your Leaf to a high-capacity “Plus” battery, why using brand-new CATL cells is the only safe choice for DIY, and how to avoid the common pitfalls that plague the second-hand market.
Why Upgrade to a “Leaf Plus” Battery?
Before we dive into the “how,” let’s talk about the “why.” The original 24kWh and 30kWh Leaf batteries were groundbreaking in their time, but technology has moved on. The “Plus” upgrade refers to installing a modern high-capacity pack (40kWh, 50kWh, 62kWh, or even 68kWh) into your older chassis.
Here is what a CNS BATTERY “Plus” upgrade delivers:
- Range Doubling: Go from a 100km anxiety-ridden commute to a reliable 350km+ range.
- New Car Performance: Experience the original torque and acceleration the Leaf was designed for, without the voltage sag of old cells.
- Cost Halving: A DIY upgrade with CNS costs roughly 50% less than an OEM replacement, and you save on labor costs.
Expert Note: Many DIYers try to save money with “recycled” or “used” batteries. This is a gamble. Used cells are already degraded, often damaged, and lack safety certifications. CNS uses only brand-new, A-grade cells from CATL—the same supplier used by major OEMs—ensuring safety and longevity.
Step 1: Selecting the Right “Plus” Configuration
Not all Leaf batteries are created equal. The first step in your DIY journey is selecting the right pack for your specific model year.
| Leaf Model | Recommended “Plus” Upgrade | Expected Range (WLTP) | Key Feature |
|---|---|---|---|
| Leaf ZE0 (2011-2015) | 40kWh or 62kWh | 240km – 350km | Perfect fit, no modifications needed. |
| Leaf ZE1 (2016-2018) | 50kWh or 62kWh | 280km – 380km | Higher voltage compatibility. |
| Leaf AZE0 (2019+) | 62kWh or 68kWh | 350km – 470km | Maximum capacity, future-proofing. |
Pro Tip: If you have a ZE0 model, upgrading to a 62kWh pack requires a BMS (Battery Management System) update. Don’t worry—our technical support team provides the coding files and guidance.
Step 2: The CNS BATTERY Advantage for DIY
As a DIY enthusiast, you need a battery that is reliable out of the box. You don’t want to spend weeks sourcing cells, spot-welding, or dealing with BMS failures.
Here is why our pre-built packs are the industry standard for DIY upgrades:
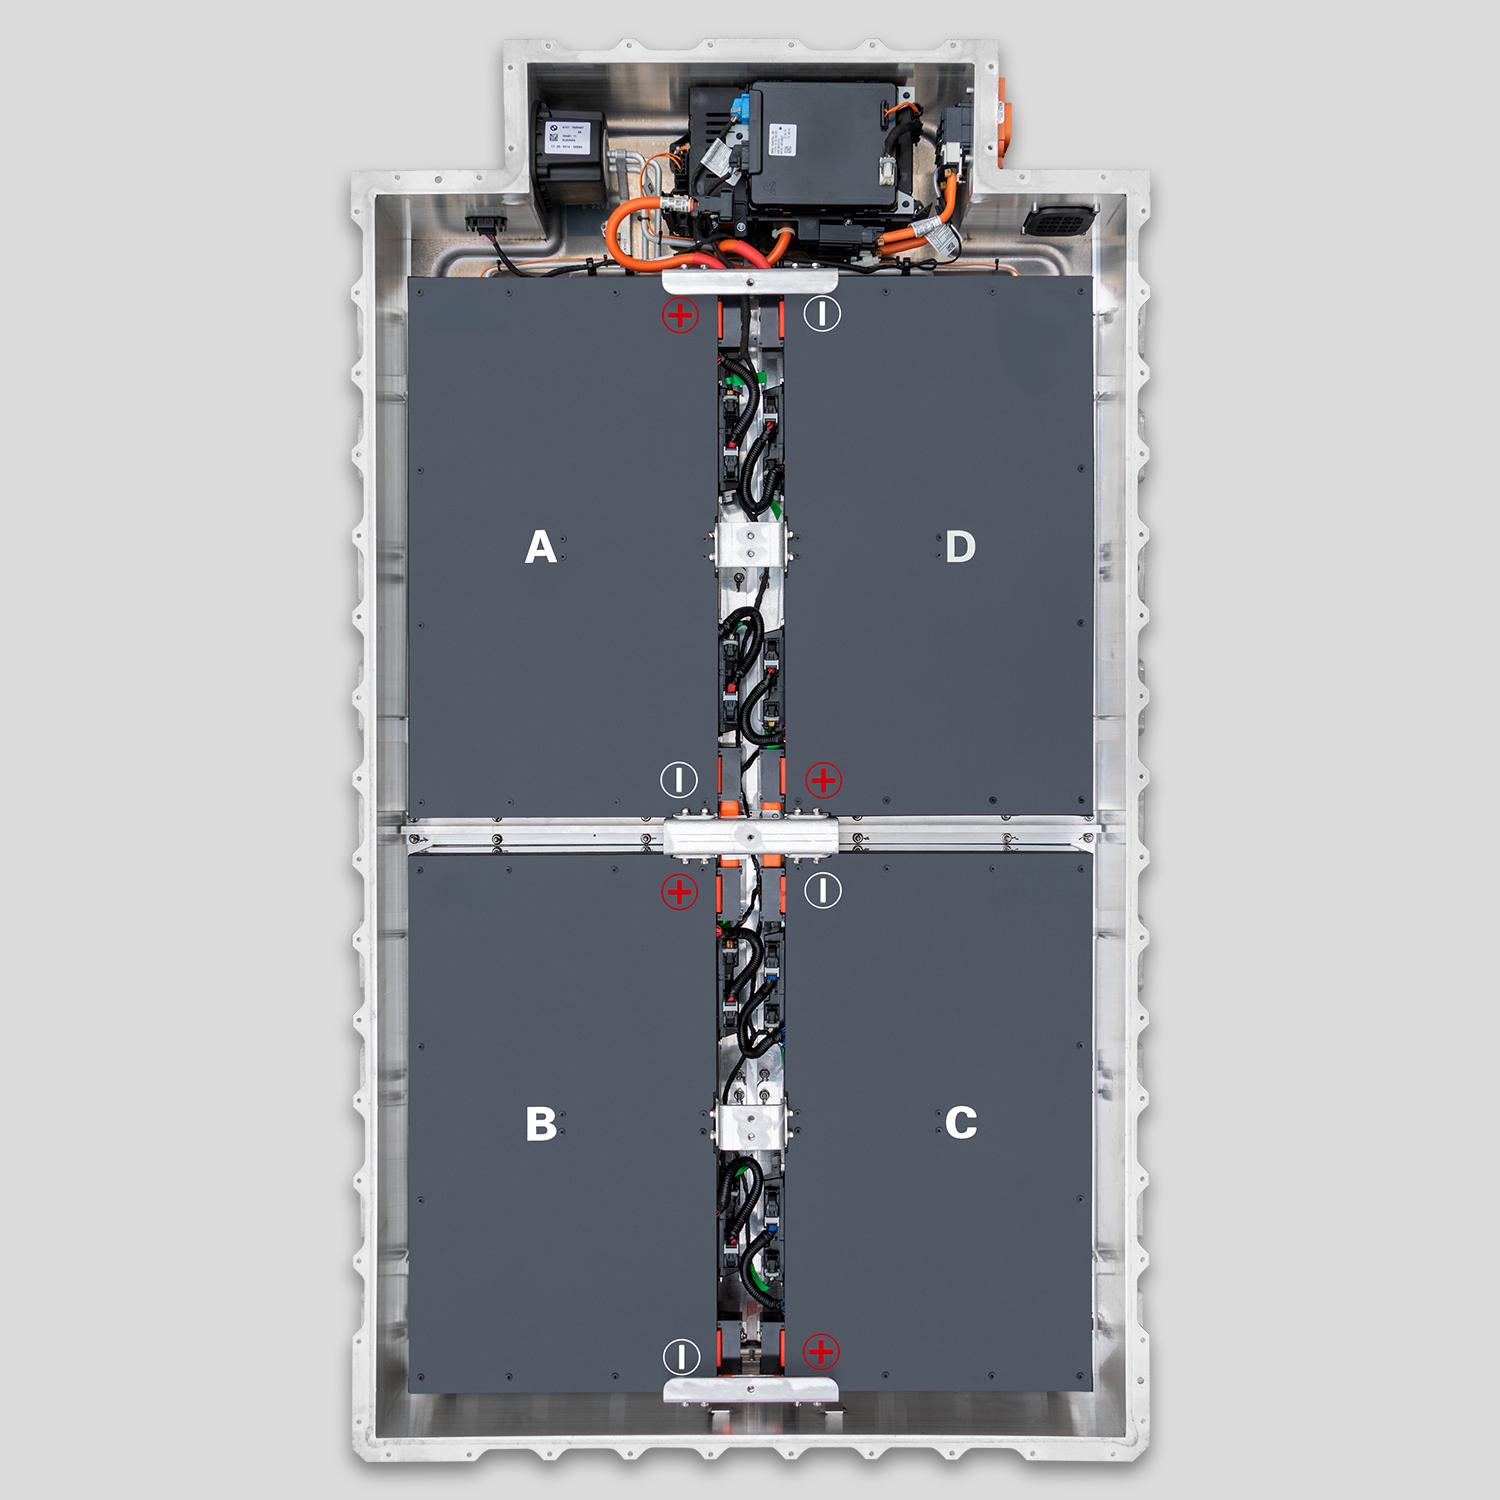
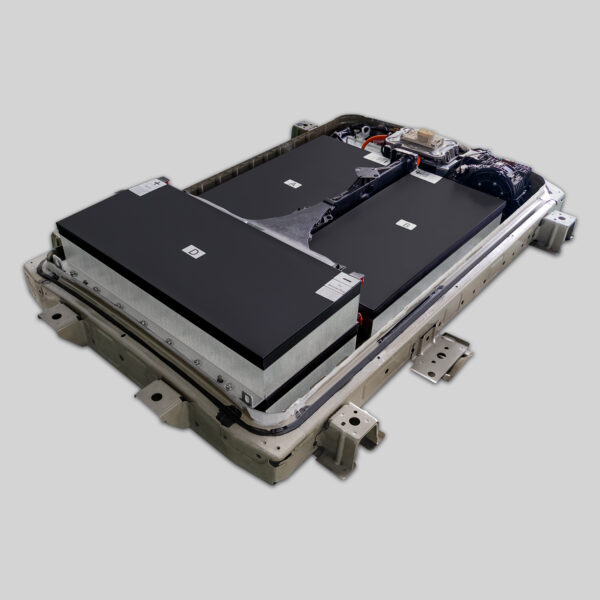
- Plug-and-Play Design: Our packs are engineered to OEM dimensions. The connectors, mounting points, and cooling channels match your original Leaf chassis perfectly.
- Zero Defect Guarantee: We assemble each pack in a controlled environment using automated machinery. This eliminates the human error risks associated with hand-building a battery.
- Comprehensive Warranty: Unlike used batteries (which have no warranty), we offer a 24-month / 80,000km warranty. This covers manufacturing defects and performance degradation, giving you peace of mind.
Step 3: The Installation Process (DIY Guide)
Installing a new battery is a significant mechanical task, but it is absolutely achievable for a competent DIYer with basic tools. Here is the standard process when you receive your CNS “Plus” battery:
Tools Required:
- Torque Wrench
- Socket Set
- Insulated Gloves (Safety First!)
- A friend to help lift (The battery is heavy!)
The Procedure:
- Safety First: Disconnect the 12V auxiliary battery to cut all power to the vehicle.
- Drain & Disconnect: If your model has a coolant system, drain the coolant. Disconnect the high-voltage cables and signal connectors from the old battery.
- Remove the Old Pack: Remove the mounting bolts (usually 8-10 bolts). Carefully lift out the old battery. Note: Old batteries are heavy and awkward.
- Install the CNS “Plus” Pack: Lower the new CNS battery into the chassis. Align the mounting holes and torque the bolts to Nissan specifications.
- Reconnect: Reattach the high-voltage cables, signal connectors, and coolant lines (if applicable).
- Coding & Reset: This is the “magic” step. Connect an OBD2 scanner. You may need to reset the BMS or input the new battery parameters (KWh rating). Contact our technical experts for the specific coding file for your model.
Time Estimate: 1.5 to 2 hours for a solo DIYer.
Step 4: Post-Installation & Maintenance
Once installed, your Leaf won’t automatically recognize the new capacity. You need to “train” the BMS.
- The First Charge: Do a full 100% charge using a Level 1 or Level 2 charger. Do not use DC Fast Charging for the first cycle.
- The First Drive: Drive the car until the battery drops below 20%. This helps the BMS recalibrate the State of Charge (SOC).
- Software Update: Some users report a “Battery Capacity Reduced” warning initially. This is normal. A simple reset via the dashboard menu or a quick OBD2 reset will clear it.
Why Choose CNS for Your DIY Project?
You might be wondering, “Why should I trust CNS BATTERY with my prized EV?”
- OEM Standards: We don’t just make batteries; we engineer powertrains. Our R&D is based on original factory standards, ensuring ultimate safety.
- Real Support: We know DIYers get stuck. We offer video call installation guidance. If you are confused about a wire, we can see it and guide you in real-time.
- Global Shipping: We handle the logistics. We ship to over 50 countries with DDP (Delivered Duty Paid) service, so you don’t get hit with surprise customs fees.
Frequently Asked Questions (FAQ)
Q1: Can I really install this myself, or do I need a mechanic?
A: Absolutely. If you can change your oil or swap a tire, you can install a CNS battery. The process is mechanical (bolts and plugs). The only electronic step is the BMS coding, and we provide free support for that.
Q2: What is the difference between a 40kWh and a 62kWh “Plus” upgrade?
A: The 40kWh is ideal for city driving and shorter commutes (approx. 240km range). The 62kWh is the “true” Plus upgrade, offering highway capability and long weekend trips (approx. 350km+ range). The 62kWh is our most popular choice.
Q3: Are these batteries safe? I’ve heard horror stories about DIY lithium.
A: Safety is our top priority. Our packs use A-grade, brand-new CATL cells with a robust BMS that monitors temperature and voltage 1000 times per second. Unlike hand-built DIY packs, ours are factory-balanced and tested to UN38.3 standards for transport safety.
Q4: How long does shipping take?
A: Shipping times vary by region. Air freight typically takes 7-15 days, while sea freight (for larger orders or specific regions) takes 4-8 weeks. We will provide a tracking number and estimated delivery date.
Q5: What if my specific Leaf model isn’t listed?
A: We offer customization. We have deep expertise in the battery field for the entire Nissan model range. Contact us now with your VIN, and our technical experts will confirm compatibility.
Ready to transform your Nissan Leaf experience?
Get a Free Custom Quote for your Leaf Plus Upgrade Today