How to Install Nissan Leaf Battery Modules: 2026 Step-by-Step Expert Guide
Are you planning to replace degraded battery modules in your Nissan Leaf but worried about improper installation leading to safety risks or performance issues? Nissan Leaf battery modules are the building blocks of the vehicle’s energy system—each generation (24kWh, 30kWh, 40kWh, 62kWh) uses unique module configurations, and even small mistakes can damage the BMS (Battery Management System) or trigger catastrophic failures. Learninghow to install Nissan Leaf battery modules correctly requires precision, safety protocols, and Leaf-specific knowledge. As CNS BATTERY’s EV experts, we’re breaking down a detailed, safe installation process for DIY enthusiasts and technicians alike, plus critical tips to avoid costly errors.
Pre-Installation Prep: Safety & Compatibility First
Before touching any battery components, prioritize safety and compatibility—these steps prevent 90% of installation-related issues. Nissan Leaf battery modules operate at 360V (high voltage), so cutting corners on safety is non-negotiable.
1. Essential Safety Gear & Tools
Never attempt module installation without the following safety equipment: • Class 00+ insulated gloves (tested for 1,000V, mandatory for high-voltage work). • Insulated tools set (wrenches, screwdrivers, torque wrench—non-conductive to prevent short circuits). • Safety glasses, flame-resistant jacket, and non-slip boots. • Voltage tester (to confirm capacitor discharge). • Well-ventilated workspace (to avoid hydrogen buildup from battery cells).
Required tools for installation: Torque wrench (calibrated to Nissan’s specs), battery module lifting tool (or sturdy strap), wire brush (for cleaning terminals), dielectric grease (to protect connections), and Leaf-specific diagnostic tool (for BMS calibration).
2. Module Compatibility Check
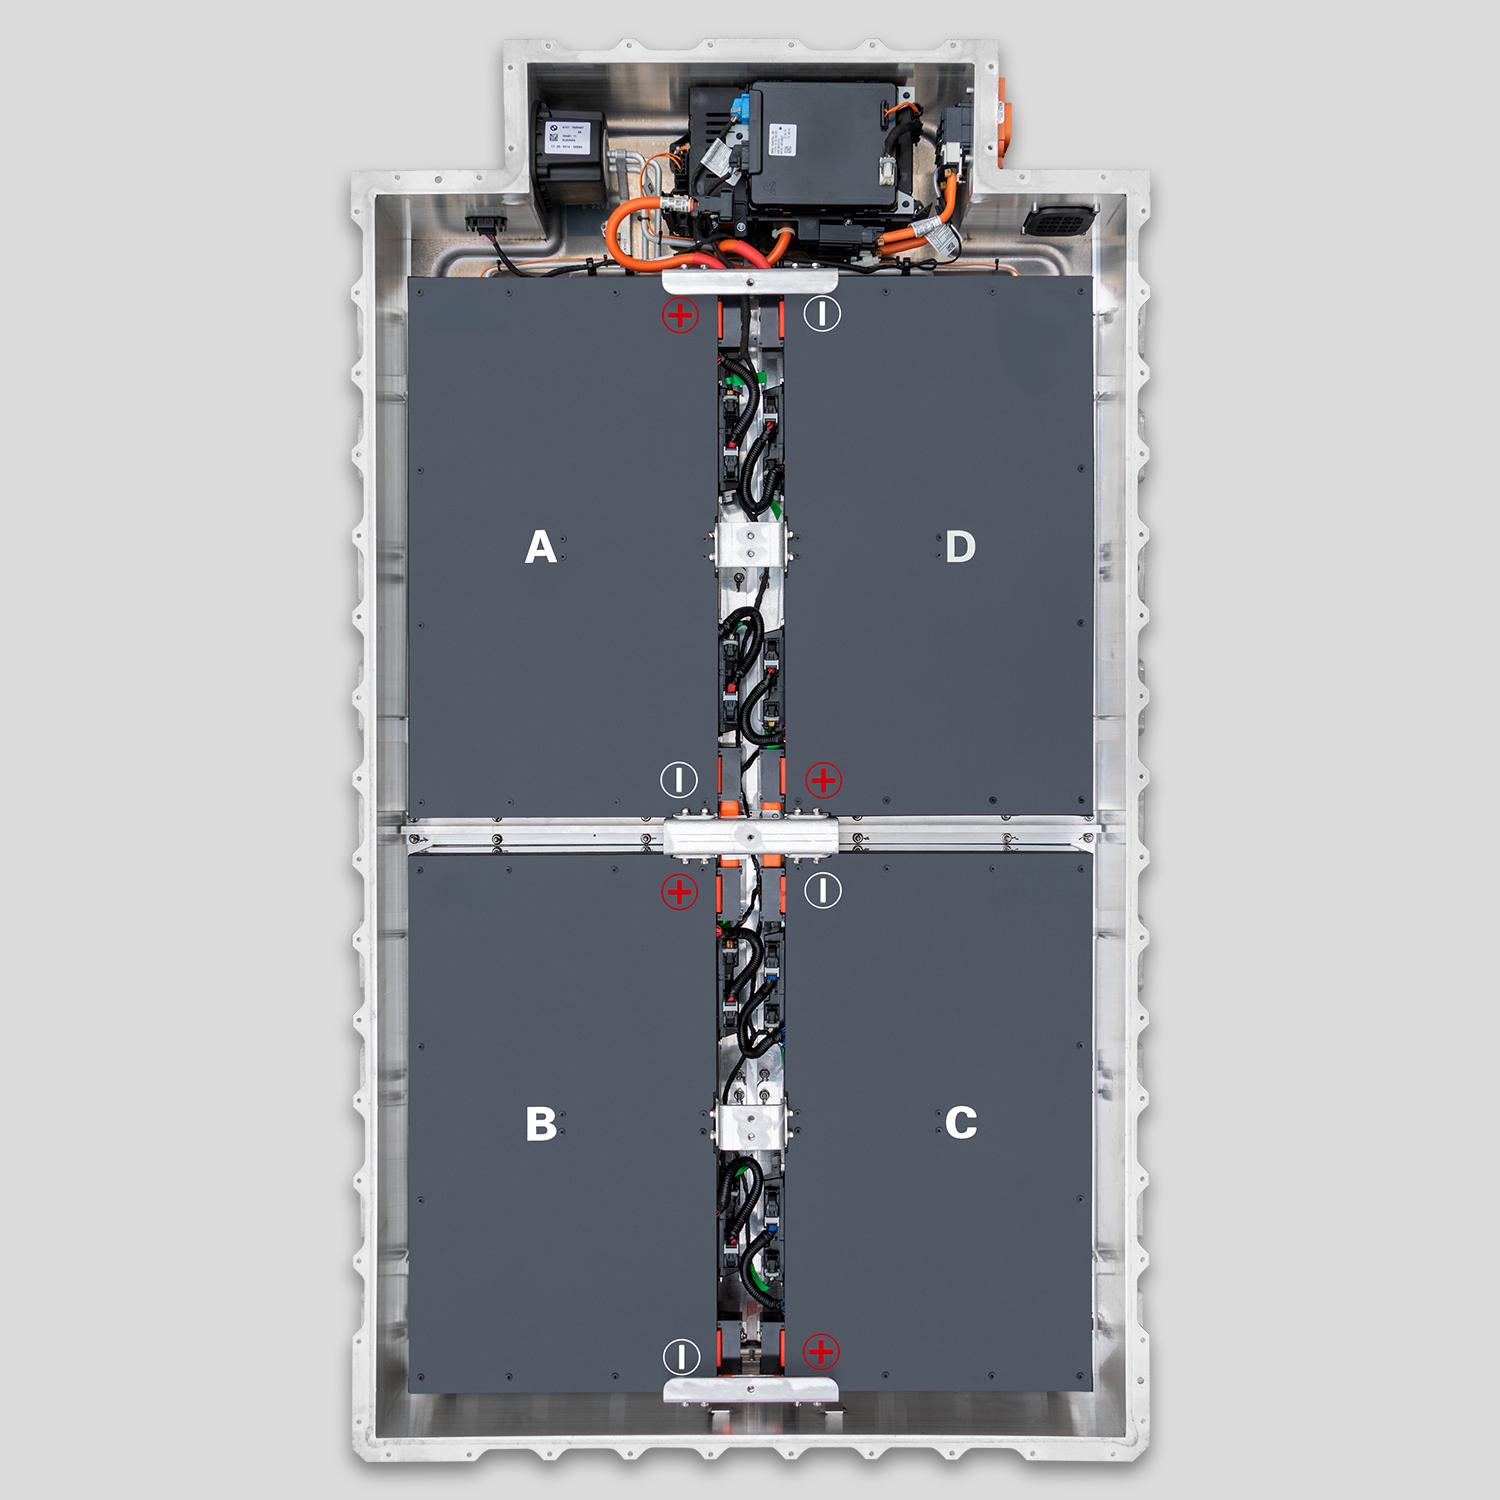
Not all Leaf battery modules are interchangeable. Match modules to your Leaf’s year and battery capacity: • 2011-2015 (24kWh): 4-cell modules (1670Wh each, 12 modules total). • 2016-2017 (30kWh): 5-cell modules (2088Wh each, 12 modules total). • 2018+ (40kWh): 8-cell modules (3348Wh each, 12 modules total). • 2019+ Leaf Plus (62kWh): Mixed 4s 3p, 7s 3p, 9s 3p modules (3 module types, 24 modules total).
Use only OEM-grade or remanufactured modules (like CNS BATTERY’s) with 85%+ state of health (SOH). Avoid mismatched or untested modules—they cause cell imbalance and BMS errors.
3. Vehicle & Battery Prep
Start by disconnecting the 12V auxiliary battery (located in the front trunk) to cut power to the high-voltage system. Next, remove the high-voltage service plug (under the rear seat or in the battery bay) and wait 15+ minutes for capacitors to discharge—verify no voltage with a tester before proceeding. Jack up the Leaf (use jack stands, never rely on a jack alone) and remove the battery bay cover (10-12 bolts, torque 8Nm).
Step-by-Step Nissan Leaf Battery Module Installation
Follow these steps for safe, correct module installation. The process takes 2-3 hours for partial module replacement, 4-5 hours for full pack replacement (varies by Leaf model).
Step 1: Remove Old Modules
Locate the module mounting brackets (each module is secured with 4-6 bolts). Use the insulated torque wrench to remove bolts (torque 6Nm for terminal bolts, 12Nm for mounting bolts). Disconnect the module’s electrical connectors—press the release tab and pull gently (avoid twisting wires). Use the lifting tool to remove modules one by one (each weighs 10-15kg, don’t lift manually to prevent injury). Inspect the battery bay for corrosion or damage—clean terminals with a wire brush if needed.
Step 2: Inspect & Prep New Modules
Test new modules with a voltage tester to ensure consistent cell voltage (within 0.02V per cell). Apply a thin layer of dielectric grease to module terminals to prevent corrosion. Check module casings for cracks or leaks—discard any damaged units (they pose safety risks). For 62kWh Leaf Plus models, label modules to match their original positions (mixed module types must go back to their specific slots).
Step 3: Install New Modules
Lower each module into the battery bay (use the lifting tool) and align with mounting holes. Secure with bolts, torquing to Nissan’s specs (refer to your model’s service manual—over-tightening damages threads). Connect electrical connectors until you hear a “click” (ensure full engagement). For 24kWh/30kWh models, install modules in sequence (left to right) to maintain cell balance. For 62kWh models, reinstall mixed modules in their labeled positions—misalignment disrupts active cooling.
Step 4: Reconnect High-Voltage System
Reinstall the high-voltage service plug and torque to spec. Reconnect the 12V auxiliary battery and turn on the Leaf’s ignition (do not start the motor). Use a Leaf-specific diagnostic tool to check for error codes—resolve any issues before proceeding.
Step 5: BMS Calibration (Critical Step)
The Leaf’s BMS must be calibrated to recognize new modules. Use the diagnostic tool to reflash the BMS, updating cell balance data, capacity thresholds, and charge curves. For 2018+ models, this includes programming the BMS to match the new modules’ SOH. Skipping calibration leads to range inaccuracies, slow charging, and premature degradation.
Step 6: Post-Installation Testing
Start the Leaf and let it idle for 10 minutes—monitor battery temperature and voltage via the diagnostic tool. Conduct a 10-15 mile test drive, checking regenerative braking, charging behavior, and dashboard alerts. Perform a DC fast charge test (if applicable) to ensure modules handle high-load charging without overheating. Verify no voltage leaks with an insulation resistance tester.
Why Professional Installation Beats DIY for Leaf Modules
While DIY installation is possible, professional service (like CNS BATTERY’s) offers unbeatable safety and reliability—especially for high-voltage systems.
1. Expertise in Leaf-Specific Nuances
Our technicians master the unique module configurations of each Leaf generation, including 62kWh Leaf Plus’s mixed modules and active cooling integration. They avoid common DIY mistakes (e.g., mismatched modules, incorrect torque specs) that void warranties and damage components.
2. Advanced Tools & Calibration
We use proprietary diagnostic tools (not consumer-grade) for precise BMS calibration, ensuring optimal performance. Our torque tools and lifting equipment meet Nissan’s strict standards, preventing module damage.
3. Safety & Warranty Coverage
Professional installation includes a 2-year warranty covering modules, labor, and BMS issues. We follow OSHA high-voltage safety standards, eliminating触电 and fire risks. DIY installations void vehicle warranties and leave you liable for damages.
Benefits of Proper Nissan Leaf Battery Module Installation
1. Restored Performance & Range
Correctly installed modules revive your Leaf’s original range, eliminating cell imbalance and voltage drops. You’ll regain consistent charging speeds and regenerative braking functionality.
2. Extended Battery Lifespan
Proper torque, terminal protection, and BMS calibration extend module life by 3-5 years. Avoiding cell imbalance prevents premature degradation, saving you from repeated module replacements.
3. Enhanced Safety
Securely installed modules reduce the risk of short circuits, overheating, and high-voltage leaks—critical for protecting you and your vehicle.
FAQ About Nissan Leaf Battery Module Installation
Can I install a single module instead of the full pack?
Yes—if only one module is degraded (identified via BMS diagnostics). But match the new module’s SOH to existing ones (within 5%) to avoid cell imbalance. We recommend testing all modules before partial replacement.
Will module installation void my Leaf’s warranty?
Professional installation with certified modules (like CNS BATTERY’s) does not affect non-battery warranties (motor, electronics). We provide documentation to preserve your warranty status. DIY installation voids most warranties.
How long do installed modules last?
OEM-grade or remanufactured modules last 5-7 years with proper installation and maintenance. CNS BATTERY’s modules come with a 2-year warranty, ensuring reliability.
Do I need to drain the cooling system for 62kWh Leaf Plus?
Yes. 62kWh models have active liquid cooling—drain and refill coolant (use Nissan-specified fluid) when removing/reinstalling modules. Improper cooling leads to overheating and module failure.
Can I reuse old module mounting bolts?
No. Nissan recommends replacing mounting bolts after removal—they stretch during torque and lose integrity. Reusing old bolts risks module loosening and vibration damage.
Ready to Install Nissan Leaf Battery Modules?
Properly installing Nissan Leaf battery modules requires expertise, safety gear, and precision. At CNS BATTERY, our Leaf-specific technicians handle every step—from module selection to BMS calibration—ensuring safe, reliable performance.
Visit https://cnsbattery.com/nissan-leaf-battery/ to get exclusive discounts on remanufactured Leaf battery modules and consult our experts for professional installation. We’ll help you restore your Leaf’s performance without the risk of DIY mistakes.