How to Install Easy Install Leaf Plus Battery for DIY Enthusiasts
If you are a Nissan Leaf owner, you know how battery degradation can limit your driving range. Upgrading to a new battery is the best way to revive your car. For DIY enthusiasts, installing a new battery is a rewarding project. This guide explains how to install an easy install Leaf Plus battery. It is designed for DIY enthusiasts. With the right tools and steps, you can complete this upgrade yourself. This guide covers everything from preparation to final checks.
Why Choose a Leaf Plus Battery?
A Leaf Plus battery offers significant improvements over older models. It provides a longer driving range. It uses advanced lithium-ion technology. This technology is more efficient and durable. The battery is compatible with various Leaf models. It meets OEM standards. This means it fits perfectly in your car. It also communicates seamlessly with your car’s systems.
One of the main benefits is cost savings. Buying and installing the battery yourself is cheaper. It is much less expensive than going to a dealership. It also gives you full control over the process. You can schedule the installation at your convenience. You do not have to rely on a mechanic’s availability.
Preparing for the Installation
Preparation is key to a successful DIY installation. You need to gather the right tools and information. This ensures the process goes smoothly. It also prevents delays and mistakes.
Tools and Safety Gear
You need specific tools for this job. These include:
- Insulated wrenches and socket sets: These are essential for safely disconnecting and reconnecting cables.
- Torque wrench: This ensures bolts are tightened to the correct specification. This is crucial for safety and performance.
- Battery lifting strap or engine crane: The battery is heavy. You need equipment to lift it safely.
- Protective gear: This includes insulated gloves and safety glasses. They protect you from electrical hazards and debris.
Gathering Information
Before you start, gather all necessary information. Check the battery specifications. Ensure it matches your car model. Read the installation manual provided by the manufacturer. Watch installation videos if available. This helps you understand the process. It also highlights any potential challenges.
Step-by-Step Installation Guide
This section provides a detailed guide on installing the battery. Follow these steps carefully. They are designed to be easy to follow for DIY enthusiasts.
Step 1: Disconnecting the Power
The first step is to disconnect the car’s power. This is critical for your safety. Locate the main fuse or service disconnect. Remove it to cut off the high-voltage supply. Wait at least 10 minutes. This allows any residual charge in the system to dissipate. Verify that the power is off using a multimeter. Do not proceed until you are certain the system is de-energized.
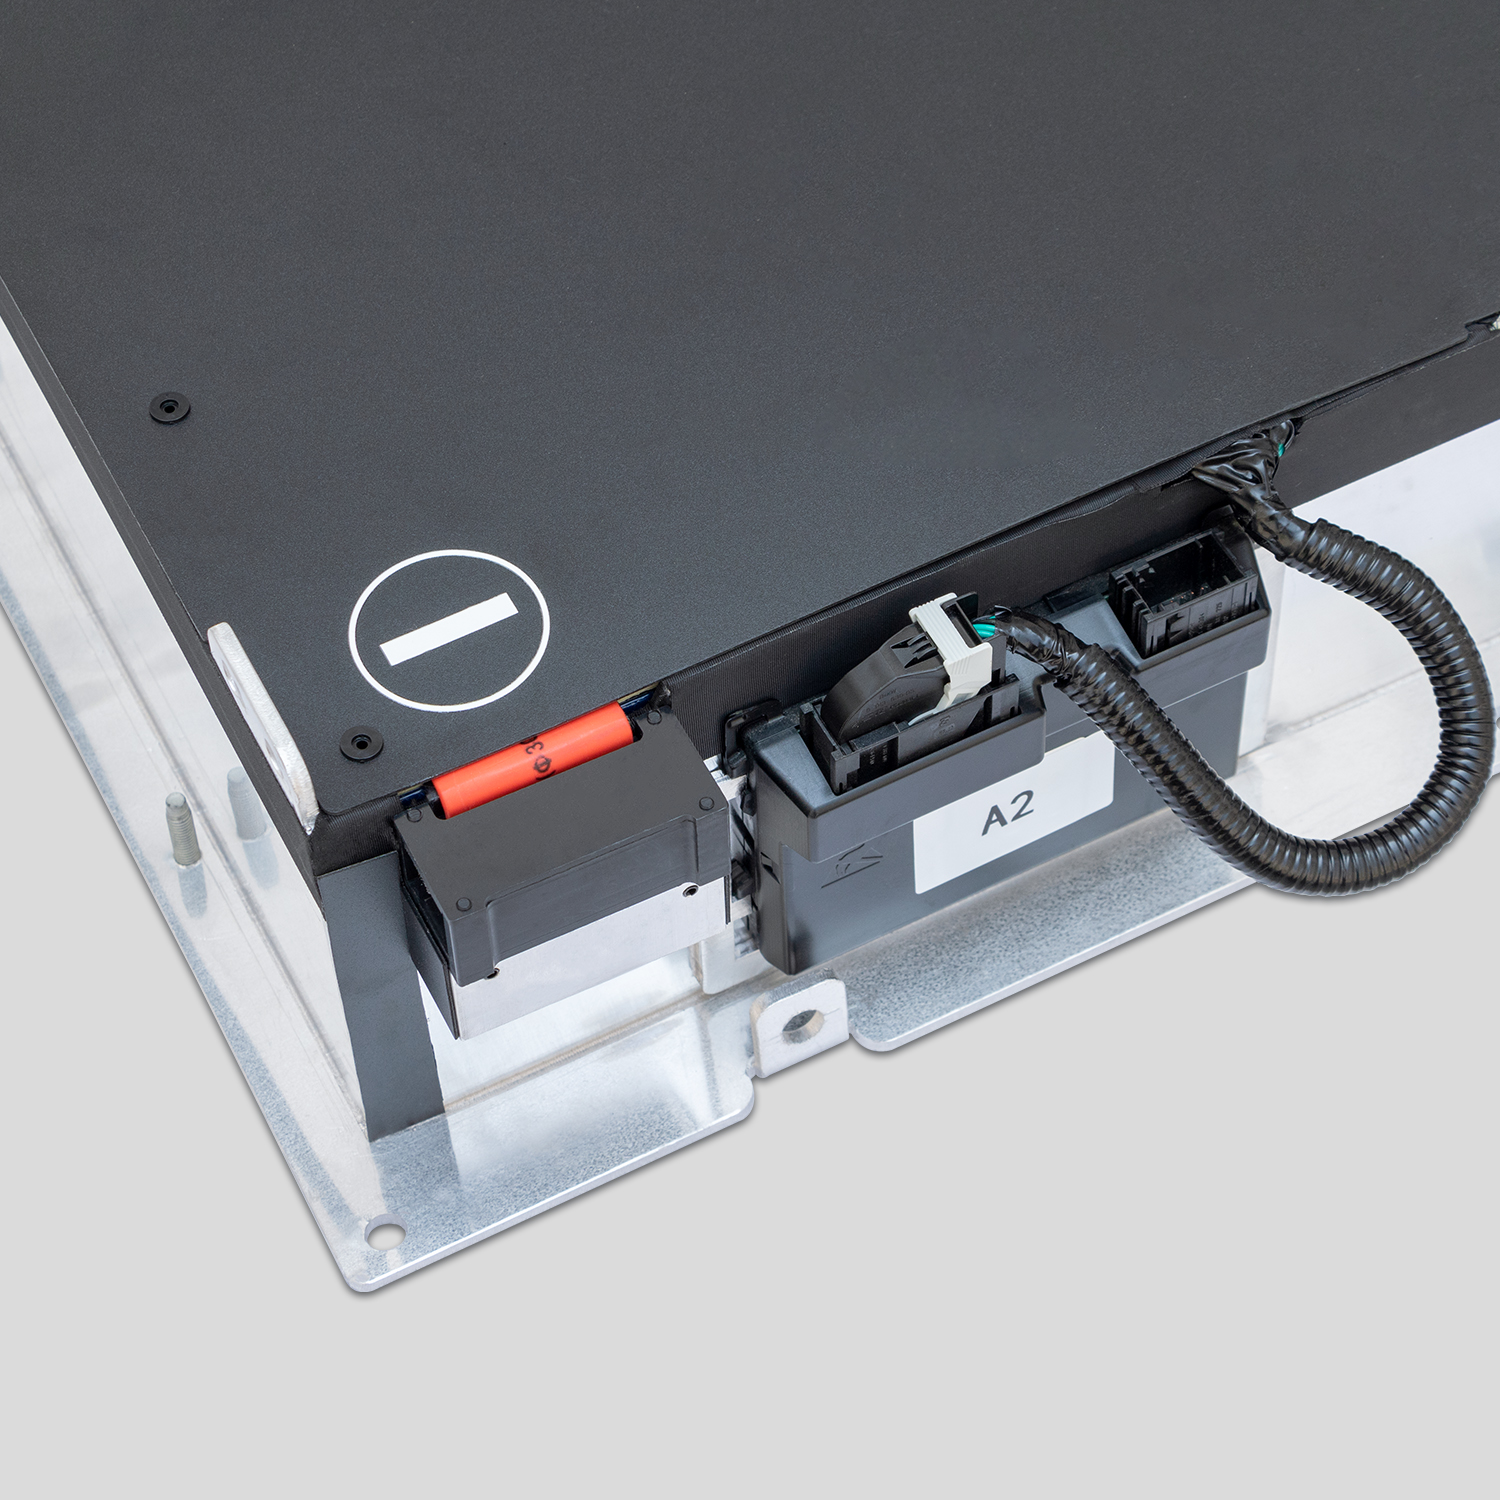
Step 2: Removing the Old Battery
Once the power is off, you can remove the old battery. Start by removing the plastic covers and shields. These protect the battery and wiring. Next, disconnect the high-voltage cables. Label them if necessary to remember their positions. Then, disconnect the low-voltage signal cables. These connect the battery to the car’s computer. After all cables are disconnected, unbolt the battery from the chassis. Use the lifting equipment to carefully remove it from the car.
Step 3: Installing the New Battery
Now, install the new Leaf Plus battery. Carefully lower it into the battery bay. Ensure it is properly aligned. Reconnect the low-voltage signal cables first. Then, reconnect the high-voltage cables. Tighten all bolts to the manufacturer’s specifications. Use the torque wrench to ensure accuracy. Replace the plastic covers and shields.
Step 4: System Integration and Testing
After the battery is installed, you need to integrate it with the car’s system. Reconnect the main power fuse or service disconnect. Turn on the car’s ignition. Check the dashboard for any error messages. Use an OBD2 scanner to check the battery management system (BMS). Ensure it is communicating correctly with the car. Check the state of charge and voltage levels. They should match the specifications of the new battery.
Troubleshooting Common Issues
Even with careful installation, you might encounter issues. Here are some common problems and how to fix them.
Communication Errors
If the BMS does not communicate with the car, check the signal cables. Ensure they are securely connected. If the problem persists, you might need to reset the BMS. Follow the manufacturer’s instructions for resetting.
Charging Problems
If the battery does not charge, check the charging port and cables. Ensure they are clean and undamaged. Verify that the high-voltage connections are tight. If the problem continues, contact the manufacturer’s technical support.
Benefits of DIY Installation
Installing the battery yourself has several benefits. It saves you money on labor costs. It also gives you a deeper understanding of your car’s systems. This knowledge is valuable for future maintenance. It also gives you a sense of accomplishment.
Cost Savings
Labor costs for battery installation can be high. By doing it yourself, you save a significant amount of money. This makes the upgrade more affordable.
Learning Experience
This project teaches you about electric vehicle technology. You learn about battery management systems, high-voltage safety, and electrical connections. This knowledge is useful for other DIY projects.
Technical Support and Warranty
Even though you are doing the installation yourself, you are not alone. Reputable manufacturers offer technical support. They can guide you through the process. They also offer warranties on their batteries. This protects your investment.
Warranty Coverage
Most new batteries come with a warranty. This covers defects in materials and workmanship. It also covers performance degradation. Check the warranty terms before purchasing. Ensure it covers DIY installations.
Technical Assistance
If you encounter problems, contact the manufacturer’s support team. They can provide guidance over the phone or video call. They can help you troubleshoot issues and complete the installation.
Conclusion
Installing a Leaf Plus battery is a great project for DIY enthusiasts. It revives your car and extends its life. With the right tools and information, you can complete it successfully. Follow the steps in this guide. Take your time and prioritize safety. Enjoy the benefits of a longer driving range and improved performance.
For more information and to get a free quote, contact our technical experts. They can help you choose the right battery for your car. They can also provide support during the installation process.
Contact Our Technical Experts Now
FAQ
Can I really install a Leaf Plus battery myself?
Yes, you can. With the right tools, safety gear, and instructions, DIY installation is possible. Many Nissan Leaf owners have successfully upgraded their batteries following detailed guides and video tutorials.
Will a DIY installation void the warranty?
Not necessarily. Reputable manufacturers, like CNS BATTERY, support DIY installations and offer warranties that cover owner-installed batteries. However, it is crucial to follow the manufacturer’s instructions carefully to maintain the warranty coverage.
How much can I save by installing the battery myself?
DIY installation can save you a significant amount on labor costs. Dealership or mechanic labor fees for battery replacement can range from hundreds to over a thousand dollars. By doing it yourself, you keep that money in your pocket.
What tools do I need for the installation?
You will need insulated wrenches, a torque wrench, a battery lifting strap or engine crane, and protective gear like insulated gloves and safety glasses. Having these tools ensures a safe and efficient installation.
What if I encounter problems during the installation?
Do not worry. Many manufacturers offer technical support for DIY enthusiasts. You can contact their support team via phone or email. Some even offer video call guidance to help you troubleshoot and complete the installation.