How to Fix BMW i3 Battery Insulation Faults (Shop Guide) – The Diagnostic Path from Crisis to Profit
The tow truck arrives with a silent, stranded 2016 BMW i3. The driver’s complaint is simple but terrifying: “It just died while driving. The dashboard says ‘High Voltage System Malfunction’ and ‘Insulation Fault’.”
As a shop owner or lead technician, your heart rate spikes. You know that an insulation fault in a high-voltage EV isn’t like a bad ground on a gas car. It means 400 volts of electricity are leaking onto the vehicle’s chassis. This is a critical safety failure that poses a lethal risk of electrocution and a high probability of thermal runaway (fire).
The customer is anxious. The dealer has quoted $22,000 for a replacement battery. They are looking at you, hoping for a miracle repair. Can you fix it? Is it just a wet connector, or is the pack internally compromised? How do you diagnose this safely without putting your team at risk?
In this comprehensive shop guide, we walk you through the professional diagnostic protocol for BMW i3 battery insulation faults, reveal the harsh reality of “repairs” versus replacements, and show you how turning a condemned battery diagnosis into a CNS BATTERY upgrade can save the customer’s car and boost your shop’s bottom line.
Understanding the Fault: What Is an Insulation Resistance Error?
The BMW i3 Battery Management System (BMS) constantly monitors the electrical isolation between the high-voltage (HV) system and the vehicle chassis (ground).
- Normal State: The resistance should be extremely high (typically >500 kΩ/V, often reading as “OL” or several Megaohms on a tester).
- Fault State: If the resistance drops below a specific threshold (often <100 kΩ), the BMS triggers an Insulation Fault. It immediately opens the main contactors, cutting all power to prevent electrocution.
Common Causes in Aging i3s:
- Internal Coolant Leaks: The #1 culprit. Conductive coolant leaks from internal cooling plates onto live busbars or cells.
- Moisture Intrusion: Water entering the pack through failed seals, vent valves, or after flooding.
- Damaged HV Cables: Rodent chewing or chafing exposing live conductors to the chassis.
- Component Failure: A shorted electric AC compressor or heater core leaking voltage to the ground.
Step-by-Step Shop Diagnostic Protocol
Do not guess. Do not simply clear codes. Follow this rigorous safety and diagnostic workflow.
Phase 1: Safety & Depower (Non-Negotiable)
Before touching anything:
- PPE Up: Don Class 00 (1000V) insulated gloves with leather protectors and an arc-flash face shield.
- Disconnect 12V: Remove the negative terminal of the auxiliary battery.
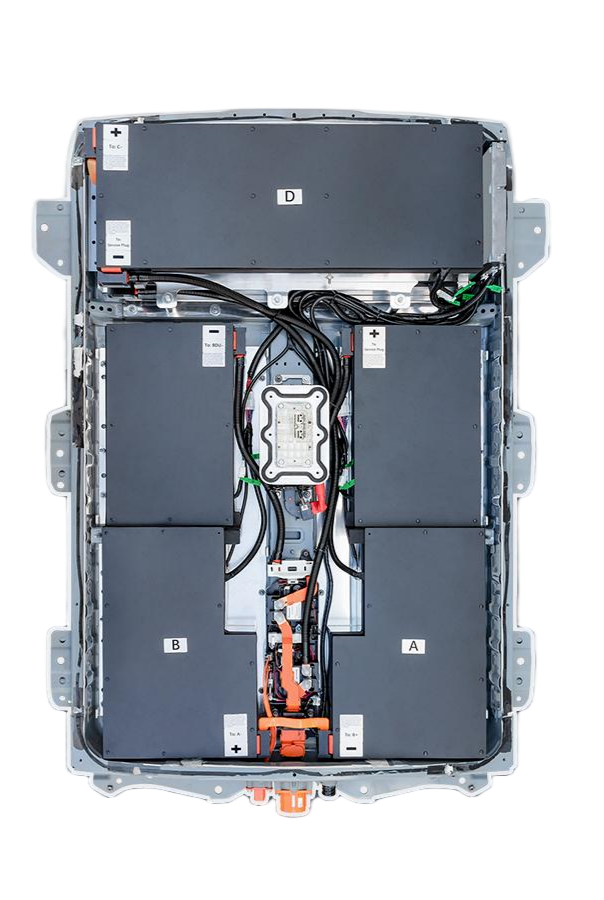
- Remove Service Plug: Extract the Manual Service Disconnect (MSD) from the battery pack (usually under the rear seat).
- Wait & Verify: Wait 10–15 minutes for capacitor discharge. Use a CAT III 1000V multimeter to verify 0 Volts at the main HV terminals. Never proceed without verification.
Phase 2: Isolation Testing (The Megger Test)
You need to determine where the leak is.
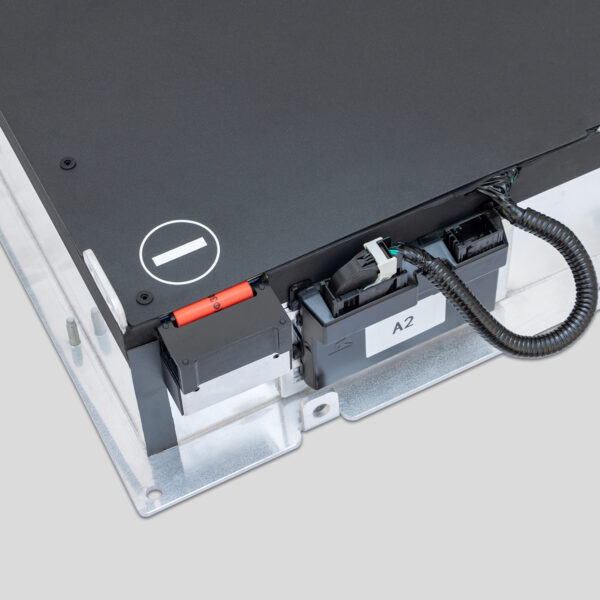
- Disconnect HV Cables: Unplug the orange HV cables from the battery pack to isolate it from the rest of the car (motor, compressor, etc.).
- Setup Megohmmeter: Set your insulation tester to 500V DC.
- Test the Battery:
- Connect one lead to the chassis ground.
- Touch the other lead to the HV+ terminal of the battery. Record the value.
- Repeat for the HV- terminal.
- Interpret Results:
- > 1 MΩ (Safe): The battery is isolated. The fault lies elsewhere (cables, compressor, heater).
- < 100 kΩ (Critical Fail): The battery pack itself is leaking. Stop here. The pack is compromised.
Phase 3: Component Elimination (If Battery Tests Safe)
If the battery tests safe, reconnect it and isolate other components one by one:
- Disconnect the electric AC compressor. Test again.
- Disconnect the high-voltage heater. Test again.
- Inspect all orange cables for rodent damage or chafing.
- Fix: Replace the faulty external component. This is a winnable repair.
Phase 4: The Internal Leak Verdict (If Battery Fails)
If the battery pack itself fails the Megger test (<100 kΩ), the diagnosis is grim:
- Cause: Conductive fluid (coolant or water) is inside the sealed casing, bridging live components to the case.
- The Reality: You cannot repair this in a standard shop.
- Opening the pack exposes technicians to lethal risks and toxic fumes.
- Cleaning corrosion from internal busbars is impossible to do thoroughly.
- Resealing a laser-welded factory pack to IP67 standards is not feasible in a service bay.
- Conclusion: The battery pack is condemned. It must be replaced. Attempting to “dry it out” or patch it is negligent and creates massive liability.
The Pivot: Turning a Condemned Pack into Profit
When you deliver the news that the battery is internally leaked and unsafe, the customer faces a crisis. The dealer wants $22,000 for a remanufactured unit. Many customers will choose to scrap the car.
This is your opportunity to be the hero. Instead of a dead-end diagnosis, offer the CNS BATTERY High-Capacity Upgrade.
Why Upgrading Is the Only Viable Solution
- Guaranteed Safety: Our BMW i3 Series Battery upgrades are brand-new, factory-sealed units with certified insulation resistance values (>10 MΩ). Zero leak risk.
- Plug-and-Play Installation: No risky disassembly of the old, leaking pack. You swap the entire unit in 4–6 hours, minimizing exposure to hazardous materials.
- Superior Performance: Customers don’t just get a fixed car; they get double the range (130–200+ miles). You transform a “total loss” into a better-than-new vehicle.
- High Margin: Secure an $8,000–$14,000 sale (parts + labor) with healthy margins. Compare this to the low-margin headache of trying to source a used module or the lost revenue of a scrapped car.
- Warranty Confidence: Backed by our 3–5 Year Warranty, you eliminate the fear of comebacks or future insulation failures.
Real Story: From “Total Loss” to “Shop Hero”
“Metro EV Solutions” in Chicago recently diagnosed a 2015 i3 with a critical insulation fault (12 kΩ). The smell of sweet coolant confirmed an internal leak. The dealer quoted $21,500 for a replacement. The owner was ready to scrap the car.
The shop owner explained the danger of the leak and presented the CNS BATTERY upgrade option. “We installed a 150 Ah unit the next day,” he reports. “The new pack tested at >5 MΩ. The customer paid $11,500, got 170 miles of range, and drove away safely. We turned a potential lawsuit into our most profitable job of the month. The customer now sends us every EV owner he knows.”
Stop Guessing, Start Solving
Fixing BMW i3 battery insulation faults requires precise diagnostics and the courage to condemn an unsafe pack. Do not gamble with high-voltage leaks.
Equip your shop with the right testing protocols, trust the data, and when a pack is failed, offer the solution that guarantees safety, performance, and profit.
Ready to master EV insulation diagnostics?
Don’t let dangerous faults stall your business. Contact CNS BATTERY today to become a certified partner. Get access to our technical guides, wholesale pricing, and training, and start turning condemned batteries into your most profitable upgrades.
👉 Become a Certified Diagnostic & Upgrade Partner
Frequently Asked Questions (FAQ) for Shops
1. What is the minimum acceptable insulation resistance for a BMW i3?
BMW typically requires >500 kΩ/V. For a 400V system, anything below 100 kΩ is a critical failure indicating a direct leak. Values between 100 kΩ and 500 kΩ warrant immediate investigation. Healthy packs usually read >1 MΩ or “OL”.
2. Can I repair a battery with an internal coolant leak?
No. An internal leak compromises the electrical integrity of the entire pack. Corrosion on internal components is irreversible in a shop setting. Attempting to repair it is unsafe and creates massive liability. The pack must be replaced.
3. What tools do I need to diagnose insulation faults?
You absolutely need a Digital Megohmmeter (Insulation Tester) capable of 500V/1000V DC, a CAT III 1000V Multimeter, and full Class 00 PPE. Standard OBDII scanners cannot measure insulation resistance.
4. How long does it take to replace a failed pack with a CNS BATTERY upgrade?
A complete swap takes 4–6 hours. Since our units are pre-assembled and sealed, there is no need to open the leaking pack or handle internal components, making the process faster and safer than any repair attempt.
5. Why is upgrading better than buying a dealer remanufactured battery?
Dealer “remanufactured” batteries are often assembled from used modules and may still have aging issues. They cost $20,000+ and come with limited warranties. CNS BATTERY upgrades use brand-new cells, cost $8,000–$14,000, provide double the range, and include a superior 3–5 Year Warranty.
6. Does CNS BATTERY provide insulation test reports?
Yes. Every upgrade undergoes rigorous quality control, including insulation resistance testing, before shipping. We provide documentation confirming the pack meets or exceeds all safety standards.
7. What if the fault is in the cables, not the battery?
If your isolation test clears the battery but faults persist when connected, inspect the HV cables and components (compressor, heater). These can be repaired or replaced individually. However, if the battery itself fails the isolated test, replacement is the only option.