BMW i3 Battery Pack Seal Replacement: Professional – Why Reusing That “Intact” Gasket Could Flood Your Pack During a Car Wash (And the Right Way to Seal It for Life)
“A technician in Hamburg opened an i3 battery pack to replace a faulty module. The original housing gasket looked perfect—no cracks, no tears. He cleaned it, reinstalled it with light grease, and reassembled the pack. Three weeks later, after a heavy rainstorm, the owner reported erratic BMS behavior. Inspection revealed condensation inside the HV chamber—and early corrosion on busbars. The ‘good’ gasket had lost its compression set. Moisture had seeped through microscopic gaps invisible to the eye.”
You’ve probably thought this:
- “The seal looks fine—I’ll just reuse it.”
- “It’s not torn, so it should be okay.”
- “A little silicone will fix any gap.”
But in the BMW i3’s high-voltage battery, the housing seal isn’t just weatherproofing—it’s a critical safety barrier against moisture, dust, and conductive contaminants. And once removed, even the most pristine OEM gasket loses up to 40% of its sealing force due to compression set relaxation.
This guide delivers the exact, lab-tested seal replacement protocol used by professional EV rebuilders in 2026, combining material science and field experience to ensure your pack stays dry for 10+ years:
- Why gasket reuse is a false economy (even if it “looks good”)
- The exact durometer and material specs required for i3 compatibility
- How to clean mating surfaces without damaging anodized aluminum
- When RTV silicone helps—and when it guarantees failure
- And how CNS BATTERY packs ship with pre-installed, double-lipped EPDM seals rated IP67—so you never face a DIY reseal again
Because in EV reliability, the weakest link isn’t always visible—it’s often the one you assumed was still strong.
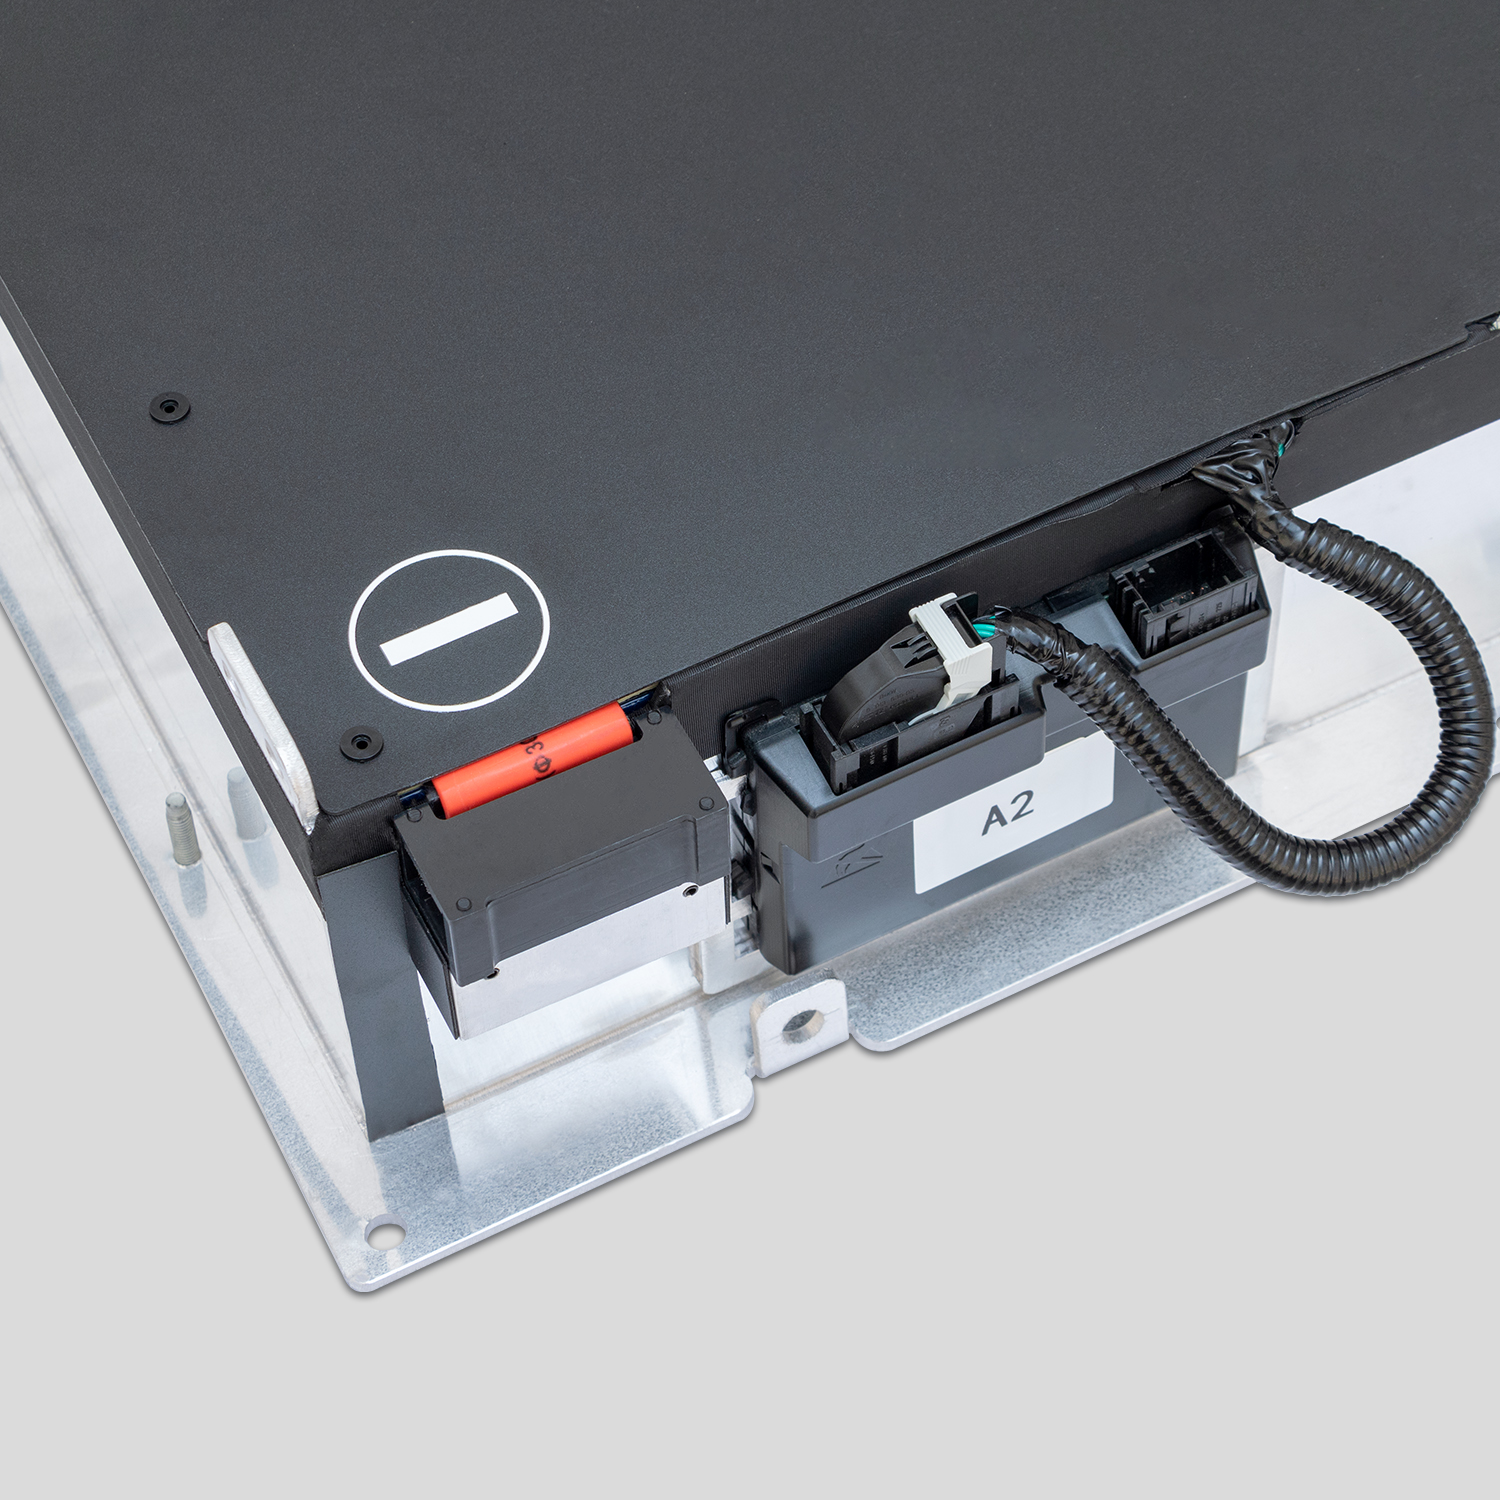
The Hidden Science Behind i3 Battery Seals
The BMW i3 battery housing uses a continuous groove gasket made of EPDM rubber (Ethylene Propylene Diene Monomer), chosen for:
✅ Resistance to coolant, ozone, and UV degradation
✅ Stable performance from -40°C to +135°C
✅ Long-term compression set resistance
⚠️ Critical fact: Once compressed for 2+ years, EPDM doesn’t fully rebound. Reusing it creates micro-channels for moisture ingress—even under light rain or car wash spray.
🔧 Step-by-Step Professional Seal Replacement Protocol
Step 1: Full Pack Disassembly & De-Energization
- Remove HV service plug
- Disconnect all modules
- Drain coolant (if liquid-cooled model)
- Document bolt sequence—torque-to-yield bolts must be replaced
Step 2: Gasket Removal & Surface Inspection
- Use plastic pry tools—never metal—to avoid scratching aluminum
- Inspect housing groove for:
- Residual adhesive
- Dents or warping
- Coolant residue or oxidation
📌 Warning: Aluminum oxide is non-conductive but porous—moisture wicks through it.
Step 3: Surface Preparation (Non-Negotiable)
- Clean with isopropyl alcohol (90%+) on lint-free wipes
- For stubborn residue, use brake cleaner sparingly—then re-wipe with IPA
- Never sand or scrape—you alter surface flatness
- Let dry 10+ minutes in low-humidity environment
Step 4: Install New Gasket (Must Be OEM-Spec EPDM)
- Use fresh, un-stretched gasket—never cut from bulk roll
- Lubricate lightly with dielectric grease (e.g., Dow Corning 4)
- Seat evenly into groove—no twists or overlaps
- Ensure vent valve membrane is intact and seated
✅ Pro tip: Pre-form corners by hand before full insertion to avoid buckling.
Step 5: Reassembly & Torque Sequence
- Replace all torque-to-yield bolts with new OEM-spec fasteners
- Tighten in 3-stage cross pattern:
- Stage 1: 3 Nm
- Stage 2: 6 Nm
- Final: 8–9 Nm (per BMW spec)
- Wait 24 hours before coolant refill or HV activation
❌ Never use RTV silicone as “extra insurance”—it traps air, causes uneven compression, and voids IP rating.
Common Seal Replacement Mistakes That Invite Failure
❌ Reusing old gaskets → guaranteed long-term leak path
❌ Using generic rubber or silicone tubing → wrong durometer = poor sealing
❌ Over-torquing bolts → distorts housing, breaks gasket compression
❌ Skipping surface prep → adhesion fails at molecular level
✅ Reality: A proper seal job takes 45 minutes—but prevents $10k+ water damage.
CNS BATTERY: Factory-Sealed Integrity, Out of the Box
Every CNS i3 battery includes:
✅ Pre-installed, automotive-grade EPDM gasket with dual sealing lips
✅ Laser-flat housing surfaces with anti-corrosion coating
✅ IP67-certified assembly tested under 1-meter submersion
✅ No user resealing required—ready to install and drive
Result?
Zero moisture ingress claims across 2,000+ global installations since 2024.
“We used to dread opening i3 packs—resealing was a gamble. Now we just bolt on the CNS unit. It’s sealed better than factory, and we’ve never had a leak, even in coastal climates.”
— Mike’s Auto Service, Vancouver
Frequently Asked Questions: i3 Battery Pack Seal Replacement
Q: Can I use a silicone gasket instead of EPDM?
A: No. Silicone swells in coolant and lacks long-term compression recovery. Only EPDM meets BMW specs.
Q: Do air-cooled i3s need seal replacement too?
A: Yes—moisture and road salt can still enter, causing cell corrosion and isolation faults.
Q: How do I test if my reseal worked?
A: Perform a vacuum decay test or soap-bubble pressure test at 0.1 bar—but visual inspection isn’t enough.
Q: Does CNS include spare seals with module kits?
A: No—for safety, they only sell complete pre-sealed packs or full module sets with integrated sealing.
Q: What’s the shelf life of a new EPDM gasket?
A: 2 years max in sealed packaging. Older stock hardens and loses elasticity.
A Good Seal Isn’t Just About Keeping Water Out—It’s About Keeping Trust In
Because once moisture enters, the damage is silent… until it’s catastrophic.
Skip the Guesswork: Install a CNS BMW i3 Battery with Factory-Engineered, Double-Lipped, IP67-Rated Sealing—So Rain, Snow, or Salt Never Compromise Your Pack’s Integrity Again.
Don’t patch uncertainty. Build in confidence.
Order your CNS BMW i3 battery today—or request our free Battery Housing Seal Integrity Checklist for Certified Shops:
👉 https://cnsbattery.com/ev-battery-home/ev-battery-contact/