Best DIY Nissan Leaf Battery Upgrade Guide
As a pioneering electric vehicle, the Nissan Leaf has won millions of fans worldwide with its reliability and affordability. However, battery degradation over time—especially in early models with LMO cells—often leaves owners frustrated by dwindling range. The good news is that a DIY battery upgrade can breathe new life into your Leaf, doubling its range without the cost of a new EV. This comprehensive guide breaks down everything you need to know, from model-specific compatibility to step-by-step installation and safety protocols.
Why Upgrade Your Nissan Leaf Battery?
Over 30% of Nissan Leaf owners consider battery upgrades within 5 years of ownership, and for good reason. Early 2011-2015 models with 24 kWh LMO batteries are prone to rapid degradation, with real-world range dropping to 50-60 miles after several years. Even newer models with NMC cells can benefit from upgrades to meet growing daily commute needs. A successful DIY upgrade can boost range to 150-200+ miles, extend vehicle lifespan, and increase resale value—all at a fraction of the cost of dealership replacements.
Model-Specific Compatibility & Upgrade Options
Nissan Leaf battery upgrades vary drastically by model year due to differences in battery design, voltage, and CAN bus communication. Choose the right方案 based on your vehicle generation:
1. 2011-2012 ZE0 Models
These early models require two critical components: a B24 22-36 pin adapter and a CAN-bridge. The CAN-bridge rewrites CAN bus messages to inform the vehicle’s system of the battery upgrade, preventing fault codes and erratic behavior. Muxsan’s MX-62 62 kWh pack is an excellent choice, doubling the original range to ~200 miles with liquid cooling to slow degradation.
2. 2013+ AZE0/ZE1/e-NV200 Models
Later models feature plug-and-play battery compatibility, needing only a CAN-bridge for proper communication. EV Rides’ 40 kWh Gen 2 pack is ideal for 2013-2017 Leafs, using refurbished Nissan cells for OEM-level reliability. It retains CHAdeMO fast charging and includes a 3-year warranty, delivering 150+ miles of range.
3. 2018+ Second-Generation Leafs
For non-invasive upgrades, Zero EV’s EX30 30 kWh auxiliary pack is a top pick. Mounted in the trunk, it works alongside the original battery without BMS hacking, adding 100 miles of range and featuring a Bluetooth monitoring app. For full replacements, 62 kWh NMC packs (matching factory voltage of 400V) offer EPA range up to 226 miles.
Essential Tools & Parts Checklist
Gather these items before starting your DIY project to avoid delays and safety risks:
-
Safety Gear: Insulated gloves (class 00 or higher), safety glasses, and a non-conductive work mat to prevent electric shock.
-
Tools: Insulated wrenches, multimeter, torque wrench, battery disconnect switch, and wire strippers.
-
Model-Specific Parts: CAN-bridge, B24 adapter (for 2011-2012 models), and compatible battery pack.
-
Additional Components: 4/0 AWG welding cable for main power lines, precharge circuit, and temperature sensors (NTC probes) for thermal management.
Step-by-Step DIY Installation Guide
Follow these steps carefully, prioritizing safety and precision. Always disconnect the 12V battery first to disable high-voltage systems.
1. Prep & Safety Checks
Park the vehicle on a level surface and engage the parking brake. Disconnect the 12V battery and wait 10+ minutes for the high-voltage capacitor to discharge. Verify no voltage remains using a multimeter before proceeding.
2. Remove the Old Battery Pack
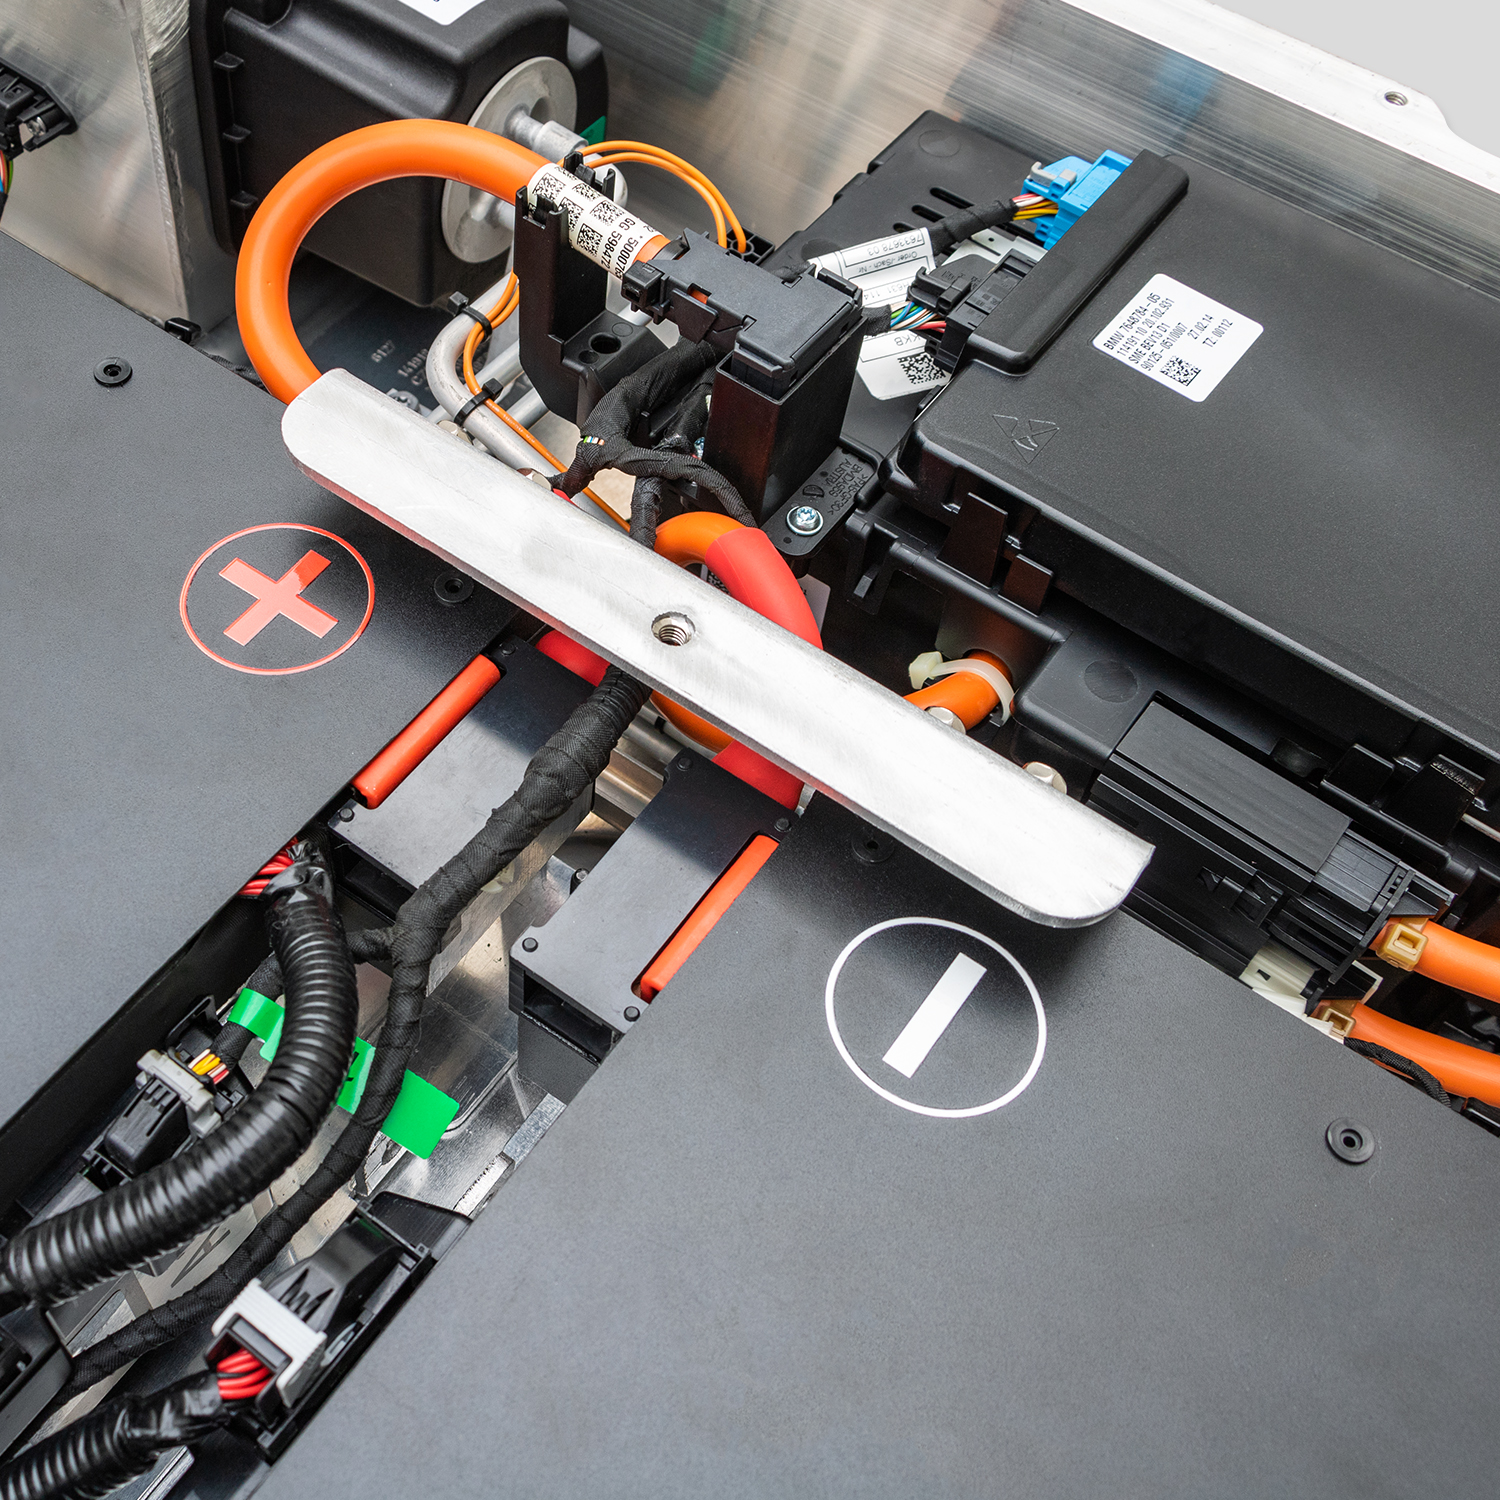
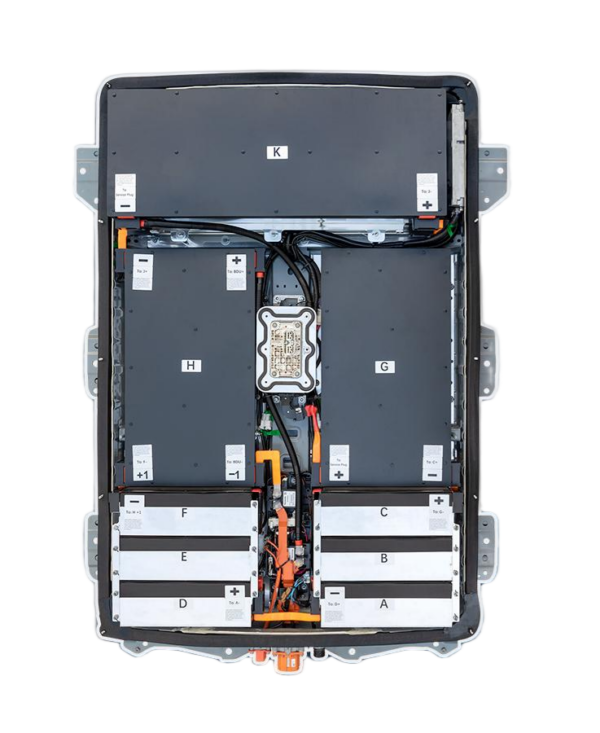
Remove the undercarriage covers and disconnect the high-voltage connectors (marked orange). For 2011-2012 models, disconnect the B24 connector before unbolting the battery. Use a torque wrench to remove the battery mounting bolts and carefully lower the pack (assist recommended—batteries weigh 400+ lbs).
3. Install the New Battery & Adapters
Position the new battery pack and secure it with the original bolts (torque to factory specs). Connect the high-voltage cables and install the CAN-bridge—mount it near the battery for optimal signal. For 2011-2012 models, attach the B24 adapter to ensure proper pin alignment.
4. BMS Calibration & Testing
Reconnect the 12V battery and power on the vehicle. The CAN-bridge will automatically modify CAN messages, but monitor for fault codes using an OBD-II scanner. Charge the battery to 100% and perform a test drive, checking for consistent range and no abnormal heating. Use a battery monitoring app to verify cell balance.
Critical Safety & Compliance Tips
DIY battery upgrades involve high voltage (360V-400V), so safety is non-negotiable:
-
Never skip the CAN-bridge—installing it only when upgrading prevents system malfunctions and fault codes.
-
Avoid mixing battery chemistries or using uncertified packs (e.g., recycled共享单车 cells) to reduce fire risk.
-
Ensure thermal management: Add ventilated enclosures and temperature sensors to derate power at 45°C+.
-
Check local regulations: Many regions require备案 for battery modifications—verify with your DMV to avoid fines.
Cost & ROI Breakdown
DIY upgrades cost $3,000-$8,000, depending on the battery pack (refurbished vs. new) and tools. This is far less than dealership replacements ($10,000+) or buying a new EV. For example, a 40 kWh upgrade on a 2015 Leaf costs ~$4,500 and increases range by 70 miles, making daily commutes and road trips feasible again.
Final Thoughts
A DIY Nissan Leaf battery upgrade is a rewarding project that extends your EV’s lifespan and usability. By choosing the right model-specific components, following safety protocols, and testing thoroughly, you can enjoy like-new range at a fraction of the cost. Remember to prioritize certified parts and compliance to keep your vehicle safe and road-legal. With this guide, you’re ready to give your Leaf a new lease on life.