BMW i3 Battery Leak Detection: Step-by-Step Shop Guide – The Silent Killer You Can’t See
A 2016 BMW i3 is towed into your shop. The customer complains of a faint, sweet chemical smell inside the cabin and a sudden “High Voltage System Malfunction” warning on the dash. There are no visible puddles under the car. The previous shop topped off the coolant and cleared the code, but the warning returned two days later.
As a professional EV technician in 2026, you know this scenario is a ticking time bomb. In the BMW i3, a battery leak is rarely just a messy drip; it is often an invisible intrusion of conductive coolant into the sealed high-voltage enclosure. Unlike a gas car radiator leak, an internal i3 leak doesn’t just cause overheating—it creates a direct path for 400 volts to short-circuit to the chassis, posing an immediate risk of electrocution, thermal runaway, and fire.
Ignoring the sweet smell or assuming it’s a “sensor glitch” is negligence. The difference between a safe repair and a catastrophic liability lies in your ability to perform a rigorous, professional leak detection protocol.
How do you find a leak that leaves no puddle?
What specific tools separate a guess from a definitive diagnosis?
And when your investigation confirms the battery pack is internally compromised, how do you pivot from a dangerous “patch job” to a safe, profitable, and permanent upgrade?
At CNS BATTERY, we have managed countless thermal and leakage events. We know that accurate detection is the first line of defense against disaster. This guide provides a step-by-step shop protocol for detecting BMW i3 battery leaks, explains the critical difference between external and internal breaches, and reveals why replacing the entire system is the only ethical solution for contaminated packs.
The Invisible Threat: Why Visual Inspection Fails
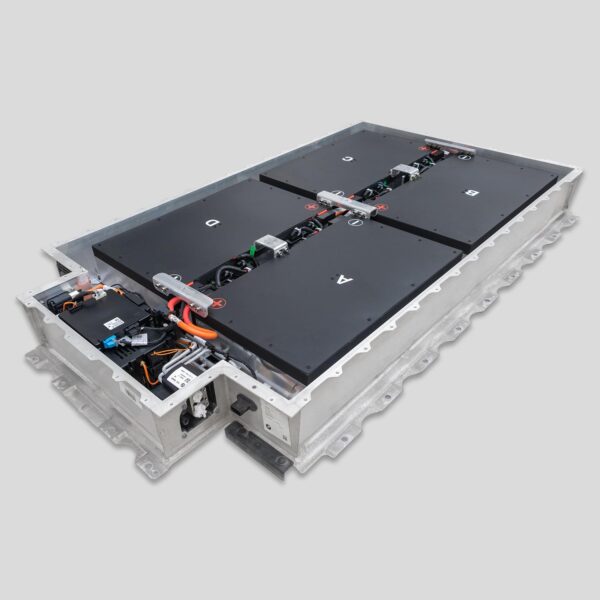
In 80% of critical i3 cases, the leak is internal. The coolant escapes from corroded cooling plates inside the sealed aluminum casing and pools around the live busbars and cell modules.
- No Puddles: The fluid stays trapped inside the IP67 enclosure.
- The Danger: As the conductive glycol mixes with electricity, it causes insulation resistance to drop. The BMS detects this and shuts down the car to prevent a fire.
- The Mistake: Many shops see “no leak under the car” and assume the battery is fine. They reset the code, sending the customer home with a bomb waiting to explode.
Professional detection requires looking where the eye cannot see.
The Professional Toolkit: Essential Gear
To diagnose like a pro, you need more than a flashlight. Equip your bay with:
- UV Dye Injection Kit: Specifically designed for EV cooling systems.
- High-Intensity UV Light: To trace microscopic seepage.
- Digital Megohmmeter (Insulation Tester): The definitive tool for confirming internal electrical breaches.
- Coolant Conductivity Meter: To test if fluid has become electrically active.
- Pressure Testing Pump: To simulate operating conditions and force leaks to reveal themselves.
- Class 00 Insulated Gloves & Face Shield: Mandatory PPE when dealing with potential HV leaks.
Step-by-Step Leak Detection Protocol
Follow this rigorous workflow to pinpoint the source of the breach. Do not skip steps.
Step 1: Safety Depower & Initial Scan
- Depower: Disconnect 12V, remove the High Voltage Service Plug (MSD), and wait 10 minutes. Verify 0V.
- Scan: Retrieve fault codes. Look specifically for Insulation Faults (e.g., CD6902) or Coolant Level Low. These are your primary clues.
Step 2: Visual & Olfactory Inspection
- Smell Test: A sweet, syrupy odor inside the cabin or near the rear battery vents is a strong indicator of internal leakage.
- External Check: Inspect all external hoses, the electric water pump, and the radiator for wetness.
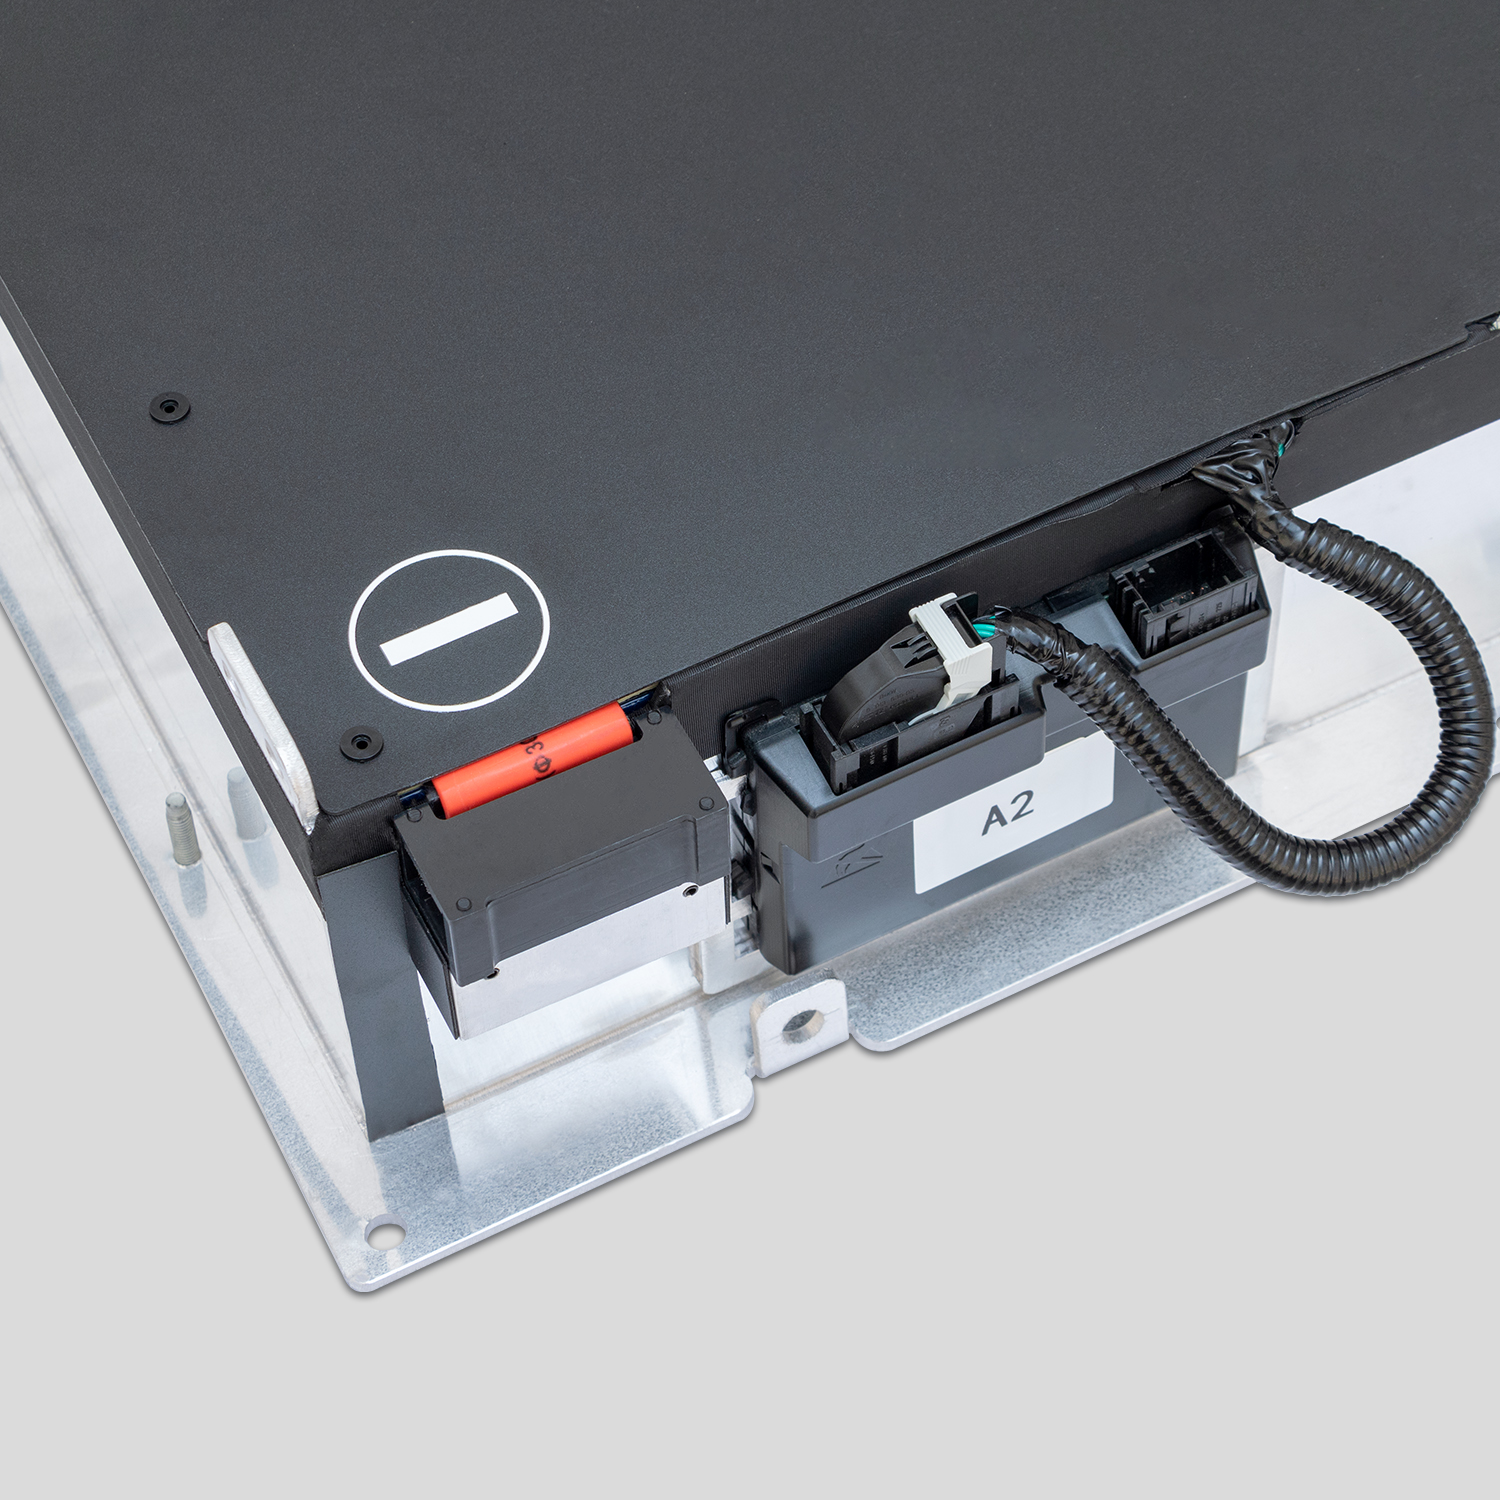
- Vent Valve Check: Remove the battery vent valve (if accessible). Is there crusty residue or wetness? This is a sign of internal pressure buildup from boiling coolant.
Step 3: UV Dye Injection & Circulation
- Inject: Add fluorescent UV dye to the coolant reservoir.
- Circulate: Reconnect 12V (keep MSD out if possible, or use a scan tool to run the pump in service mode). Run the pump for 5-10 minutes to circulate the dye through the entire loop, including the internal battery channels.
- Inspect: Use the UV light to scan every inch of the external lines, connections, and the battery casing seams.
- External Glow: If you see glowing fluid on hoses or the outside of the case, you have an external leak. Repairable.
- Internal Signs: If you see glowing fluid seeping from the vent valve or casing seams, or if the dye level drops without external traces, suspect an internal leak.
Step 4: The Decider – Insulation Resistance Test (Megger)
This is the most critical step. It tells you if the leak has compromised safety.
- Isolate: Disconnect the main HV cables from the battery pack.
- Test: Set your Megohmmeter to 500V DC. Measure resistance between HV+ and Chassis, and HV- and Chassis.
- Interpret Results:
- > 1 MΩ (Safe): Insulation is intact. The leak is likely external or minor. The pack may be salvageable after cleaning.
- < 100 kΩ (Critical Failure): STOP. Conductive fluid is inside the pack bridging high voltage to the ground. The battery is electrically compromised.
- The Verdict: A low reading confirms an internal leak. The pack is contaminated and unsafe.
Step 5: Pressure Decay Test (Optional but Recommended)
- Pressurize the cooling system to spec (approx. 1.5 bar).
- Monitor the gauge for 15 minutes. A rapid drop with no external evidence confirms an internal breach into the cell stack.
The Hard Truth: Why Internal Leaks Are Unrepairable
If your Megger test confirms low insulation resistance (<100 kΩ), you must deliver the hard news to the customer. There is no “fix.”
- Permanent Contamination: Once conductive coolant touches the internal busbars and cells, it causes galvanic corrosion. You cannot flush this out without disassembling the pack, which is impossible to do safely in a shop.
- Carbon Tracking: Electrical arcing in the wet environment creates carbon tracks on insulators. These tracks are permanent conductive paths that will cause shorts even if the pack is dried.
- Seal Integrity: To “fix” an internal leak, you must open the sealed IP67 casing. No shop can recreate the factory laser-welded or robotic-adhesive seal. Moisture will inevitably return.
- Liability: If you attempt to clean and reseal a contaminated pack, and it catches fire next week, your shop is liable. Insurance will not cover negligence involving high-voltage safety systems.
The Only Solution: The battery pack is total loss. It must be quarantined and replaced.
The CNS BATTERY Solution: Eliminate the Leak Forever
When you explain that the battery is internally leaked and unsafe, the customer faces a crisis. The dealer will quote $20,000+ for a remanufactured unit. This is your opportunity to offer the CNS BATTERY High-Capacity Upgrade—the only solution that guarantees a leak-free future.
Why Upgrading Is the Only Safe Fix
- Factory-Perfect Seal: Our BMW i3 Series Battery upgrades are brand-new, factory-sealed units. They come with certified leak-test results. Zero risk of internal leakage.
- Advanced Cooling Design: Our internal cooling plates use updated materials and designs resistant to the corrosion that plagued original i3 packs.
- Zero Contamination Risk: Brand-new cells and busbars mean no history of coolant exposure. Insulation resistance is guaranteed >10 MΩ.
- Plug-and-Play Safety: Swap the old, leaking hazard for a new, safe unit in 4–6 hours. No disassembly of the compromised pack.
- Double the Range: While solving the leak, you upgrade the customer from a failing 60 Ah or 94 Ah pack to a 120 Ah to 180 Ah system, giving them 130–200+ miles of range.
- Cost Efficiency:
- Cleanup + Failed Repair: $500+ (labor) + 100% Risk of Fire/Liability.
- Dealership Replacement: $20,000+.
- CNS BATTERY Upgrade: $8,000 – $14,000 USD. You get a brand-new, leak-proof battery with double the range for half the dealer price.
Real Story: From “Invisible Leak” to “Dry & Safe”
“Westside EV Repair” in California had a 2015 i3 come in with a sweet smell but no visible leaks. The Megger test showed 15 kΩ resistance—critically low. The customer asked if they could just “dry it out.”
“We explained that the coolant was already inside touching live wires,” says the owner. “We refused the repair due to safety liability. Instead, we installed a CNS BATTERY 150 Ah upgrade. The new pack arrived perfectly sealed. We installed it, filled the external lines with fresh coolant, and pressure tested. Zero leaks, >5 MΩ insulation. The customer paid $11,500, got 170 miles of range, and drove away safely. We avoided a potential lawsuit and made a great profit.”
Stop Guessing, Start Detecting
BMW i3 battery leak detection is not optional; it is mandatory for safety. A low insulation reading is a red flag that demands immediate action. Do not attempt to patch a leaking high-voltage system.
Equip your shop with the right tools, follow the professional protocol, and when a leak is found, offer the solution that guarantees safety and performance.
Suspect a battery leak?
Don’t risk a catastrophe. Contact CNS BATTERY today for a professional assessment. Discover how our BMW i3 Series Battery upgrades can eliminate leak risks permanently, providing your customers with a safe, dry, and high-range driving experience.
👉 Get Your Leak Diagnosis & Upgrade Quote
Frequently Asked Questions (FAQ) for Shops
1. Can I repair a leaking BMW i3 battery pack by cleaning it?
No. Internal leaks indicate coolant has entered the high-voltage section. Cleaning the exterior does not remove the conductive fluid inside, nor can a shop replicate the factory IP67 seal. The pack must be replaced.
2. How do I tell if the leak is internal or external?
Perform a UV dye test and an Insulation Resistance (Megger) test. If dye seeps from the casing seams or vents, or if insulation resistance drops below 100 kΩ, the leak is internal and the pack is condemned.
3. What happens if I drive with an internal battery leak?
Conductive coolant can cause short circuits, insulation faults, and thermal runaway (fire). It also creates a risk of fatal electrocution if the chassis becomes energized. The vehicle must not be driven.
4. Is it safe to open a leaking pack to clean it?
Absolutely not. Opening a compromised pack exposes technicians to live voltage mixed with conductive fluid. It releases toxic gases and voids all safety certifications. The pack must be quarantined and disposed of as hazardous waste.
5. Does CNS BATTERY guarantee their packs are leak-free?
Yes. Every upgrade is factory-sealed, pressure-tested, and inspected before shipping. We provide documentation confirming zero leaks and high insulation resistance.
6. How much does it cost to fix a leak vs. upgrading?
External hose repairs cost $300–$600. Internal leak “repairs” are impossible/risky. A dealership replacement costs $20,000+. A CNS BATTERY upgrade costs $8,000–$14,000, providing a brand-new, leak-proof battery with double the range.
7. What should I do with the old leaking battery?
It must be treated as hazardous waste. Drain the coolant safely into approved containers, quarantine the pack in a fire-safe area, and arrange for certified recycling/disposal. Do not store it near other vehicles.