
🛠️ The Ultimate Nissan e-NV200 Battery Upgrade Guide for DIY Enthusiasts
If you own a Nissan e-NV200, you know it is the workhorse of the electric van world. But like all batteries, its original pack eventually degrades, leaving you with range anxiety and frequent charging stops. For the hands-on DIY enthusiast, simply replacing the old battery with a refurbished unit is not enough—you crave performance, longevity, and a true upgrade.
This guide is designed specifically for those looking to breathe new life into their e-NV200. We will walk you through why a brand-new battery replacement is the only logical choice for a DIY project and how to ensure a seamless, professional-grade installation without needing to visit a mechanic.
📉 Why Refurbished Batteries Are a DIY Nightmare
Before we dive into the upgrade path, let’s address the elephant in the room: refurbished or recycled batteries.
As a seasoned EV battery expert, I strongly advise against them for DIY projects. Here is why they are a trap:
- Hidden Degradation: You are buying someone else’s old battery. The cells inside are already aged and unstable. Within months, you might face swelling, sudden power drops, or complete failure.
- The “Black Box” Problem: Refurbished packs often lack proper Battery Management Systems (BMS). If something goes wrong, diagnosing it requires specialized equipment you likely do not have at home.
- No Warranty Safety Net: Many recycled batteries come with no warranty or a very short one. If you install it yourself and it fails, you are out of luck and out of money.
For a DIYer, the risk of buying a refurbished battery far outweighs the initial cost savings.
⚡ The DIY Advantage: New vs. Recycled
When you decide to upgrade your e-NV200, choosing a brand-new, factory-fresh battery changes the game. Here is a comparison of what you are really buying:
| Feature | Recycled/Refurbished Battery | CNS BATTERY (New) |
|---|---|---|
| Core Cells | Used, mismatched, degraded | Brand New CATL Cells (Top-tier quality) |
| Warranty | None or very short | 2-Year / 80,000 km Official Warranty |
| DIY Safety | High risk of swelling/failure | Plug-and-Play, Zero Defects Guarantee |
| Longevity | 6–12 months max | Years of reliable service |
| Price | 70-80% of new price | 50% less than OEM dealer price |
The Verdict: For the DIYer, a new battery is the only way to guarantee that the hours you spend under the van result in a reliable, long-term solution.
🚀 Step-by-Step: Upgrading Your e-NV200 Battery
Ready to start your upgrade? Here is how the process looks when you partner with a manufacturer that supports the DIY community.
1. Selecting the Right Capacity
The first step is choosing the right “fuel tank” for your needs. The Nissan e-NV200 typically supports packs ranging from 40kWh to 62kWh.
- 40kWh: Perfect for city driving and light commutes.
- 50kWh / 62kWh: Ideal for delivery drivers or those needing longer range without the “charge anxiety.”
2. The Plug-and-Play Experience
One of the biggest fears for a DIYer is wiring. You do not want to be guessing which wire goes where.
Our batteries are engineered to OEM standards. This means:
- Exact Fit: The dimensions match your e-NV200 perfectly.
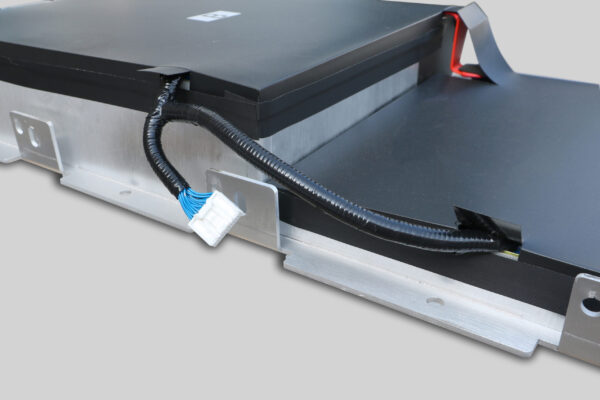
- Color-Coded Connectors: No guesswork. The connectors match the vehicle’s harness exactly.
- No Modifications: You do not need to cut, splice, or modify the battery or your van.
3. The Installation Process
Based on feedback from hundreds of DIY customers, installing a new CNS battery typically takes 1 to 2 hours.
What you will need:
- Basic wrenches and screwdrivers.
- Insulated gloves (we provide these for free).
- A friend to help lift the old pack out.
The Process:
- Disconnect: Isolate the vehicle’s 12V power.
- Remove: Take out the old, heavy, degraded battery.
- Connect: Lower in the new battery and connect the main harness.
- Test: Power up and check the BMS communication.
🛡️ Safety First: BMS and Protection
As an expert, I cannot stress enough how important the Battery Management System (BMS) is. It is the brain of the battery.
Our DIY kits come with a Smart BMS that protects you from:
- Over-Charging: Automatically stops when full.
- Over-Discharging: Prevents deep drain that kills cells.
- Thermal Runaway: Advanced sensors prevent overheating, even in summer heat.
This level of protection means you can sleep soundly knowing your homemade upgrade is as safe as a factory-installed one.
💬 Real Stories from the Garage
Don’t just take my word for it. Here is what Thomas B., a DIYer from Amsterdam, had to say after upgrading his e-NV200:
“The installation was surprisingly simple. The complete battery pack was plug-and-play; it automatically matched the system after plugging in the connector, without any additional steps. Now, the full charge consistently provides 348km of range… The seller also provided a free installation toolkit, including insulated gloves and terminal cleaner, which was very thoughtful.”
This is the standard experience we aim for every DIYer to have.
📩 Get Your Custom Quote Today
Are you ready to stop dreading the red battery warning and start enjoying the full potential of your Nissan e-NV200?
Simple steps to start:
- Select: Choose your e-NV200 model and desired kWh.
- Submit: Fill out the form with your contact details.
- Receive: Get a personalized quote and free compatibility check.
Stop paying premium prices for recycled junk. Upgrade to a brand-new, factory-warranted battery that is built to last as long as you own your van.
Get Your Free Custom Quote Now
❓ Frequently Asked Questions (FAQ)
Q1: Is it safe for a non-professional to install this battery?
Absolutely. While we recommend having basic mechanical knowledge, our kits are designed for “Plug-and-Play.” We provide HD video tutorials and a free toolkit. If you get stuck, our engineers offer remote video guidance to walk you through it step-by-step.
Q2: How long does the installation take?
For a DIY enthusiast, the physical installation usually takes about 1 to 2 hours. This includes removing the old battery and securing the new one. If you are working alone, it might take a bit longer, but it is a manageable weekend project.
Q3: What if my van’s software doesn’t recognize the new battery?
This is a common concern. Our batteries are programmed to match OEM communication protocols. In the rare case where reprogramming is needed, our customer service team provides remote support to guide you through the BMS setup via video call.
Q4: What is the warranty on these DIY batteries?
We stand by our quality. All our batteries come with a minimum 2-year or 80,000 km warranty. This covers manufacturing defects and ensures that if anything goes wrong (which is rare with new cells), you are covered.
Q5: How much range will I get after the upgrade?
This depends on the capacity you choose. A new 50kWh pack typically restores your e-NV200 to factory range levels (approx. 348km+), while a 62kWh upgrade can give you significantly more range for long-haul trips.


