
Step-by-Step: Leaf ZE1 40kWh to 62kWh Repair
Tired of range anxiety? If you own a Nissan Leaf ZE1 (specifically the 2011-2013 models with the 40kWh battery), you are likely familiar with the struggle of shrinking capacity and limited driving distance. The good news is that a full revival is possible. Upgrading your 40kWh battery pack to a brand-new 62kWh lithium-ion system isn’t just a repair; it is a transformation that brings your vehicle’s range and performance back to modern EV standards.
At CNS BATTERY, we specialize in OEM-compatible powertrain solutions for Nissan and BMW. We have helped thousands of Leaf owners worldwide swap out their degraded or limited-capacity packs for high-performance replacements. This guide will walk you through the “why” and the “how” of this upgrade, providing you with the expert insights needed to make an informed decision.
Why Upgrade Your Leaf ZE1 from 40kWh to 62kWh?
The Nissan Leaf ZE1 chassis, particularly the 2011-2013 models, is a robust platform, but the original 40kWh batteries have a finite lifespan. Even if your battery isn’t completely dead, the degradation can make the car impractical for daily use.
Here is what you gain by upgrading to a 62kWh system:
- Double the Range: The most significant benefit. You can expect a real-world range of approximately 250-280 km (155-175 miles) on a full charge, compared to the original 120-150 km. This makes highway driving and longer commutes feasible again.
- Modern Battery Chemistry: Newer 62kWh packs utilize advanced Lithium Iron Phosphate (LFP) or NMC chemistry, offering superior thermal management and longevity compared to the older 40kWh modules.
- Cost-Effective Revival: Buying a brand-new 62kWh replacement battery from CNS BATTERY costs roughly 50% less than purchasing a brand-new Leaf or paying for an OEM factory replacement. It is the ultimate budget-friendly way to get a “new” car.
Is Your ZE1 Compatible?
Before diving into the repair steps, it is crucial to confirm compatibility. The ZE1 chassis is unique because it was designed to house different battery sizes.
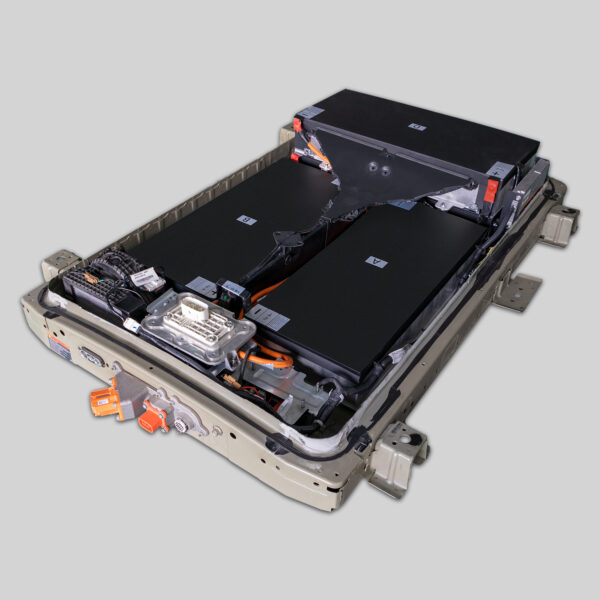
- Physical Fit: The 62kWh battery pack is physically larger than the 40kWh unit. However, the ZE1 chassis has the necessary structural space to accommodate it.
- Electrical Interface: This is where professional engineering matters. The connectors, voltage levels (360V+), and Battery Management System (BMS) protocols must match the car’s original specifications.
- Expert Verification: At CNS, we perform a free VIN compatibility check. We ensure that the wiring harnesses, mounting brackets, and communication protocols are a perfect plug-and-play match for your specific ZE1 model before you purchase.
Step-by-Step Repair & Installation Guide
While we always recommend professional installation due to the high voltage involved, understanding the process helps you communicate with your mechanic. Here is the standard procedure for a ZE1 40kWh to 62kWh swap.
Step 1: Preparation and Safety
- Disconnect Power: Locate the Maintenance Plug (service disconnect) in the rear of the vehicle and remove it. This cuts off the high-voltage circuit.
- Gather Tools: You will need standard wrenches, socket sets, insulated gloves, and safety glasses.
- Remove Interior Components: To access the battery bolts, you often need to remove the rear seat cushion and the plastic trim on the floor.
Step 2: Removing the Old 40kWh Pack
- Disconnect Cables: Carefully disconnect the positive and negative terminals, followed by the low-voltage signal cables.
- Unbolt the Chassis: Remove the bolts securing the battery tray to the vehicle’s undercarriage. This usually requires lifting the car.
- Extract the Pack: With the help of a jack or a lift, carefully slide the old 40kWh battery out from underneath the vehicle.
Step 3: Installing the New 62kWh Pack
- Positioning: Slide the new 62kWh pack into place. Thanks to OEM-standard engineering, the mounting points should align perfectly with the ZE1 chassis.
- Reconnect: Attach the high-voltage cables and signal wires. Our packs are designed with color-coded connectors to prevent wiring errors.
- Secure the Tray: Bolt the battery tray back to the chassis, ensuring all torque specifications are met for safety.
Step 4: System Integration and Testing
- BMS Programming: This is the most critical step. The new battery’s BMS must communicate with the car’s ECU. At CNS, we provide pre-programmed units or remote video guidance to ensure the system recognizes the new capacity.
- Diagnostic Check: Once powered on, run a diagnostic scan to ensure there are no error codes and that the State of Charge (SOC) reads correctly.
Expert Tip: If you encounter issues during the BMS handshake, our technical support team offers real-time video guidance to walk you through the troubleshooting process, ensuring a smooth integration.
Why Choose CNS BATTERY for Your ZE1 Upgrade?
Choosing the right supplier is just as important as the upgrade itself. Here is why global customers trust us with their Nissan Leaf repairs:
- Brand-New CATL Cells: Unlike refurbished or recycled batteries, we use brand-new, A-grade cells sourced directly from CATL (Contemporary Amperex Technology Co. Limited), the world’s leading lithium-ion battery manufacturer. This guarantees zero degradation at the point of sale.
- Unbeatable Warranty: We back our confidence with a 2-year / 80,000 km warranty. This covers manufacturing defects and ensures the battery maintains at least 70% capacity during this period—a standard that surpasses many OEM offerings.
- Global DDP Shipping: We handle the complexity. We offer Delivered Duty Paid (DDP) service to over 50 countries, meaning the battery arrives at your door without surprise customs fees.
Real User Experience: Mark T. from California
“The original battery in my Leaf ZE1 lasted 8 years, but the range had dropped to only 120km. Replacing it with an OEM battery would cost $16,000! I chose a 62kWh battery from CNS for less than half that price. The installation was plug-and-play, taking only 2 hours. Now, my full charge range is 430km. The 2-year warranty gives me peace of mind.”
Frequently Asked Questions (FAQ)
Q1: Will a 62kWh battery physically fit in my 2012 Leaf (ZE1)?
Yes, absolutely. The ZE1 chassis was engineered with the structural space to fit larger packs. Our 62kWh units are designed to match the OEM dimensions, ensuring a perfect fit without any chassis modifications.
Q2: Do I need to change the software or dashboard in my car?
Generally, no major hardware changes are needed. However, the BMS (Battery Management System) needs to be programmed to communicate the new capacity to the car’s computer. We provide the necessary programming support or pre-programmed modules to ensure your dashboard accurately displays the new 62kWh range.
Q3: How much does it cost to upgrade from 40kWh to 62kWh?
Pricing varies based on your location and the specific configuration (e.g., LFP vs NMC). However, you can expect to pay roughly 50% less than the cost of a brand-new Nissan Leaf battery from the dealership. For an exact quote tailored to your vehicle, we recommend using our free assessment tool.
Q4: Is the installation difficult? Can I do it myself?
If you are mechanically inclined and have experience with high-voltage systems, it is possible. The process is largely bolt-on, but extreme caution is required due to the high voltage (over 360V). We strongly recommend having a certified technician perform the installation to avoid voiding the warranty and to ensure safety.
Ready to Revive Your Leaf?
Don’t let an old battery kill a good car. Upgrading your Nissan Leaf ZE1 to a 62kWh system is the smartest investment you can make for your vehicle.
Get Your Free Custom Quote Today!
Our experts are ready to verify your VIN and provide a personalized solution.
Contact Our Technical Experts Now

