The Ultimate Checklist for Leaf ZE1 Battery Replacement: Ensure a Flawless Swap
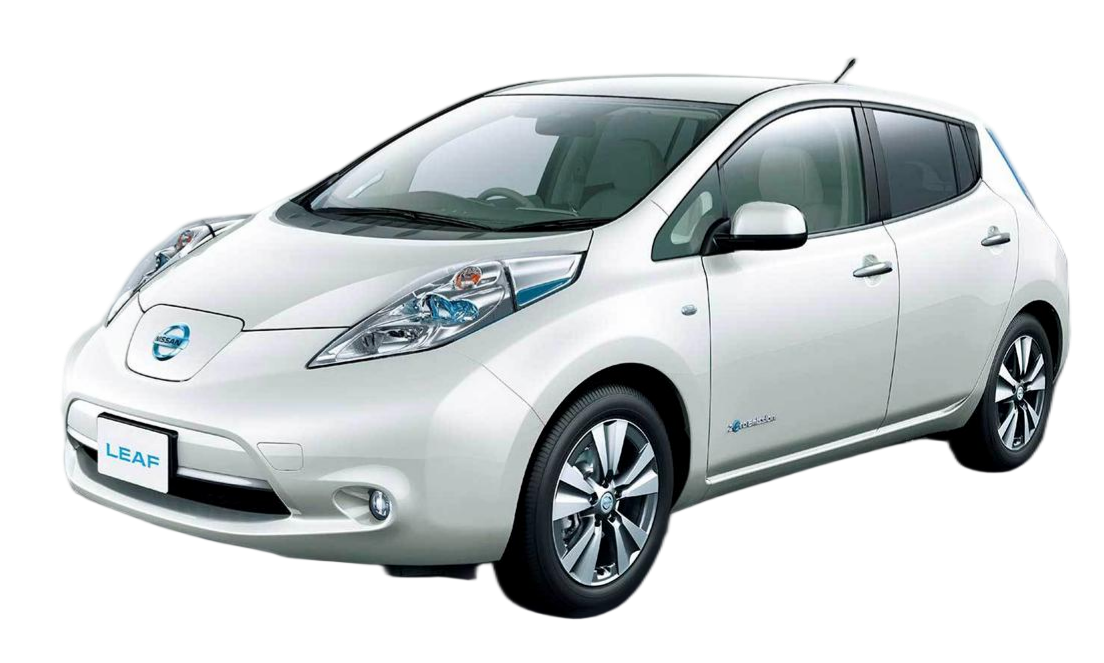
The Nissan Leaf ZE1 (2013-2017 model) represents a sweet spot in electric vehicle history. It’s a car that has proven the longevity of EV technology, but like all batteries, its original 24kWh or 30kWh packs are now facing the inevitable decline in capacity. If you’re reading this, you likely love your car’s chassis and driving dynamics but are tired of the “range anxiety” that comes with a degraded battery.
Replacing the battery in a Leaf ZE1 is not just about buying a new box of cells; it’s an engineering project. As a CNS BATTERY expert, I have overseen thousands of these swaps. A successful replacement requires more than just physical strength—it demands the right checklist. This guide will walk you through the Ultimate Checklist for Leaf ZE1 Battery Replacement, ensuring you don’t make costly mistakes that could void warranties or damage your car.
Phase 1: The Pre-Installation Audit
Before you even jack up the car, you must verify compatibility. The ZE1 chassis was produced for nearly a decade, and Nissan made subtle changes to the Battery Management System (BMS) and physical connectors over time.
1. VIN Verification is Non-Negotiable
Do not guess your model year or BMS version. The difference between a plug-and-play installation and needing a complex adapter harness can be determined by a single digit in your Vehicle Identification Number (VIN).
- Why it matters: The ZE1 saw updates from the early “Phase 1” to the later “Phase 2” BMS protocols. A mismatch here means your new battery won’t communicate with the car, resulting in a “Traction Battery Failed” error.
- Action Item: Use a service like CNS BATTERY’s Compatibility Checker. Upload your VIN, and a technician will confirm if the physical connectors and communication protocols match your specific year.
2. Assessing the “Heart” of the Battery: Cell Chemistry
Many buyers are tempted by refurbished or “used” batteries to save money. However, for a ZE1, this is often a false economy.
- The Risk: Used cells are already degraded. Even if they test “good” at 80% capacity, they will degrade rapidly in the next 12 months.
- The Standard: Your checklist must specify Brand New CATL (Contemporary Amperex Technology Co. Limited) cells. These are the gold standard for quality and safety. They offer the highest energy density and the longest cycle life, ensuring your ZE1 drives like new for another 100,000 miles.
3. Warranty Validation
A battery is the most expensive component. If the supplier doesn’t offer a substantial warranty, they don’t stand behind their product.
- Minimum Standard: Look for a warranty that covers 2 Years or 80,000 km (whichever comes first). This should include protection against manufacturing defects and a prorated coverage ensuring the battery maintains at least 70% capacity throughout the warranty period.
Phase 2: Tools & Safety Preparation
The Leaf ZE1 battery weighs approximately 300 kg (660 lbs). This is not a solo job without the correct equipment. Safety is paramount because you are dealing with high-voltage DC current (around 360V).
Essential Tools Checklist:
- Heavy-Duty Transmission Jack: A standard floor jack will not suffice. You need a jack rated for at least 1000kg with wide saddle adapters.
- Insulated High-Voltage Tools: At minimum, you need insulated wrenches and screwdrivers (CAT III rated) to avoid short-circuiting the main contactors.
- BMS Programming Interface: While the physical swap is mechanical, the software handshake is digital. Ensure you have access to the correct diagnostic cable and software (or that your battery supplier includes programming services).
- Personal Protective Equipment (PPE): Rubber insulated gloves and safety glasses are mandatory.
Phase 3: The Installation Process
This is where the rubber meets the road. Even if you are hiring a mechanic, you should understand these steps to supervise the process.
Step 1: Isolation and Disconnection
- Park the car on a level surface and engage the parking brake.
- Crucial Step: Open the hood and disconnect the 12V auxiliary battery first. This cuts power to the BMS and prevents accidental arcing when you disconnect the high-voltage cables.
Step 2: Draining the Coolant (If Applicable)
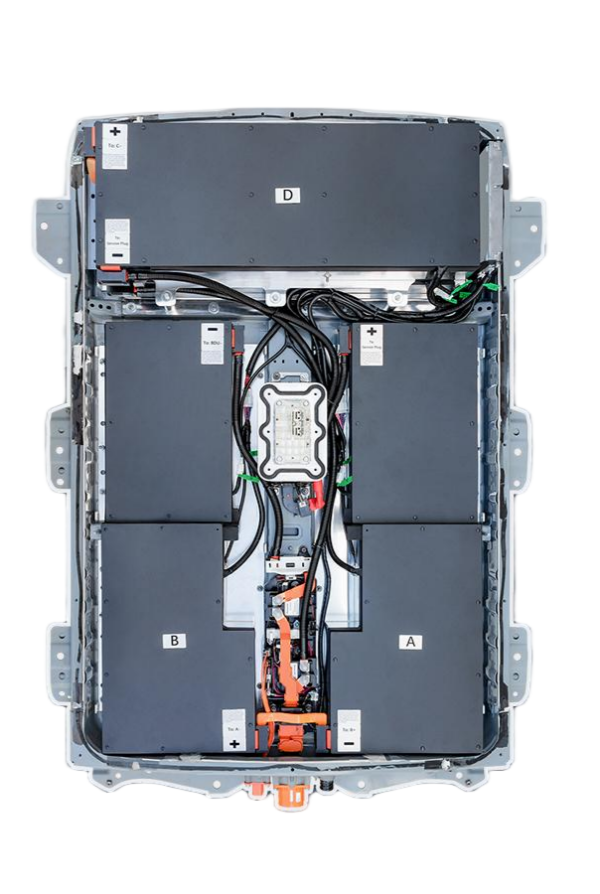
- The ZE1 battery uses a liquid cooling system. You must place a drain pan underneath the passenger side of the battery tray. Disconnect the coolant hoses and drain the fluid completely. Warning: Do not spill coolant on the high-voltage components.
Step 3: Physical Removal
- Remove the underbody plastic shields.
- Disconnect the high-voltage orange cables from the service plug area.
- Remove the 12 retaining bolts securing the battery to the chassis.
- Carefully lower the old battery using the transmission jack.
Step 4: The “Plug-and-Play” Moment
- Lift the new CNS BATTERY pack into place. Because it is designed to OEM specifications, the bolt holes and connector positions should align perfectly.
- Reconnect the high-voltage cables and coolant lines.
- Programming: This is the most critical step. The new BMS needs to be initialized to match your car’s specific VIN and software version. If you encounter errors here, a remote video support session with a technical expert (like those offered by CNS) can save hours of frustration.
Phase 4: Post-Installation Testing
Do not drive the car immediately. You need to validate the health of the installation.
- The Visual Check: Look for any pinched wires or leaking coolant connections.
- The Voltage Check: Use a multimeter to verify the 12V connection is stable.
- The First Boot: Turn the car on (do not engage the drive mode yet). Check the dashboard for error codes. Access the battery health menu (usually via the trip computer) to verify the battery is reporting full voltage and 100% State of Charge (SoC).
Phase 5: Charging and Calibration
Your final step is to calibrate the new battery. Lithium-ion batteries require a “break-in” period.
- First Charge: Use a Level 2 charger (240V) to charge the battery from 0% to 100%. Do not use a DC fast charger for the first cycle, as it can stress the new cells.
- Driving Cycle: Drive the car until the battery is depleted (or nearly so), then charge it back to 100%. This helps the BMS accurately learn the new cell characteristics.
Why Choose a CNS BATTERY for Your ZE1?
At CNS, we don’t just sell batteries; we provide powertrain solutions. For the Leaf ZE1, we offer specific advantages that simplify your checklist:
- OEM-Compatible Design: Our packs are engineered to fit the ZE1 chassis perfectly, including the mounting points and connector orientations.
- Zero Modification: We guarantee plug-and-play compatibility for specific model years, eliminating the need for custom wiring.
- Expert Support: If you get stuck on Step 4 (Programming), our team offers remote video guidance to walk you through the BMS setup.
Ready to revive your Nissan Leaf ZE1? Don’t let an old battery kill a good car. Get a free, personalized quote today and ensure your swap is flawless.
Get Your Free Custom Quote Now
Frequently Asked Questions (FAQ)
Q1: Can I install the ZE1 battery myself, or do I need a mechanic?
While it is physically possible for a DIYer with the right tools (transmission jack, insulated tools), the BMS programming step often requires technical expertise. If you are not comfortable with automotive electronics, we highly recommend using a professional mechanic. However, many of our customers have successfully installed it themselves using our step-by-step video guides.
Q2: How much will my range improve after the replacement?
If you are upgrading from the original 24kWh or 30kWh pack to a modern 40kWh or 62kWh module (depending on chassis clearance and改装), you can expect a massive improvement. A new 40kWh pack can restore your range to approximately 160-180 miles (260 km) on a full charge, effectively doubling the capability of the degraded original battery.
Q3: What payment methods do you accept for international customers?
We understand international transactions can be complex. We support various secure payment methods, including bank transfers and major credit cards. For specific regional payment options, please contact our sales team directly via the contact form.
Q4: How long does shipping take to my country?
We offer DDP (Delivered Duty Paid) shipping to over 50 countries. Shipping times vary depending on your location and the method chosen (air vs sea). Typical delivery ranges from 1-2 weeks for air freight to 4-8 weeks for sea freight. We handle all customs clearance to ensure a smooth delivery.