Step-by-Step: Nissan e-NV200 50kWh to 24kWh Battery Swap
The Nissan e-NV200 is a versatile workhorse, but not every delivery or utility route needs a massive 50kWh battery. For urban couriers or local service fleets, downsizing to a 24kWh pack can significantly cut costs and weight. However, swapping from a high-capacity 50kWh to a lower 24kWh pack isn’t just about physical fitment—it requires precise engineering to ensure the Battery Management System (BMS) and Vehicle Control Unit (VCU) communicate correctly. This guide walks you through the technical process of executing a safe and efficient Nissan e-NV200 50kWh to 24kWh swap, focusing on maintaining OEM-level safety and performance.
🛠️ Why Downgrade from 50kWh to 24kWh?
Before diving into the steps, it’s crucial to understand the “why.” The standard 50kWh battery in the e-NV200 provides a long range, but it comes with a high price tag and considerable weight.
- Cost Efficiency: A 24kWh battery is significantly cheaper to manufacture and purchase.
- Weight Reduction: Removing 26kWh of cells reduces the vehicle’s weight, improving payload capacity and potentially increasing efficiency for short trips.
- Specific Use Cases: For last-mile delivery in dense urban areas (where range anxiety is minimal), a 24kWh battery is often the perfect economic balance.
⚠️ The Technical Challenge
Swapping a battery isn’t like changing a tire. The Nissan e-NV200 uses a sophisticated CAN Bus communication protocol. If you simply plug a 24kWh pack (which has different voltage and capacity parameters) into a car originally programmed for 50kWh, the car will likely throw an error code (like “Check Charging System” or “Battery Fault”) and refuse to operate.
The core challenge is BMS-VCU Matching. The new battery’s BMS must “speak” the same language as the car’s VCU.
📋 Phase 1: Pre-Swap Preparation
1. Diagnostic Check
Before disconnecting anything, use an OBD2 scanner compatible with Nissan vehicles to read the current state of the 50kWh battery. Ensure there are no existing VCU faults.
2. Safety First
- Disconnect the 12V Auxiliary Battery: This cuts power to the control circuits.
- Wear PPE: Insulated gloves and safety glasses are mandatory when working with high-voltage (HV) systems.
- Discharge the System: Wait at least 10 minutes after disconnecting the 12V to allow capacitors in the inverter to discharge.
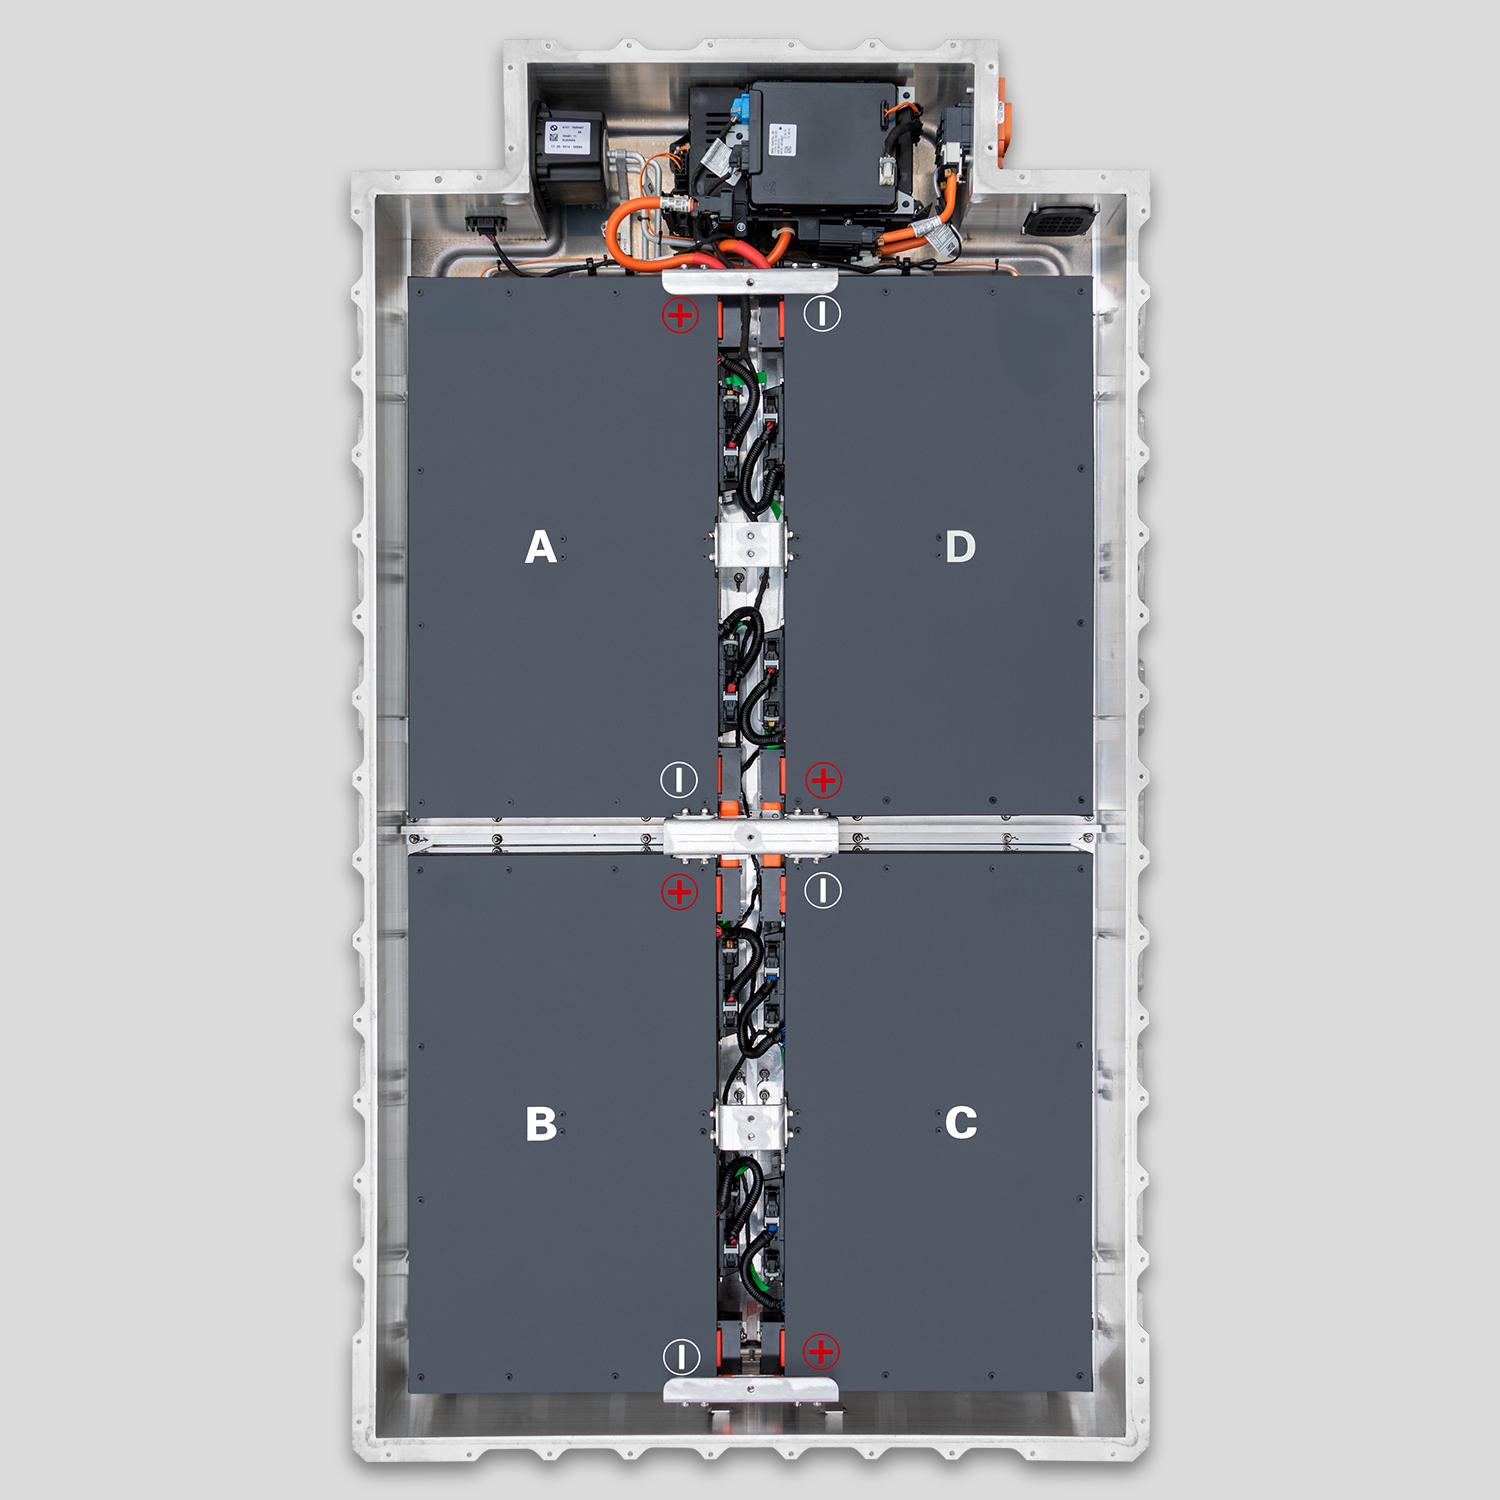
🔧 Phase 2: Physical Removal of the 50kWh Pack
1. Access the Undercarriage
The e-NV200 battery is located under the cabin floor. You will need a vehicle lift or jack stands.
2. Disconnect HV Cables
- Locate the main HV connectors (Positive and Negative) and the interlock loop.
- Warning: Do not force the connectors. They are keyed to prevent incorrect mating.
3. Disconnect the LV Harness
This harness carries the CAN Bus signals (CAN_H and CAN_L) between the BMS and the VCU. Carefully disconnect this from the old battery module.
4. Remove Mounting Bolts
The 50kWh pack is secured with specific anti-theft or Torx bolts. Remove these systematically to lower the heavy pack.
🔋 Phase 3: Installing the 24kWh Solution
This is where CNS BATTERY expertise becomes critical. Unlike generic aftermarket packs, a professional solution requires specific adaptations.
1. Physical Fitment
A standard 24kWh cell block will not naturally fit the 50kWh chassis mounts. A proper conversion kit includes:
- Custom Brackets: To secure the smaller pack to the OEM chassis points.
- Rigid Enclosure: The 24kWh cells must be housed in a waterproof and shockproof case (usually IP67 rated).
2. Wiring the New BMS
Connect the new 24kWh battery’s HV terminals. Ensure the polarity is correct to avoid catastrophic damage.
3. The “Magic” Connection: CAN Bus Adaptor
This is the most crucial step. The new battery must come with a pre-programmed BMS or an external adaptor module that mimics the original 50kWh communication protocol, or the car must be reflashed to accept the 24kWh parameters. Professional tuning or a specific adaptor harness is often required.
💻 Phase 4: Calibration & Testing
1. Reconnect 12V and Power On
Turn the key to “ON” (do not start the car yet). The dashboard should light up.
2. BMS Initialization
The new BMS needs to initialize with the car. This may take 2-5 minutes. During this time, the BMS learns the cell voltages and balances the pack.
3. Road Test (Low Speed)
Before driving at highway speeds, take the vehicle for a low-speed test (under 30 km/h) to ensure the thermal management system (if active) is functioning and there are no error codes.
🚀 Why Choose a Professional 24kWh Conversion?
Downsizing your Nissan e-NV200 battery is a complex electrical engineering task. Attempting a DIY conversion with mismatched cells can lead to:
- Bricking the VCU: Irreversible damage to the car’s main computer.
- Fire Hazards: Incorrect BMS programming can lead to thermal runaway.
- Voided Warranty: On remaining OEM components.
CNS BATTERY offers a reliable alternative. We specialize in OEM-compatible battery solutions for the Nissan range, including customized capacity swaps. Our packs utilize brand-new CATL cells and undergo rigorous testing to ensure they integrate seamlessly with the vehicle’s existing software, eliminating the guesswork and danger of a homemade conversion.
Expert Tip: If you are considering this swap for a fleet, always consult with a battery specialist. We offer pre-sales compatibility assessments to ensure the 24kWh solution meets your specific voltage and communication requirements.
❓ Frequently Asked Questions (FAQ)
Q1: Is it safe to put a 24kWh battery in a car designed for 50kWh?
Yes, but only if the Battery Management System (BMS) is correctly programmed to match the vehicle’s Controller Area Network (CAN Bus) protocol. Using a professionally engineered kit, like those from CNS BATTERY, ensures the car recognizes the new capacity without throwing error codes or compromising safety.
Q2: Will the car’s range display be accurate after the swap?
If the BMS is properly calibrated, the range display will be accurate. However, because the physical capacity is halved, the displayed range will reflect the actual 24kWh capability (approximately 100-130 km depending on driving conditions), not the original 200+ km.
Q3: Can I use second-hand cells for this conversion?
While technically possible, we strongly advise against it. Used cells have degraded health (SOH) and inconsistent voltage levels. This inconsistency creates a “weakest link” scenario, drastically reducing the lifespan of the new pack and increasing the risk of fire. Brand-new cells are the only safe choice for a long-term solution.
Q4: How long does the installation take?
For a professional technician with the correct brackets and harnesses, the physical swap usually takes 1 to 2 hours. However, the diagnostic setup and BMS initialization can add additional time if custom programming is required.
Q5: Where can I get a reliable 24kWh conversion kit?
You can get a free quote and technical consultation for a Nissan e-NV200 battery solution by contacting our experts. We provide customized packs with the correct specifications for your vehicle.