Nissan Leaf SV New Battery Installation Guide
Is your Nissan Leaf SV struggling to keep you on the road? The “Leaf” in your car’s name might be green, but a dying battery turns that into “red” anxiety fast. If you are facing the dreaded “Turtle Mode” or seeing your range drop to a fraction of what it once was, you are not alone.
Replacing a Nissan Leaf battery is a significant investment, and the process can seem daunting. But here is the good news: you do not have to pay the sky-high dealership prices to get your car back to 100% health.
At CNS Battery, we specialize in OEM-compatible, high-performance battery packs for Nissan Leafs (including the SV trim) and BMWs. We have helped thousands of owners extend their vehicle’s life with brand-new, cost-effective solutions.
This guide will walk you through the entire process of installing a new battery in your Nissan Leaf SV, from preparation to that satisfying moment when your range bar fills up again.
Why Replace Your Nissan Leaf SV Battery?
The Nissan Leaf SV (often referring to the S, SL, or specific trim levels across model years) relies heavily on its battery health. Over time, capacity fades.
- The Problem: A degraded battery means you cannot go to work, run errands, or enjoy road trips without constant fear of being stranded.
- The Cost Trap: Dealerships often quote prices exceeding $12,000 to $16,000 for a replacement.
- The Solution: High-quality aftermarket solutions, like those from CNS Battery, offer brand-new CATL cells at roughly 50% less than OEM prices.
Before you start, ensure you have the right pack. We support all major Leaf generations:
- ZE0 (2011-2017)
- AZE0 (2018-2020)
- ZE1 (2021+)
🛠️ Tools and Safety Preparations
Safety is paramount when dealing with high-voltage systems. A Nissan Leaf battery pack operates at a high voltage that can be lethal.
⚠️ Warning: If you are not comfortable working with high-voltage automotive systems, hire a certified technician. However, if you have mechanical experience, this is a feasible DIY project.
What You Will Need:
- Safety Gear: Insulated rubber gloves, safety glasses, and non-conductive clothing.
- Basic Tools: A full socket set (metric), torque wrench, pry bars, and a breaker bar.
- Lifting Equipment: A floor jack and sturdy jack stands (or a car lift).
- Removal Tools: A 12mm or 13mm wrench for the negative terminal, and a 14mm wrench for the high-voltage connectors.
- Cleaning Supplies: Brake cleaner and electrical contact cleaner.
Step-by-Step Installation Guide
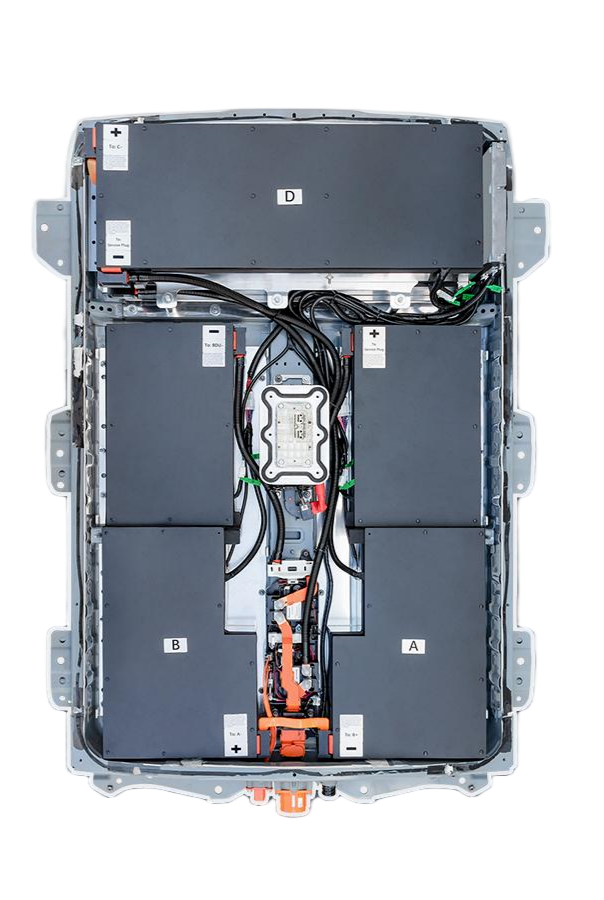
This guide assumes you have purchased a compatible replacement pack (e.g., 40kWh, 62kWh, or upgraded 68kWh) from a reliable source like CNS Battery.
Step 1: Power Down and Disconnect
- Park your Leaf SV on a flat, level surface and engage the parking brake.
- Open the hood. Locate the 12V auxiliary battery.
- Crucial Step: Disconnect the NEGATIVE (Black) terminal first. Wait at least 10 minutes to allow the capacitors in the high-voltage system to discharge.
Step 2: Remove the Underbody Shields
- Slide under the car (ensure it is securely on jack stands).
- Remove the plastic underbody splash guards. These are usually held on by plastic push-pins and a few screws.
- Set these aside carefully; you will need them for the new installation.
Step 3: Accessing the High-Voltage Connectors
- Locate the two large high-voltage (HV) connectors on the side of the battery pack.
- Using a 14mm wrench, loosen the locking nuts.
- Carefully disconnect the positive and negative HV cables. Tape the ends or tuck them aside to keep them clean.
Step 4: Unbolt the Battery
- The battery is secured to the chassis with multiple bolts (typically 4-6 main bolts, plus grounding straps).
- Remove all securing bolts. This may require extensions due to the tight space.
- Support the Weight: The Nissan Leaf battery weighs approximately 600-700 lbs (270-320 kg).
- Pro Tip: Do not try to lift it by hand. Use a floor jack with a wide wooden pallet or a transmission jack to support the pack as you slide it out.
Step 5: Slide Out and Slide In
- Slowly lower the jack and slide the old battery out from under the vehicle.
- Clean the Bay: This is the perfect time to spray brake cleaner on the mounting points and wipe away 10 years of road grime.
- Position your new CNS Battery pack on the jack.
- Slide the new pack into the chassis rails. Ensure it sits flat and flush.
Step 6: Reassembly and Reconnection
- Jack the new battery up until the mounting holes align with the chassis.
- Reinstall all the securing bolts. Torque them to Nissan specifications (usually around 80-100 Nm, but consult your manual).
- Reconnect the High-Voltage cables. Tighten the locking nuts securely to prevent arcing.
- Reinstall the underbody shields.
Step 7: Power Up and Programming
- Go back to the hood and reconnect the 12V battery terminal.
- Turn the car on. You should see the “Ready” light illuminate.
- BMS Programming (The Final Step): Most modern replacements (especially upgraded packs like those from CNS) require the Battery Management System (BMS) to be programmed to communicate with the car’s ECU.
- This usually takes a professional scan tool or our specific programming service. If you are doing this yourself, ensure you have the programming cable and software ready.
Why Choose a CNS Battery for Your Leaf SV?
At this point, you might be wondering, “Why should I choose CNS for this critical component?”
Because we are not just selling a box of cells; we are selling peace of mind and value.
- Unbeatable Warranty: We back our Nissan Leaf batteries with a 2-year / 80,000 km warranty. This far exceeds the industry standard for aftermarket batteries and matches the confidence of a major manufacturer.
- Brand-New Quality: Unlike competitors who refurbish old packs, we use brand-new CATL (Contemporary Amperex Technology Co. Limited) cells. CATL is one of the world’s leading lithium-ion battery manufacturers, ensuring top-tier performance and safety.
- Expert Support: If you encounter a hiccup during installation (like a BMS programming error), our technical team offers remote video guidance to walk you through the fix in real-time.
- Cost Efficiency: Save thousands compared to a dealership without sacrificing safety or range.
Frequently Asked Questions (FAQ)
Q1: How long does the installation take?
For a professional mechanic, the physical swap usually takes 1 to 2 hours. For a DIYer with the right tools, it might take 3-4 hours, especially if you are cleaning the bay thoroughly. The most time-consuming part is often the BMS programming, which can take 30 minutes if you are unfamiliar with the software.
Q2: Will a new battery fix the “Turtle Mode” warning?
Yes, absolutely. “Turtle Mode” indicates the car is limiting power due to low battery capacity or cell imbalance. Installing a brand-new, high-capacity pack (like the 62kWh or 68kWh options we offer) will eliminate this warning and restore your car to full performance.
Q3: Is it safe to install the battery myself?
While the physical removal and installation are mechanical tasks similar to changing an engine, the high-voltage aspect is dangerous. Only attempt this if you have experience with hybrid or EV safety protocols. If in doubt, use our “Find a Installer” support or hire a local mechanic. We provide detailed installation videos to help your technician.
Q4: What capacity should I choose for my Leaf SV?
If you have a ZE0 or AZE0 model, upgrading from a 40kWh or 30kWh to a 62kWh is a game-changer. For ZE1 models, sticking with the 62kWh or upgrading to 68kWh is recommended for maximum range. We can help you select the perfect fit based on your VIN.
Ready to Revive Your Nissan Leaf SV?
Don’t let a bad battery sentence your reliable Nissan Leaf SV to the scrapyard. With a CNS Battery replacement, you can get back on the road with a full range and a full tank (of electrons) for a fraction of the cost.
Get Your Free Custom Quote Today.
We offer personalized compatibility checks to ensure the perfect fit for your specific Leaf model year and trim.