Nissan Leaf 30kWh New Battery Replacement Tutorial: A Step-by-Step Guide
Replacing the battery in your Nissan Leaf is a significant investment in extending the life of your vehicle. Whether your original 30kWh pack has degraded or you are upgrading for better performance, doing it yourself can save you thousands compared to dealership labor costs. At CNS BATTERY, we specialize in OEM-compatible solutions for Nissan and BMW models, and we have helped hundreds of DIY enthusiasts and repair shops successfully complete this process.
This comprehensive tutorial is designed to guide you through replacing your Nissan Leaf’s 30kWh battery pack safely and efficiently. We will cover the necessary preparations, the step-by-step removal and installation process, and the critical programming steps required for your vehicle to recognize the new battery.
⚠️ Safety First: Preparing for the Replacement
Before you begin, it is crucial to understand that working with high-voltage systems requires strict safety protocols. Always wear insulated gloves and safety glasses. Ensure your workspace is dry and well-ventilated.
Tools and Equipment Checklist:
- Lifting Equipment: A vehicle lift or sturdy jack stands.
- Socket Set: Metric sockets (8mm, 10mm, 12mm, 14mm).
- Torque Wrench: Essential for correctly tightening battery bolts.
- Insulated Tools: To prevent accidental short circuits.
- Multimeter: For checking voltage connections.
- CNS 30kWh Battery Pack: Ensure you have the correct model for your Leaf year (e.g., ZE0, AZE0).
Expert Tip: At CNS BATTERY, we recommend performing a VIN compatibility check before purchasing to ensure the connectors and Battery Management System (BMS) match your specific Leaf model.
🛠️ Step 1: Disconnecting the Vehicle Power
To eliminate the risk of electric shock, you must disconnect the vehicle’s low-voltage system.
- Open the Hood: Locate the 12V fuse box.
- Disconnect the 12V Battery: Always remove the negative terminal first, followed by the positive terminal. Tape the ends to prevent accidental contact.
- Wait: Allow at least 10 minutes for the capacitors in the high-voltage system to discharge completely.
🔋 Step 2: Removing the Old Battery Pack
The 30kWh battery pack is located underneath the vehicle. Follow these steps to remove it:
- Lift the Vehicle: Safely raise the car using a lift or jack stands. Ensure the vehicle is stable.
- Remove Underbody Panels: Use a 10mm socket to remove the plastic underbody covers to access the battery casing.
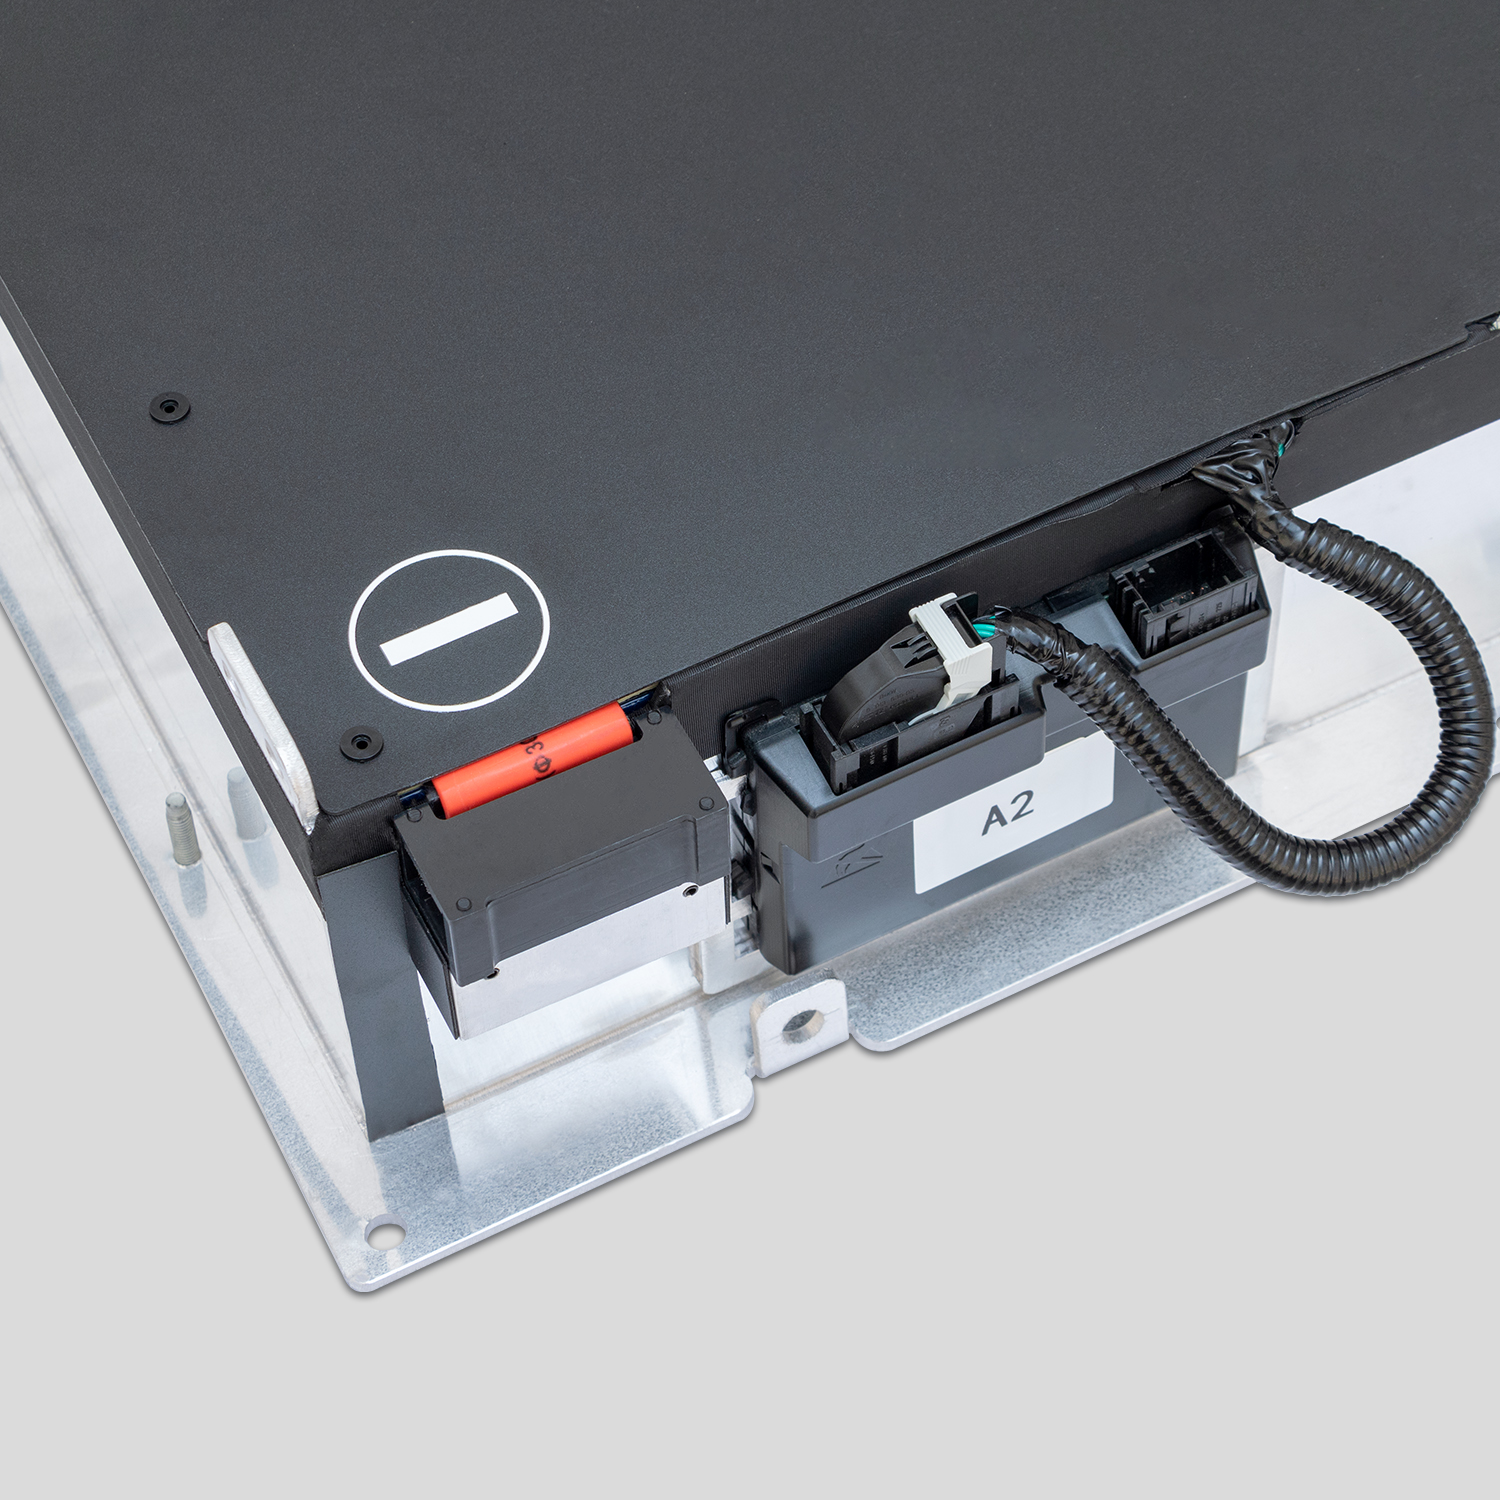
- Disconnect High-Voltage Cables:
- Locate the orange high-voltage service plug (usually near the rear of the battery).
- Release the locking tab and pull the plug out to physically disconnect the high-voltage circuit.
- Disconnect the positive and negative main cables from the battery terminals.
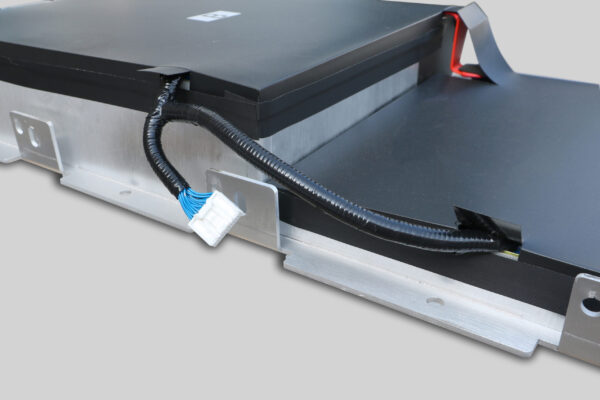
- Disconnect Signal/Communication Cables: Carefully unplug the communication harnesses connected to the Battery Management System (BMS).
- Remove Mounting Bolts: There are typically 12-16 bolts securing the battery to the chassis. Remove these using the appropriate socket. Keep them organized for reinstallation.
- Lower the Battery: Carefully slide the battery out from under the vehicle. Due to its weight (approx. 200-250kg), it is highly recommended to use a transmission jack or engine crane.
🆕 Step 3: Installing the New CNS Battery
Now that the old unit is removed, you can install your new replacement.
- Position the New Pack: Carefully slide the new CNS 30kWh battery into place using your jack. Ensure the orientation matches the original (check the position of the BMS and cable exits).
- Secure the Mounting Bolts: Hand-tighten the mounting bolts first to ensure proper alignment, then torque them to the manufacturer’s specifications (usually around 40-50 Nm).
- Reconnect Signal Cables: Plug in the communication harnesses to the BMS connector. Ensure the locking tabs click securely.
- Reconnect High-Voltage Cables: Reattach the positive and negative main cables. Important: Do not fully tighten the main terminal bolts yet.
- Reinstall Underbody Panels: Replace the plastic shields to protect the battery from road debris.
💻 Step 4: System Programming and Final Checks
Unlike older cars, electric vehicles require the BMS to be “awakened” and synchronized with the car’s computer.
- BMS Activation: Connect a diagnostic tool (or use the CNS-provided programming interface) to the OBD2 port. You will need to input specific parameters so the BMS recognizes it is a new pack.
- Voltage Check: Before reconnecting the 12V battery, use a multimeter to check the voltage at the main terminals. It should read approximately 360V (for a 30kWh Leaf).
- Reconnect 12V Power: Reconnect the positive terminal first, then the negative terminal on the 12V battery.
- System Test: Turn on the ignition (do not start driving yet). Check the dashboard for any error codes. The battery bars should display correctly (typically 12 bars for a full charge).
- Torque Final Check: Once the system is powered and error-free, fully torque the main high-voltage terminal bolts.
📋 Frequently Asked Questions (FAQ)
Q1: Can I really replace a Nissan Leaf battery myself?
Yes, thousands of owners have successfully done this with the right tools. It is essentially a “Plug-and-Play” process, but we strongly recommend having a friend who is mechanically inclined assist you, especially with lifting the heavy pack. If you encounter issues with the BMS programming, our technical support team offers video call guidance to walk you through it.
Q2: What is the warranty on a CNS replacement battery?
CNS BATTERY offers an industry-leading 2-year / 80,000 km warranty on our automotive batteries. This covers defects in materials and workmanship, and we guarantee the battery maintains at least 70% capacity during this period. This is significantly longer than the warranty offered by most refurbished battery sellers.
Q3: How much can I save by buying from CNS BATTERY instead of a dealership?
You can expect to save 50% or more. While dealerships often charge upwards of $12,000 to $16,000 for a replacement, our new OEM-compatible packs start at a fraction of that cost, offering the same safety and performance standards as the original factory parts.
Ready to revive your Nissan Leaf? Get a free, personalized quote for your perfect battery solution today.