The Ultimate Guide to BMW i3 Battery Replacement & Installation
Last Updated: April 1, 2026
If you own a BMW i3, you know that the battery is the heart of your driving experience. However, as the years pass, battery degradation is inevitable. When that “Check Battery” light illuminates or your range drops significantly, the daunting question arises: What is the best solution for a BMW i3 battery replacement?
The original manufacturer (OEM) replacement can be prohibitively expensive. Fortunately, there is a reliable, high-performance alternative. This comprehensive handbook is designed for DIY enthusiasts and professional mechanics alike, providing you with a step-by-step roadmap for installing a new, compatible battery pack.
Why Choose a New Battery Pack Over Refurbished?
Before diving into the installation, it is crucial to understand what you are installing. Many owners face the dilemma of choosing between a costly OEM battery, a risky refurbished unit, or a third-party new pack.
At CNS BATTERY, we specialize in providing Original Equipment Manufacturer (OEM) compatible solutions specifically engineered for the BMW i3. Unlike refurbished batteries made from recycled cells—which often suffer from swelling, rapid degradation, and short lifespans—our packs utilize brand-new, premium-grade battery cells.
Key Advantages:
- New Cell Technology: We use high-density cells (such as those from CATL) that often match or exceed the performance of the original factory cells.
- Cost Efficiency: Save over 50% compared to the original manufacturer’s price.
- Extended Warranty: We back our confidence with an industry-leading 24-month / 80,000km warranty, far surpassing standard industry offerings.
Pre-Installation Checklist: Preparation is Key
Before you lift a wrench, ensure you have the correct tools and a safe environment. Safety is paramount when working with high-voltage systems.
1. Tools Required:
- Insulated wrenches and socket sets.
- Torque wrench (for precise bolt tightening).
- High-voltage insulated gloves (Class 00 or higher).
- Multimeter or diagnostic scanner.
- Battery terminal cleaner.
2. Safety First:
- Disconnect Power: Always disconnect the 12V auxiliary battery first to cut control power.
- No Jewelry: Remove all metal jewelry to prevent accidental short circuits.
- Workspace: Work in a dry, well-ventilated area free of flammable materials.
3. Verify Compatibility:
Every BMW i3 model year has specific voltage and interface requirements. Before purchasing, utilize a VIN compatibility check to ensure the new pack matches your vehicle’s specifications perfectly. This prevents connection issues and ensures the BMS (Battery Management System) communicates correctly with your car.
Step-by-Step Installation Guide
This guide assumes you are replacing the entire high-voltage traction battery. If you are unsure about any step, we recommend contacting our technical support team for video guidance.
Step 1: Vehicle Preparation
- Park the vehicle on a level surface and engage the parking brake.
- Open the hood and disconnect the negative terminal of the 12V battery. Wait at least 10 minutes to allow capacitors to discharge.
Step 2: Removing the Old Battery
- Remove the underbody protection panels.
- Locate the high-voltage service disconnect (if applicable) and remove it.
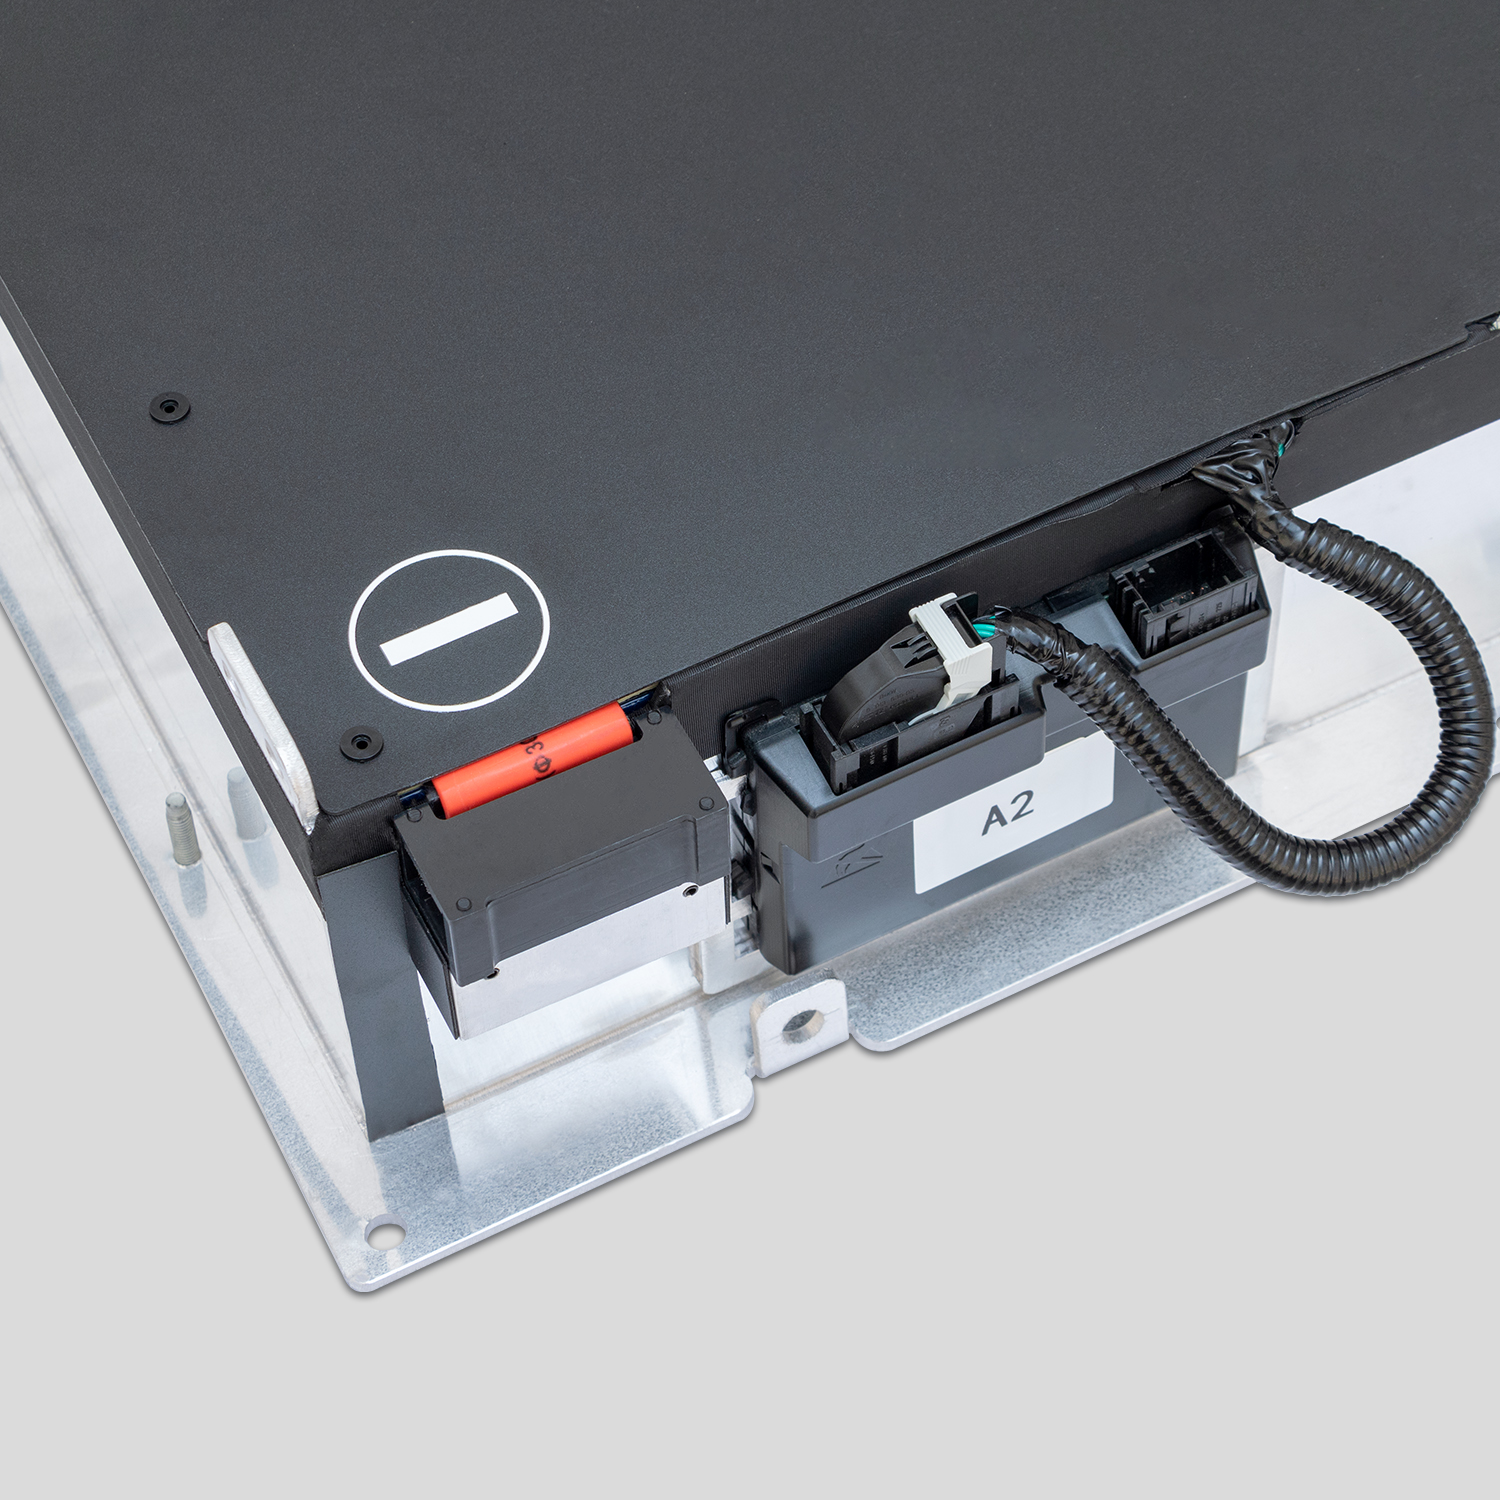
- Carefully disconnect the high-voltage cables from the old battery pack. Note the polarity (Positive/Negative) and the routing of the cables.
- Remove the grounding cables and any sensor connectors (temperature sensors, etc.).
- Unbolt the battery mounting brackets. The BMW i3 battery is heavy; use a proper lift or hoist to lower it safely.
Step 3: Installing the New CNS Battery Pack
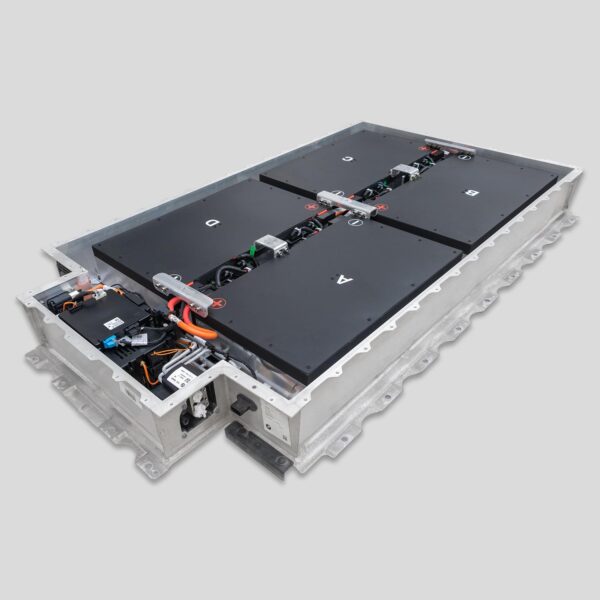
- Visual Inspection: Check the new CNS battery casing for any damage during shipping.
- Positioning: Using your lift, carefully position the new battery into the chassis. Align the mounting holes.
- Secure Mounting: Tighten the mounting bolts to the manufacturer’s specified torque (refer to your vehicle’s service manual).
- Cable Connection: Reconnect the high-voltage cables. Ensure the positive and negative terminals are correctly matched. Tighten securely to prevent arcing.
- Sensor & Grounding: Reconnect all temperature sensors and grounding straps.
Step 4: System Reintegration & Programming
- Reinstall the underbody panels.
- Reconnect the 12V battery terminals.
- BMS Programming: This is the most critical step. The new battery’s BMS must be programmed to communicate with the vehicle’s ECU. This usually requires specialized diagnostic software (such as ISTA). If you do not have access to this, professional installation is recommended, or contact our support team for guidance.
Post-Installation Testing
Once installed, do not drive immediately. Perform the following checks:
- Leakage Test: Use a multimeter to check for any current leakage from the casing to the ground.
- Voltage Check: Verify the open-circuit voltage matches the specifications (typically around 360V-400V for a full i3 pack).
- Diagnostic Scan: Turn the ignition on (do not start the motor) and scan for error codes. If no high-voltage system faults appear, proceed to start the vehicle.
- First Drive: Take a short test drive to monitor power delivery and check for warning lights.
Frequently Asked Questions (FAQ)
1. Is the installation really “Plug and Play”?
While the physical connectors are designed to match OEM standards (making the wiring “plug and play”), the BMS (Battery Management System) programming often requires a diagnostic tool to sync the new battery ID with the vehicle’s computer. We provide video tutorials and remote support to assist with this process.
2. How long does the installation take?
For a professional mechanic familiar with the BMW i3 layout, the physical swap typically takes 1 to 2 hours. For a DIY user, especially if it is your first time, budget 3 to 4 hours to ensure you work safely and methodically.
3. What if I encounter a problem during installation?
CNS BATTERY offers dedicated technical support. If you get stuck on a wiring connection or programming step, our experts can guide you via video call or phone to resolve the issue, ensuring you aren’t left stranded.
4. Does this void my car’s warranty?
Replacing the battery with an aftermarket part can affect the remaining factory warranty. However, our packs are designed for perfect compatibility. We recommend consulting with a mechanic regarding your specific vehicle warranty status. Our 2-year warranty covers any defects in the battery pack itself.
5. What payment and shipping options are available?
We offer DDP (Delivered Duty Paid) shipping to most countries, handling all customs fees. We accept various secure payment methods, and our sales team can assist with bulk orders or specific regional requirements.
Ready to Revive Your BMW i3?
Don’t let a failing battery sideline your electric journey. With the right preparation and a high-quality replacement pack, you can restore your BMW i3 to its former glory—or even upgrade its range beyond factory specifications.
For personalized assistance, VIN compatibility checks, or to get a free quote on your new battery solution, contact our technical experts today.